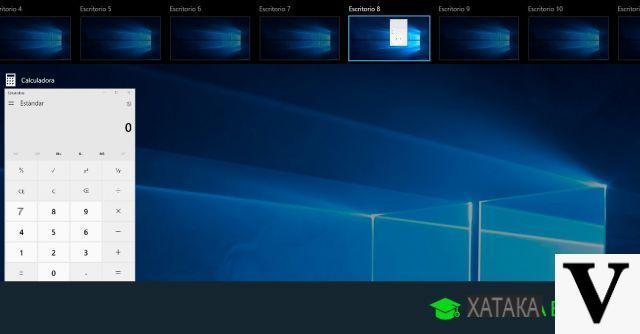
Those who have already gone through Linux-based systems or OS X / macOS know perfectly well the existence of virtual desktops: in fact, this provides for having several desktops available at the same time while having only one monitor, an absolutely useful feature if several operations are carried out with the computer together and no need to organize open windows.
Virtual desktops end up becoming indispensable for those who learn how to use them, however users of Microsoft's operating system had to wait for the advent of Windows 10 to test their usefulness.
And, if you haven't done so yet, this is the guide for you: together we will learn how to create, manage and eliminate desktop virtuals in Windows 10 to optimize work and better organize open windows.
The personal advice I can give you is to focus mainly on keyboard shortcuts where possible: switching from one desktop to another (and from one application to another) without touching the mouse can really be a time-saving trick.
Preliminary information
We always recommend doing an installation through one 100% genuine and original license, this is to avoid data loss or hacker attacks. We are aware that purchasing a license on the Microsoft store has a high cost. For this we have selected for you Mr Key Shop, a reliable site with free assistance specialized in in your language, secure payments and shipping in seconds via email. You can check the reliability of this site by reading the many positive verified reviews. Windows 10 licenses are available on this store at very advantageous prices. Furthermore, if you want to upgrade to the latest versions of Windows operating systems, you can also purchase the upgrade to Windows 11. We remind you that if you have a genuine version of Windows 10, the upgrade to the new Windows 11 operating system will be free. Also on the store you can buy the various versions of Windows operating systems, Office packages and the best antivirus on the market.
Create desktop virtuals in Windows 10
Creating a virtual desktop is really simple: if you use the mouse or the touchscreen, just select the button "Activity view" present on the system tray of Windows 10 (image below) ...
... and, from there, select the item "New desktop" bottom right.
If you have a keyboard, however, everything is even simpler: just press the key combination CTRL+WIN+D to instantly create a new desktop.
The newly created desktops will be added to the right of the current desktop; you can create as many desktops as you like.
Manage virtual desktops in Windows 10
Now that we have created a new virtual desktop, to navigate it, just go to Activity View and select it with the mouse to use it immediately.
From the keyboard, to move to the newly created desktop it will be sufficient to type the key combination CTRL + WIN + Right Arrow; in the same way, to return to the previous desktop just type CTRL + WIN + Left Arrow.
Once you are placed on the new desktop, you will notice that there are no open windows on it - and that the system tray does not report open windows elsewhere. At this point you can use it exactly like your classic desktop.
move an application from one desktop to another, just go to the activity view - reachable via keyboard shortcut WIN+TAB: at the top the windows open on the current desktop will be shown and at the bottom they will be shown active desktops.
At this point it is enough drag the application to the target desktop or, alternatively, right click / long tap on it and select Move To. In addition, with the Anniversary Update it will also be possible make one window or even all windows of an app are shown on all desktops.
Eliminate desktop virtuals in Windows 10
When we no longer need a virtual desktop we can safely delete it from Activity View by clicking / tapping on the red X corresponding to it. Alternatively, we can delete the desktop using the keyboard positioning ourselves on it and pressing the keys CTRL+WIN+F4.
Windows open on the deleted desktop, if any, will not be closed but move to the desktop immediately to the left.
Doubts or problems? We help you
Remember to subscribe to our Youtube channel for videos and other reviews. If you want to stay up to date, subscribe to our Telegram channel and follow us on Instagram. If you want to receive support for any questions or problems, join our Facebook community or contact us on Instagram. Don't forget that we have also created a search engine full of exclusive coupons and the best promotions from the web!


