If you are looking for the perfect tutorial with which you can record the screen of your Mac, iPhone, iPad and even Apple TV, with or without audio, within this tutorial, we will teach you the simplest and easiest way you can do it and so you don't lose sight of anything.
To carry out this task, we must rely on various technological tools, which will undoubtedly help us achieve our mission.
Here we will use a specific mobile application, which works for various web tools, as they can be of the greatest help for developers or content creators.
Anyone looking to have several shots and video of applications or video games from your mobile phone screen, so learn a lot more about these tools, uses and how you can make the most of their benefits.
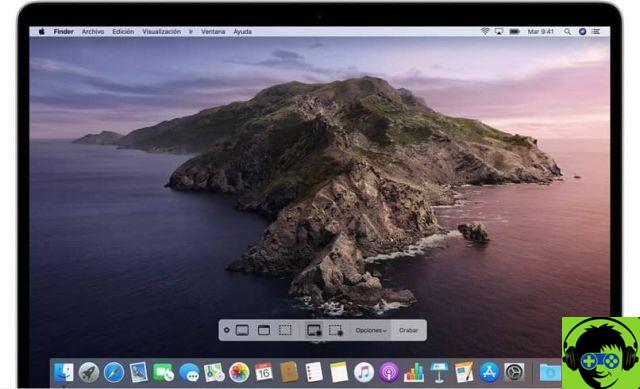
How to record a screencast on your Mac
To get started, the first thing we need to do is download the Quicktime application from the App Store or its official website, to get started with the tutorial.
Once the application is ready and installed, all you have to do is open it to enter the section " Fillet »And then access the option» New screen recording »Where you can see how it works. opens a window where you will see a register button highlighted.
Once this button is pressed, you will see that a message will appear and you can also drag the mouse from the PC and start selecting the specific area you want to record or, failing that, make a full screen recording. Once the recording is finished, all you have to do is press the stop button, which you will see positioned in the top menu of your Mac device
You know the easiest way to record your iPhone and iPad screen
Now if what you are looking for is the solution and the exact steps with which you can record the screen and also the audio of your iPhone and iPad, it is important that you know that everything is quite similar.
As in the previous step, we need to download the Quicktime application, which once downloaded, we need to open it and go to the section » fillet "And then go to the option" New video recording »In which we will start with the registration.
When we press this button, you will be able to see that the Mac's FaceTime camera will turn on. If you have your iPhone device connected via cable to your Mac, right next to the button that starts recording, you will be able to see an arrow, pointing all the way down.
If we press it, we can see that it will display various options among which we will see the name of the device, to which we connected. We select the name and we will see on the screen that the recording will start.
It is important that you know that if you decide to record your device screen, the same recording system will automatically clear the operator name, place the battery at 100%, and also set the default time to 9:41, which was just the moment when the iPhone original was presented in 2007.
With all these tools, you will ensure that your device registration is optimal, without any kind of error and also of excellent quality.
Being the latter it has been a problem among users who often complain uses lenses, which also leave a watermark within their recordings, making the end result not what they are looking for. So it is always necessary to improve the speed of your device.


