For many users, the iPhone has now become the primary device for taking and storing everyday photographs. However, everyone may not be able to avoid a bad fall capable of making the screen of the aforementioned smartphone unusable, so as to lose the chance to recover your image gallery. Even in these cases, however, it is possible to try to resolve the matter by operating in different ways.
Future precautions
Before starting with the list of possible solutions, let's see which ones precautions to have in the future to avoid total loss of photos. Basically there are two possibilities: synchronize the gallery with iCloud or perform a daily data backup.
Synchronize the gallery with iCloud
Apple offers 5GB of iCloud storage for free (very little to save images), but still allows you to expand it to 50GB for just $ 0,99 a month. Using just the gallery sync on iCloud, all photos will be saved to the cloud and can be accessed from other devices even with a broken or unusable iPhone (procedure that we will see shortly). For this reason we invite you to activate the option.
- Open the app "Settings" your iphone
- Continue with your name at the top
- Choose the item "ICloud"
- click "Photo Gallery"
- Activate the toggle to the right of "ICloud Photos"
Back up your data daily
Alternatively, it will be possible to activate an automatic and daily backup of the data, always on iCloud. In case you make this choice, however, the toggle "ICloud Photos" must be deactivated.
- Open the app "Settings" your iphone
- Continue with your name at the top
- Choose the item "ICloud"
- click “Backup iCloud”
- Activate the toggle to the right of “Backup iCloud”
Rrecover photos from a broken iPhone
Let's now move on to all the possibilities for recovering photographs on a broken and unusable iPhone.
Use iCloud
If one of the preliminary operations above has been carried out, it will be possible to recover all the images quickly and easily.
In the first case, it will be enough to access the iCloud website by entering your own Apple ID and then choose the Photos icon. Here all the shots taken with iPhone will appear and can be immediately downloaded to your computer (or left on the cloud).
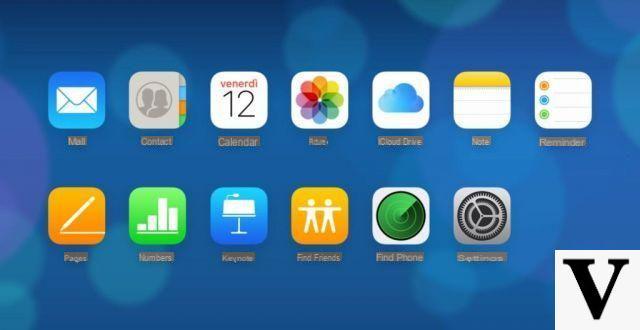
In the second, however, you will need to use a new iPhone (or iPad or iPod touch) without configuration. In fact, during the first start-up phase, the possibility of recovering the data and then configuring the device will appear via iCloud backup, within which the images will be present.
Replace damaged parts
It almost seems obvious to say it, but obviously, by replacing the damaged pieces of the iPhone, it will again be possible to use the smartphone to recover all the lost data.
Many avoid this option for fear of having to spend a fortune on repair, but in reality, in order not to completely abandon the iPhone, you could try a "do it yourself" approach. On iFixit there are in fact many useful articles that explain step by step all the steps to follow to replace the iPhone components.
Furthermore, the prices asked for the individual components are not really that exaggerated, especially if you want to buy only to recover the images (and therefore do not expect high quality). In fact, they can be found on eBay batteries around 15/20 euros e displays that do not exceed 30 euros.
Connect the smartphone to the computer
We close the guide with the procedure that could easily and immediately solve any problem. In fact, by connecting iPhone to a computer, it will be possible to read all the photographs inside it as if it were a classic camera or SD card. On Windows, all you need is open the folders of the aforementioned smartphone using "This PC", while on macOS it will be enough import images from the "Photos" application (standard on all Macs).
The only problem that could arise in this case will be the impossibility of unlocking the iPhone via the lockscreen code (due to the broken display for example), an operation necessary for the computer to have access to the data. In these cases, the only option you will have will be to use a third party software such as "EaseUS MobiSaver", available on the official website for both Windows and macOS. Once you have downloaded and installed it, just follow the steps below.
- To boot "EaseUS MobiSaver"
- Connect iPhone to computer via Lightning cable and wait for reading
- Select the recovery method from those that appear on the software screen
- Find the name of the iPhone
- Proceed with "Scan"
- Wait for the items to be scanned and then immediately save them to a folder on your computer

Alternative
The best alternative to "EaseUS MobiSaver" è “iMyFone D-Back iPhone Data Recovery”, free software for download, but impossible to use to recover the scanned data without the full purchase at the price of 45,99 euros (we recommend trying the free version first, in order to scan the iPhone and understand what data can be recovered).
- To boot “iMyFone D-Back iPhone Data Recovery” on your computer and click "Try now" or on "Buy now" (purchase is required to recover data)
- Connect iPhone to computer via Lightning cable and wait for reading
- click "Restore from iOS device" via the left sidebar
- Continue with "Start"
- click "Following" and uncheck the item "Select all" top right
- Check the box for "Photo Gallery", "App photos", "Video" e "App Videos"
- Proceed with "Scan" at the bottom right and wait for the procedure to complete
- When the search is finished, save all scanned items on your computer (purchase required)
Doubts or problems? We help you
Remember to subscribe to our Youtube channel for videos and other reviews. If you want to stay up to date, subscribe to our Telegram channel and follow us on Instagram. If you want to receive support for any questions or problems, join our Facebook community or contact us on Instagram. Don't forget that we have also created a search engine full of exclusive coupons and the best promotions from the web!


