Sometimes it is necessary to reset Ubuntu to factory settings without losing information. However, if you are unable to start your computer, we recommend that you read the following guide in which we will talk about How to recover Grub on Ubuntu Linux using Boot Repair easily?
GRUB is the boot manager of the Linux operating system, when it is damaged there could be related problems on startup of system. It is for this reason that we have prepared a guide through which you can solve this annoying problem.
How to recover Grub on Ubuntu Linux using Boot Repair easily?
As its name indicates, Boot Repair is a tool designed for repair boot Linux based operating systems, like Ubuntu. Using this popular tool it is possible to repair the so-called "GRUB" and thus be able to access the operating system again.
You can get this very useful tool very easily through conventional methods, i.e. using the Ubuntu terminal. To perform this process you need to learn how to install packages or programs in Ubuntu from the terminal as we explain in the following guide.
Get the Boot Repair app
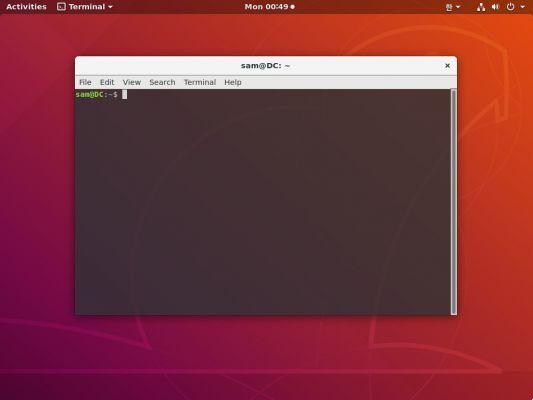
- The first thing you should do is open a terminal, this can be done very easily by pressing the key Ctrl + Alt + T configuration.
- Once the terminal has been successfully started, the following codes must be applied one by one: "sudo add-apt-repository ppa: yannubuntu / boot-repair", " sudo apt-get update «,« Sudo apt-get install boot -repair ».
- After completing the above procedure, the download and installation process for the Boot Repair tool is complete, which means that you can now start using it to repair boot-related issues.
Use Boot Repair to repair or restore GRUB on Ubuntu
Once the Boot Repair tool is completely downloaded, you can start using it to repair GRUB on Ubuntu. If you are unsure about this process, please read the following carefully:
- Using the application is quite simple, you just have to go to the Ubuntu applications section and locate the tool "Boot repair".
- Once the application has successfully opened, simply click on the option "Recommended repair (repairs the most frequent problems)", which as the name suggests is the ideal option, as it solves most problems.
- In case this option does not solve your problems, you can also choose the «Advanced options» that the application presents, in any case this option requires knowledge, so act with caution.
- You also need to keep in mind that you can perform this action via the method Live CD, which is especially useful if you can't boot into your computer in any way.
Perform the GRUB recovery procedure with a USB
Performing the operation using a pendrive can be very convenient, knowing that it is not possible to start the system. To perform this process, it is recommended that you log on to a computer with Ubuntu that boots correctly, read the following guide to start the process:
- The first thing to do is to download the application, for this you can go to the sourceforge website through which the Boot Repair ISO will be downloaded.
- After you have successfully downloaded the CD image, it is time to install the USB tool known as usb-creator-gtk. You will be able to get this app via the terminal, you can enter it by pressing Ctrl + Alt + T.
- When you are inside the terminal type the following code «sudo apt-get install usb-creator-gtk» and press "Enter".
- When the process is complete, insert a USB stick into your computer, run the USB-Creator application and finally select the previously downloaded ISO.
- After this process, boot from the USB drive on the system with the damaged GRUB and repair it using the application. After booting with the USB drive, the software will guide you through the steps to follow. Finally, if you want to optimize your PC performance, you can speed up Ubuntu's boot time by changing the Grub timeout.


