Among the novelties of Windows 8.1 we also find an integrated antivirus, Windows Defender, completely revised and corrected with respect to the program of the same name in Windows 7: the new Defender integrates all the features of Microsoft Security Essentials, another Microsoft security tool that is decidedly more performing and effective. Only real flaw is the complete dependence on Windows Update for automatic definition updates: the latter are conveyed as a system update, so in case of Windows Update problems (it does not work, it is in manual setting or worse off) the antivirus will not receive updated definitions: having an outdated antivirus is like not having it at all completely loses its effectiveness.
All is not lost though: if we do not want to switch to other antivirus but want to stay with Windows Defender (in the end it is integrated with Windows and it is more than enough) just enable the scheduled update of Windows Defender using some advanced options. In this way we will “unlink” the Microsoft antivirus update from Windows Update, considerably increasing the security of the system.
PLEASE NOTE: This guide is for Windows 8, Windows 8.1 and Windows 10 users.
Preliminary information
We always recommend doing an installation through one 100% genuine and original license, this is to avoid data loss or hacker attacks. We are aware that purchasing a license on the Microsoft store has a high cost. For this we have selected for you Mr Key Shop, a reliable site with free assistance specialized in in your language, secure payments and shipping in seconds via email. You can check the reliability of this site by reading the many positive verified reviews. Windows 10 licenses are available on this store at very advantageous prices. Furthermore, if you want to upgrade to the latest versions of Windows operating systems, you can also purchase the upgrade to Windows 11. We remind you that if you have a genuine version of Windows 10, the upgrade to the new Windows 11 operating system will be free. Also on the store you can buy the various versions of Windows operating systems, Office packages and the best antivirus on the market.
Windows Defender
Schedule automatic update
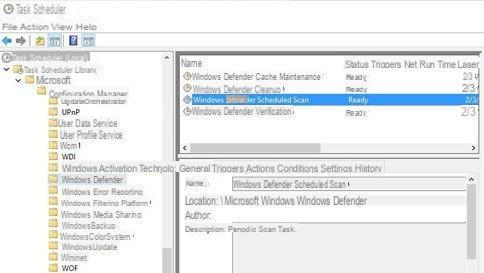
We start the tool to set up the scheduled operations; just type schedule task in the Start screen or in the search bar and start the item Plan activities.
In the new program that will open we will be able to manage every aspect of planning. First we expand the folder tree on the left to bring us to the Windows Defender folder.
Now let's go to the top right box and click on Create Activity.
A new window will open where you can set all the parameters necessary for planning. In the first tab we will have to configure as shown in the image below.
We will make the following changes:
- In the name we insert Defender Update;
- Press Change user or group… and enter SYSTEM as user;
- We enable the check box Run with the highest privileges.
Once we have pressed the Change user or group button… we will have to manually search for the user SYSTEM and add it; to do this, simply follow the order indicated in the image below.
Specifically:
- We insert the name system;
- we do the name check to get the right user;
- we confirm with OK.
Why assign this schedule to SYSTEM and not to the user (by default selected)? As we will see later, part of the procedure requires the command prompt to be started completely automatically. Having this prompt open at regular intervals can be very annoying, as it can also cancel a full screen program running at that moment (a game or a video). By assigning the schedule to SYSTEM the prompt window will be completely invisible to the user, making the update silent.
Now let's move to the Activation tab and click on at the bottom New.
Here we can decide when to start the update; we can set more parameters but the basic one to activate is the update when the PC is turned on, in particular at user access.
We set high Upon access in the Start the activity field.
We set Any user, insert a 1 minute delay (useful for waiting for the Internet interface and self-starting programs to start) and check the item On.
Returning to the Activations tab we can (at our discretion) activate other update schedules by clicking on New and setting the daily and hourly update (useful if the PC will never be turned off). We set high On a schedule in the Start the activity field.
Now let's configure the following fields:
- Daily
- Recurs every 1 day
- Repeat the activity every 1 hour for the duration of 1 day
- check the item Enabled.
Once the time configuration of the schedule is finished, we must now show the program which command it will have to execute to start the update; go to the Actions tab and click on at the bottom New.
We make the following changes:
- in Operation we leave Program start;
- in the program or script we use the Browse key to reach the following file
"C:Program FilesWindows DefenderMpCmdRun.exe"
- In the Add topics field we enter
-SignatureUpdate
Click on OK at the bottom to confirm. The last tabs allow you to modify other secondary parameters of the planning, but in our case we can safely ignore them.
Click OK below to make the changes effective.
Windows Defender updates will now be fully automatic and silent, even in the event of a Windows Update problem. To enable scheduling history just use the following item as shown in the image.
Doubts or problems? We help you
Remember to subscribe to our Youtube channel for videos and other reviews. If you want to stay up to date, subscribe to our Telegram channel and follow us on Instagram. If you want to receive support for any questions or problems, join our Facebook community or contact us on Instagram. Don't forget that we have also created a search engine full of exclusive coupons and the best promotions from the web!


