As a good photography enthusiast you are, you would like to take "artistic" shots, perhaps photos that capture the movement and dynamism of other subjects. Did I guess? Then let me give you some "tips" on how to take pictures on the go. Whether it's taking clear photos while you are moving or taking artistic shots with water, lights or other moving elements, I assure you that you can reach your goal without problems, as long as you follow the "tips" that I will give you. in a little while.
For the sake of completeness of information, then, after having explained to you how to use a Reflex camera to take artistic shots by exploiting the movement of the subjects to be immortalized, I will also provide you with information that will be useful if you want to take moving photos with the iPhone (the so-called Live Photos) or on Instagram, in the latter case using the Boomerang effect.
So, are you ready to get started? Yup? Well: make yourself comfortable, take all the time you need to concentrate on reading the next paragraphs and, more importantly, try to put into practice the advice I will give you. I am sure that by doing this you will take pictures of a very good level. Enjoy your reading and have fun!
How to take moving photos with Reflex
You wish to know how to take pictures on the go using a reflex, so you can take sharp shots as you move, or because you want to create artistic effect photos using water, lights or the background of a moving subject? No problem: if you want, I can explain to you how to do all this. Turn on your camera and then follow the directions below.
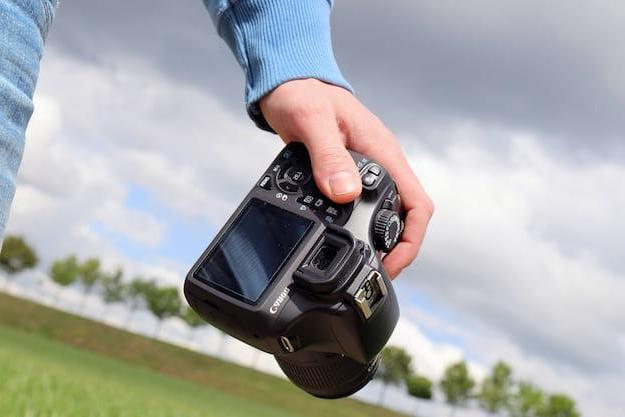
Please note: in the next paragraphs I will refer to the settings and buttons of the Reflex in my possession, one Canon EOS 1300D. In general, however, the indications that I will give you should be valid for all SLR cameras, even if they can clearly change the names of the buttons and options to be selected.
Take sharp photos on the go

It is your intention take sharp photos on the go, know that you can do it in two ways: using very short shutter speeds or using stabilized lenses, which are perfect for minimizing the chances of encountering the micro-blur effect generated by the natural hand shake.
To take clear pictures using very short shutter speeds, you have to take into account several factors, first of all the subject to be photographed: is it a car that whizzes by at maximum speed? Or a child who kicks the ball four times? The shutter speeds will be different: in the first case it would be advisable to use a much shorter time (eg. 1/1000), while in the second it may be sufficient to use a shutter speed a little longer (eg. 1/320).
Another factor to take into account when choosing the shutter speed is the light condition of the environment in which you are located. Let's say you are indoors: use a very short shutter speed (eg. 1/1000) would almost certainly mean getting an underexposed photo. Conversely, if you are outdoors, where sunlight can be very intense (especially at certain times of the day), use a very short shutter speed (eg. 1/100) could result in overexposed shots.
In these cases, to find the "square", you could adjust other parameters such as sensibility ISO (increasing it if you are in darker environments and decreasing it in brighter environments) and adjusting theaperture opening (opening it as much as possible if you are in a dimly lit environment or lowering it if you are in a very bright light environment).
How can you adjust the values in question? After turning on the camera and setting the manual shooting mode, press the button Av / + - (if necessary) and adjust the shutter speed by turning the main bezel (the toothed “wheel” located next to the shutter button). Do the same thing also with regard to the modification of the aperture of the diaphragm (marked by the abbreviation f/). To change theISO, on the other hand, presses on the namesake button placed on the camera body, so as to adjust the value: do not increase it too much, otherwise the photo will be "noisy".
If you decide to use objectives stabilized, you will be even easier to take clear photos even if you are on the move, especially if you want to avoid the micro-blur generated by the natural shaking of the hands. Usually, stabilized lenses are easily recognizable by the abbreviation IS (Image Stabilization) and, for obvious reasons, they cost a little more than those without the image stabilizer. If you want some "tips" on which lens to buy, do not hesitate to read the buying guide that I have just linked to you.
Taking pictures of moving water

want photograph water in motion because you are going to make the suggestive silk effect that all budding photographers sooner or later want to learn to reproduce? To do this, all you have to do is close the diaphragm as much as possible to avoid letting too much light into the sensor (which would cause an overexposed shot) and set a reasonably long shutter speed (eg. 1 ", 5 ", 30 ", Etc.).
Since increasing the shutter speed means letting a considerable amount of light enter the sensor, it is practically impossible not to resort to the use of a filter N / A. Thanks to this accessory, which must be applied on the lens, it is possible to reduce the light by several stops, allowing you to set the shutter speed necessary to obtain the silk effect, without encountering overexposure problems.
See offer on Amazon See offer on Amazon
Clearly, using very long shutter speeds, it is a must also use a tripod on which to place the camera (otherwise the photo is moved).
Taking pictures with moving lights

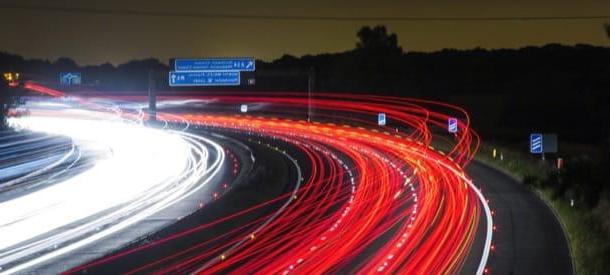
If you want photograph lights in motion you have to adopt more or less the same precautions that I indicated in the previous chapter on moving water. Even in this case, in fact, you have to set a rather low aperture (eg. f / 11, f / 16, etc.) and use a reasonably long shutter speed (ex. 2 ", 10 ", 30 ", Etc.).
I remind you that, by setting a very long shutter speed, it is a must use a tripod on which to place the camera, so as not to generate photos that have blur or micro-blur.
Take photos with moving background

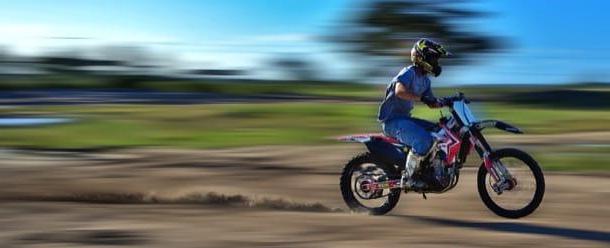
You want to shoot with moving background, using the so-called technique of panning? This is a great idea, especially if you want to add some dynamism to the main subject of the photo. To do this, you must first set a relatively short shutter speed (eg. 1/60, 1/30, etc.) and then make sure you have activated theautomatic autofocus.
In addition to that, also make sure that the aerial selection mode of both single-point and dynamic autofocus. As for the camera in my possession, you have to press the button AF and then select the item AI Servo. As for the Reflex in your possession, refer to the user manual of the same.
By setting the parameters in question, you will be able to position the point of focus where you prefer, with the possibility of following the subject as it moves and at the same time correcting the focus. If you have a lens with image stabilizer, to prevent blur is somehow not corrected, remember to disable stabilization from the appropriate button that should be placed on the lens in use.
How to take photos on the go with iPhone

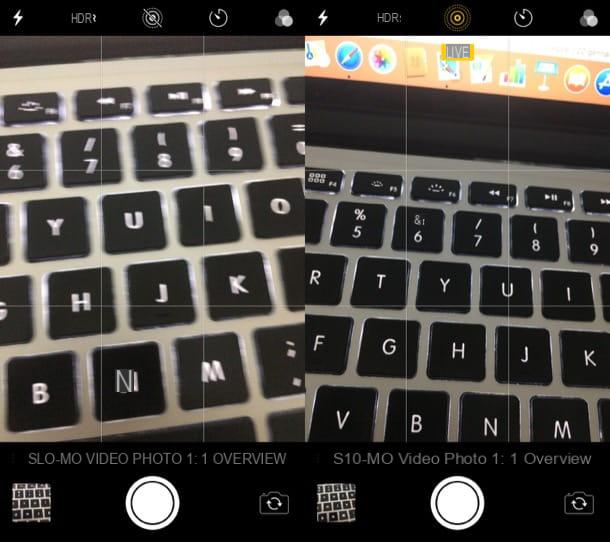
want take photos on the go with iPhone, The so-called live Photos? If you have a iPhone 6s or later of the Apple smartphone you can do it without the slightest problem. The first thing you need to do is open the app Camera and tap on the icon dashed circle at the top: the latter will turn yellow and the wording will appear LIVE, indicating that you have activated the shooting mode in question.
At this point, you just have to take the Live Photo by pressing on shutter button placed in the center of the screen (bottom). To view the Live Photo, then, presses on miniature of the same that appeared in the lower left corner of the screen and, to reproduce the moving image, press harder on it (or make a long tap, if your iPhone does not have 3D Touch).
Are you planning to take photos on the go with your iPhone, meaning you want to take sharp shots despite being on the go? If your iPhone's camera is stabilized, as in all newer Apple smartphone models, you shouldn't have much of a problem doing it (but don't expect miracles!). If, on the other hand, you want to "play" a little with the shooting parameters, you can do it using third-party apps, such as the very famous ProCam ed Halide, as the app Camera included “standard” in iOS does not offer the possibility to modify them.
If you want advice on which parameters to use to make clear photos, refer to the information I gave you in one of the previous chapters.
How to take photos on the go on Instagram

want take photos on the go on Instagram, or one of those shots (even if it would be more correct to talk about short videos) that are played in loop? To do this, all you have to do is use the effect Boomerang. To proceed, start the Instagram app on your Android or iOS device, log in to your account, press the icon of thelittle man located at the bottom left and then tap on the button capacitor positive (+) lead which is on your profile picture located at the top left.
In the screen that opens, scroll through the various shooting modes available and select the one called Boomerang. To take the photo in motion, then, presses the button depicting the symbol of infinity (∞) and move the phone, so that the blur is generated.
To conclude, fai tap sul pulsating The tua storia to publish the content as an Instagram Story, or press the button of the arrow pointing to down to add it to the saved items. Easier than that ?!
How to take photos on the go


