uses Instagram for some time now and, for better or worse, you have become familiar with all its main features. However, you would like some advice on how to embellish, or at least customize, your shots in order to make them more original and "attractive" in the eyes of followers. Well, if that's the case, there is no doubt: you've come to the right place at the right time!
In this guide, in fact, I will have the opportunity to explain to you how to edit photos for instagram suggesting some applications suitable for the purpose and explaining how to best master the editing tools included in the official app of the social network. Furthermore, it will be my care to explain to you how to create original compositions for your Stories and how to edit photos on Instagram without publishing them or following their publication. All in a very simple way, of course.
So, can we know that you are still standing there? Courage: make yourself comfortable, take all the time you need to concentrate on reading the next lines and, more importantly, try to put into practice the instructions I will give you. If you do, you won't have the slightest problem completing your tech feat today. There is nothing left for me to do, except wish you good reading and have fun!
- How to edit photos on Instagram without posting them
- How to edit photos on Instagram already published
- How to edit Instagram photo location
App to edit photos for Instagram
Let's start this discussion by considering some of the best photo editing app for instagram. Surely you will find these solutions useful to retouch the shots you intend to publish on the photographic social network: make good use of them!
Snapseed (Android / iOS)
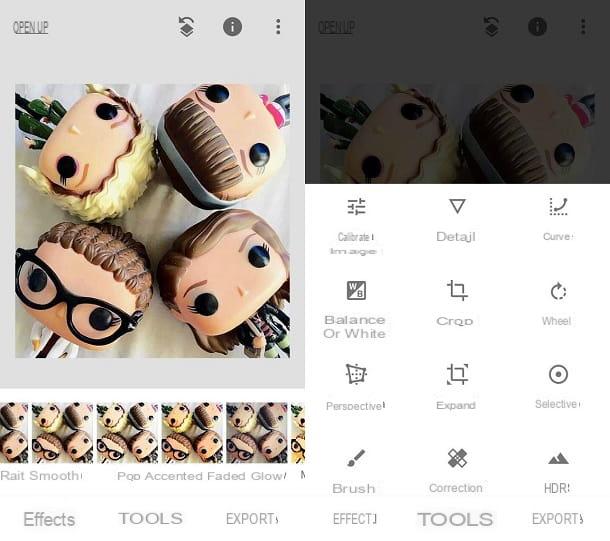
Snapseed is a free app for Android and iOS, developed by Google, which provides users with numerous tools that offer the possibility to retouch the main parameters of digital photos and to apply effects and presets “on the fly”. While packed with features, Snapseed's interface is “clean” and minimal, which makes it very easy to use.
After installing and launching Snapseed on your device, tap anywhere on the screen and, in the menu that opens, select theimage to edit. To act on the various parameters of the photo, then presses on the item Instruments (below) and, in the menu that opens, select one of the tools included in the app (eg. Calibra, to calibrate the brightness, contrast, colors and other parameters of the photo; Sharpness o Details, to make the shot clearer; Prospective, to change its perspective, etc.).
If, on the other hand, you want to apply one of the many preset filters, press on the voice Effects placed at the bottom left and tap on one of the many filters available: since there are many, take the time to try more than one, so as to find the one that best suits your shot.
When you make any changes to your photo, remember to save it by pressing the checkmark at the bottom right. At the end of the work, then tap on the item Export (bottom right) and, from the menu that appears, select the items Share> Instagram, in order to share the edited photo on Instagram, or select one of the other options available (eg. Save, to save the shot on your device; Export, to create a copy by changing its size, format and / or quality or Export as, to create a copy of the image in a selected folder).
VSCO (Android/iOS)
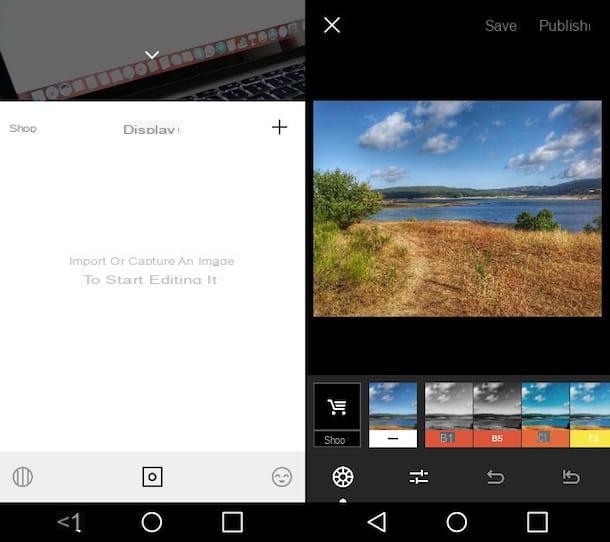
Also VSCO is an app that can be useful for retouching photos to be published on Instagram, as it allows you to edit digital shots using both presets and acting on image parameters. Basically it is free but, by subscribing to the subscription VSCO X starting at $ 19,99 / year, you can take advantage of additional filters and functions.
After installing and starting VSCO on your Android or iOS device, press the button Register with your email address or on the button Register with your phone number and create your account following the instructions you see on the screen. Alternatively, if you are already registered with VSCO, click on the item Log in and enter your login credentials to log in.
Once logged in, tap on the symbol of square placed in the center of the screen, then press on the symbol capacitor positive (+) lead which is located at the top right and, in the new screen that has opened, select the image you want to modify by tapping on its preview and then pressing on the item Import (located at the bottom).
After selecting the image to retouch, press on theicon with adjustment bars, located at the bottom left, and retouch the image using the many presets available in VSCO. If you want to act "manually" on some shooting parameters, tap on theicon with adjustment bars located at the bottom left and select the parameter you want to retouch (eg. Exposure, Contrast, Etc.).
When finished, click on the option Save (placed at the top), tap on the symbol (...) at the bottom, select the item Share and tap on the Instagram item, to share the photo on the social network.
More apps to edit photos for Instagram
If you want to rely on other apps to edit Instagram photos, I suggest you take a look at the solutions listed below: I am sure you will find some that meet your needs.
- Pixlr (Android / iOS) - is an app that offers a rather large set of tools, which includes tools to manually act on the parameters of your shots and create fun collages.
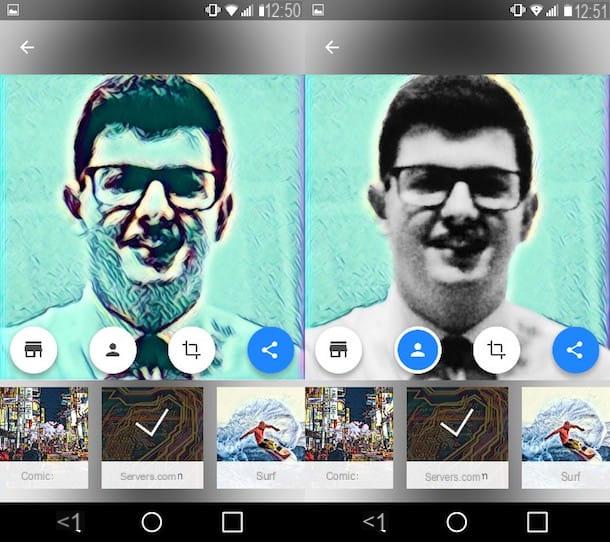
- Prisma (Android / iOS) - this app allows you to turn any image into a real masterpiece. To use it, just choose the image to retouch, select one of the many free filters among those available and wait for it to be applied. To work, Prisma requires access to the Internet and its full version, which allows you to process photos in high definition and access Premium filters, is accessible by subscribing to a subscription starting at € 1,99 / month.
For more information about using these and other apps to retouch photos, consult the tutorial I linked to you: surely this further reading will also be useful to you.
How to edit photos for Instagram Story
Since the Stories are among the most popular types of content on Instagram, let's see together how to edit the photos to be published through this function.
Instagram editor
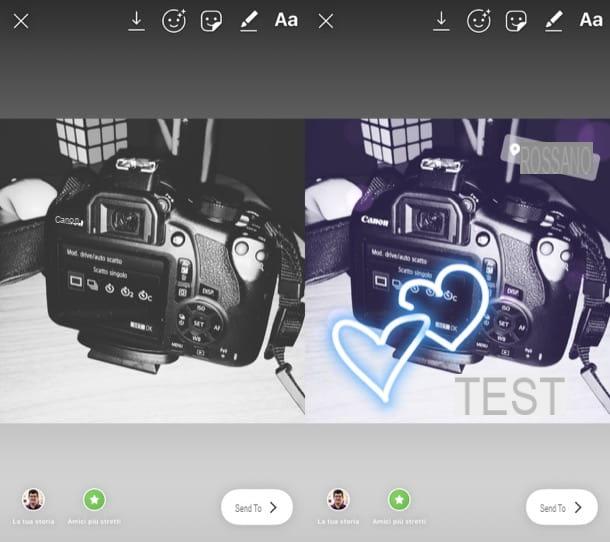
If you want to change a photo you want to post into a Story, you can rely onInstagram editor which allows you to do this by adding stickers, texts, drawings and so on to the images in an extremely simple and fast way.
To take advantage of these functions, access Instagram through its app for Android and iPhone, tap on the symbol oflittle man located at the bottom right, click on the symbol capacitor positive (+) lead located on your profile photo and select the photo you want to include in the Story, or take one right now.
Then tap on the icon of face with the stars to add effects to the photo, click on thesmiling sticker to add stickers (some, like that Survey e Countdown, are interactive), tap on the icon of pencil to draw on the photo or press the symbol Aa to add text to it.
Once you have edited the photo to be published in your Instagram Story, you just have to press the button The tua storia place at the bottom and that's it. If any steps are not clear to you or you want more information on how Instagram Stories work, consult the guide I linked to you because it will certainly be useful.
Unfold (Android / iOS)
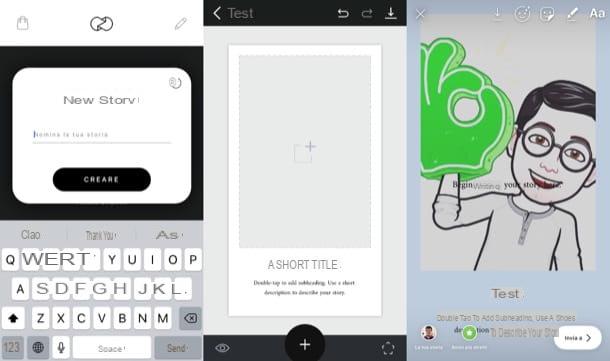
If you want to rely on third-party tools, I recommend that you resort to Unfold, a free solution for Android and iOS that allows you to create graphic compositions for Instagram quickly and easily. The free version includes 25 templates: to buy more you need to make in-app purchases starting from 1,09 euros.
After installing and starting Unfold, tap the button capacitor positive (+) lead at the bottom, type the name of your new story in the appropriate text field and presses the button Creation. Then press the button capacitor positive (+) lead always placed at the bottom, select one of the templates from the menu that opens and edit it by replacing the sample text and images with the content you want to publish on Instagram (just tap on them to edit them).
To edit the content, click on the del icon pentagon which is located at the bottom right, then presses the icon of drop to change the color of the page or that of the T to add a new text field.
When finished, tap on the icon arrow facing down, press on the item Share page on Instagram, you agree to start the Instagram app on your device and publish the Story by pressing on the voice The tua storia present in the app of the photographic social network.
More apps to edit photos for Instagram Story
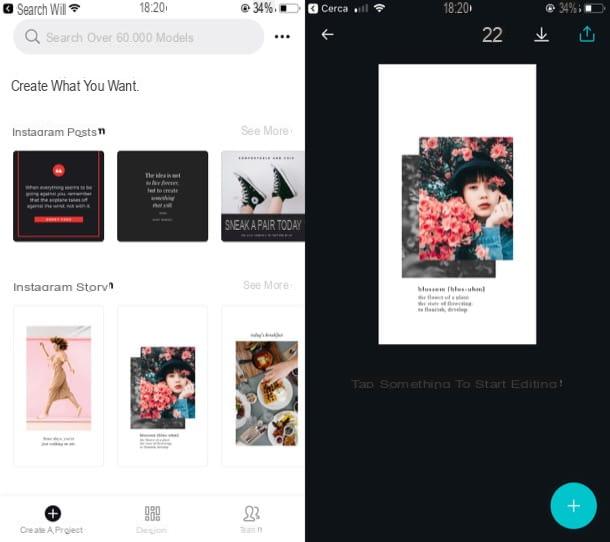
If you want to try other apps to edit photos for Instagram Stories, take a look at the solutions listed below - they might come in handy.
- canva (Android / iOS) - this is an app that works upon free registration, thanks to which it is possible to create Stories for Instagram starting from some ready-to-use templates. Its minimal interface makes it quite simple to use.
- Adobe Spark Post (Android / iOS) - this app, developed by Adobe, is free and allows you to create various graphic works in a rather simple way, including Stories to be published on Instagram.
- About (Android / iOS) - is the perfect app for those short of ideas on which quotes to write on Instagram Stories. Since it also allows you to edit images to suit this type of content, I strongly suggest you try it.
How to edit photos on Instagram
If you want to know how to edit photos on instagram, before or after their publication, follow the instructions included in the next chapters.
How to edit photos on Instagram without posting them

It is your intention edit photos for Instagram without posting them, so as to use the social network as a photo editing app, know that you can use a very simple "trick" to succeed in your intent. All you have to do is apply one of the filters to the image you want to edit, save it to the camera roll and set the airplane mode on your device to prevent the shot from being published. Find everything explained below.
To begin with, log in to Instagram via its app for Android or iPhone, press the button capacitor positive (+) lead located in the center of the screen (bottom), select the photo you want to edit (if you don't want to select it from library, you can take one at the moment via the function Gallery) and tap on the item NEXT at the top right.
In the screen that opens, select one of the Instagram filters to apply them to the shot in question and / or tap on the item Modification (located at the bottom right) to apply corrections regarding the brightness, contrast, heat, etc. Now is the time to activate the flight mode: Its Android, swipe from top to bottom to call up the Notification curtain and click on google Airplane mode / Offline mode; on iPhoneinstead, it recalls the Control Center by swiping from bottom to top (on iPhone 8/8 Plus and earlier) or from top to bottom from the top right corner of the screen (on iPhone X and later) and tap on theplane. More info here.
After activating the airplane mode, from the Instagram app do the following: on Android, tap on the items Next> Share (top right), press sui three dots placed next to the wording Automatic publication as soon as possible and select the items Delete post> Delete from the menu that opens. Up iPhoneinstead, tap on the items Next> Share (top right), wait for the wording to appear We will try again when the connection is better and press on (X) placed in correspondence of the latter.
At the end of the operation, deactivate the airplane mode (just press the icon of thearea present in Notification curtain of Android or in Control Center iOS) and that's it: as if by "magic", the edited photo should be saved in the camera roll of your device.
If the solution described above is not to your liking, you can retouch the photos using one of the apps listed in the last part of the tutorial: you will surely find them very useful.
How to edit photos on Instagram already published
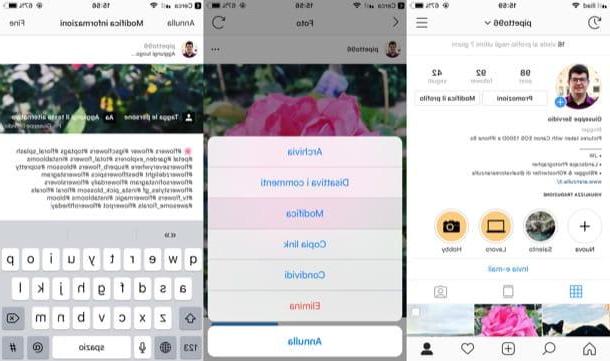
Would you like to make changes to photos already posted on Instagram? Unfortunately you cannot apply filters to them and / or correct their parameters, but you can still modify their caption, adding or removing hashtags, texts, etc.
To proceed, log in to Instagram via its app for Android or iPhone, tap on thelittle man located at the bottom right, locate the photo you want to edit from the feed and press on its preview, to open it.
Hence, it follows the symbol of gods three dots located in the upper right corner of the photo, select the item Modification from the menu that opens and make the desired changes: tap the button Tag people to tag other users, tap on the text field Write a caption ... to add a caption that also includes hashtags (words and phrases written with the symbol # in front to label and index the content) and, once you have finished making the desired changes, presses on the item end to save it all. Simple, right?
How to edit Instagram photo location

Change the location of photos on Instagram it's very simple: after identifying the content you have published on the social network, all you have to do is select its preview in the feed of the Instagram app for Android or iPhone.
At this point, press on the symbol of three dots located in the upper right corner on the photo, select the item Modification from the menu that opens, tap on the item Add location… (if you had entered the place in the photo, press on his name and tap on the item Edit place), search and select the place name of your interest and tap on the item end to complete the changes made. Easier done than said!
How to edit photos for Instagram


