Align text with Word on PC and Mac

If you want to learn how to align text with word using your PC, open the document you want to modify and use the mouse to select the portion of text to be aligned: to select an entire paragraph, simply click three consecutive times on one of the words written in it.
Alternatively, if you prefer to act as a keyboard, you can use the key combination Shift + Left Arrow o Shift + Right Arrow to select, letter by letter, the text located to the left or right of the Word cursor; the combination Shift + Ctrl + Right Arrow or Left Arrow (Or shift + options + right arrow or left arrow on Mac) to select the word that is to the left or right of the Word cursor or the combination Shift + Down Arrow to select the current row.
At this point, all you have to do is click on the button relating to the type of alignment you want to adopt in the top center of the Word toolbar, in the Home. The buttons for alignment are those with the 4 black lines placed one above the other arranged in various positions.
Then click on the button Align left(the icon with the black lines shifted to the left) to align the selected text left, up Align to center (the icon with the black lines centered) to center the selected text, on Align right (the icon with the black lines shifted to the right) to align the selected text right or up Justify (the icon with the black lines all the same length) to justify the text.

You can also align text with Word using convenient keyboard shortcuts. Then select the text to be aligned as seen above and press the keys at the same time Ctrl + T of your PC keyboard to align the text to the left, Ctrl + R to right align text, Ctrl + E for center-aligned or Ctrl + F to justify it.
If you use a Mac, the shortcuts to use to align the text are as follows: cmd + e to center the paragraph, cmd + j to justify it; cmd + l to align it to the left or cmd + r to align it to the right.
If you want to justify a text before even writing it, all you have to do is select the mouse cursor at the point on the sheet where you want to align the text (e.g. left margin, right margin, center) and double click as soon as the icon of the alignment you want next to the pointer.

If you want to align the text contained in a table, all you have to do is click inside the cell in which you want to change the text layout, go to the Table Tools> Layout Word and click on one of the icons contained in the box Alignment.
The available alignment options are as follows: Top Left, Top Center, Top Right, Center Left, Center, Center Right, Bottom Left, Bottom Center, and Bottom Left right.

Similar speech applies to the alignment of text placed near images. In this case, to align the text you have to go to the tab Picture Tools> Format Word and select the type of alignment you want from the menu that opens by clicking on the button Location.
The available alignment options are as follows: In line with text, top left with framed text, top center with framed text, top right with framed text, middle left with framed text, middle of the center with framed text, middle right with framed text, lower left with framed text, lower center with framed text, or lower right with framed text.

If you want more information on how text alignment works in relation to image position in Word, check out my tutorial on how to anchor a picture in Word.
Align text with Word Online
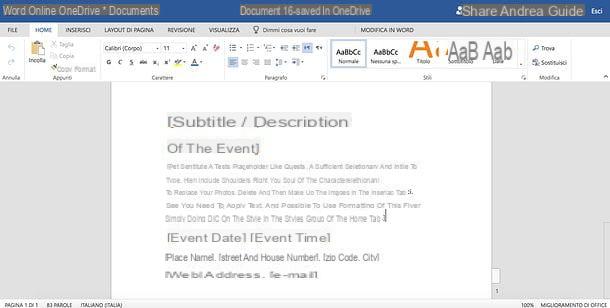
Do you need to align the text contained in a Word document, but the famous Microsoft software is not installed on the PC you are currently using? Don't despair. You probably weren't aware of it, but there is an online version of Word that is completely free and can be used directly from your browser (eg. Chrome, Firefox o Safari) without installing additional software - all you need to use it is a Microsoft account. If you don't have such an account yet, read my tutorial on how to create a Microsoft account and fix it now.
Since Word Online relies on OneDrive, the cloud storage service from Microsoft (which I told you about in my dedicated guide), if you intend to modify an existing Word file, you must first upload it to it. Then connect to the home page of OneDriveclick on your button Go to my OneDrive (if required), log in to yours Microsoft account and upload the document you need to edit online by dragging it into the browser window. You will be able to follow the upload progress through the icon arrow which will appear at the top right.
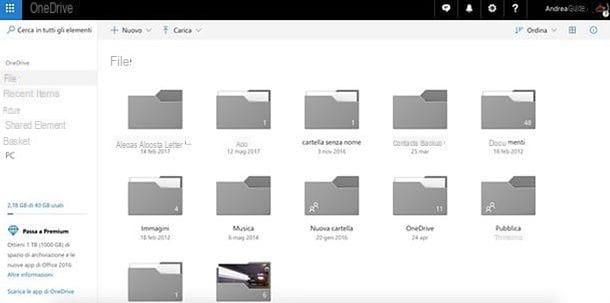
Once the upload is complete, click on the icon of the Word file you want to edit (within OneDrive) and it will automatically open in Word Online. At this point, all you have to do is follow the same instructions I gave you earlier for the classic version of Microsoft software.
Then select the portion of text to align, select the tab Home and click on one of the buttons with four horizontal lines available in the section Paragraph.
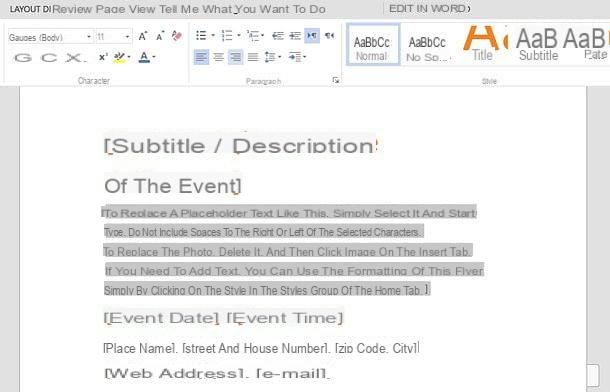
To align the text in a table, instead, select the tab Table Tools> Layout that appears at the top right and selects one of the options available in the section Alignment. As mentioned, everything is practically identical to the “offline” counterpart of Word.
At the end of the changes, to download the edited document in Word Online, click on the button Filletlocated at the top left, select the item Save with name from the bar that appears on the side and click on the button Download a copy.
Align text with Word on smartphones and tablets

Do you need to work on a Word document but don't have your PC handy? Again there is no problem. Word, in fact, is also available in the form of an application for Android, iOS and Windows 10 Mobile and can be used at no cost on all devices equipped with displays equal to or lower than 10.1 ″ (otherwise it requires the subscription of a subscription to Office 365, which costs from 7 euros / month).
To align text using the Word mobile app, download it from your device's store (on Android and Windows 10 Mobile it may be pre-installed), launch it and log into your Microsoft account. Then choose whether to create a new document or whether to open an existing one: you can draw on the memory of the device or one of the supported cloud storage services, such as dropbox, OneDrive, Google Drive e iCloud (only your iOS).
Once the document has been opened (or created), if you are using a smartphone, select the portion of text to align (by making a long tap on a word and then selecting the rest with the indicators that appear on the screen), tap the button ... (iOS) or sul triangle (Android) located at the bottom right and select the tab Home from the drop-down menu that appears at the bottom left.
At this point, scroll down the menu until you find the icons relating to the alignment of the text (those with the horizontal lines), press on the one you are interested in and that's it. To align the text in a table, instead, tap inside it, select the tab Table from the drop-down menu that appears at the bottom left, go to Alignment and select one of the available options (eg. left, center etc.) to complete the operation.
The document, if it already exists, will be saved automatically. Otherwise you will have to tap on the back arrow and choose the option to save it. Easier done than said, right?
How to align text with Word


