How to make a Power Point on Word for Windows
As I already mentioned in the introductory lines of this tutorial, you can facilitate the creation of the slides of a PowerPoint document, by defining the relative structure directly in Word.
In practice, this consists in "transforming" the text of your interest into titles, based on a series of criteria that I will explain shortly, and then transfer it directly to the PowerPoint presentation. Below you will find everything explained in detail.
Create the structure

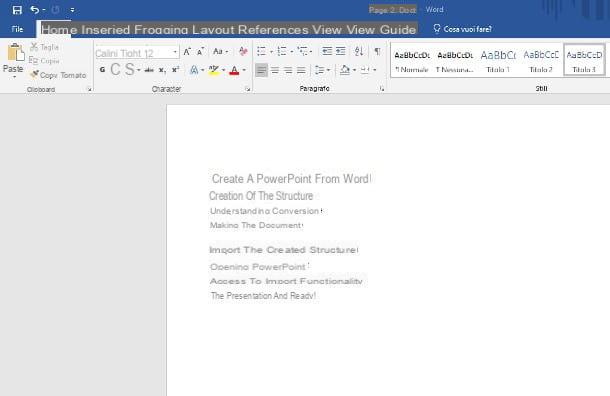
In order to create a structure that can be effectively imported into PowerPoint, you must be aware of the principles by which the conversion is carried out. First, all the content you want to import into the slide must be formatted with one of the formats Title (from Title 1 to Title 9) available in the box Styles of the card Home of Word. The import criterion is composed as follows.
- Texts formatted in 1 title will become the titles of new slides (elements of level 1).
- Texts formatted in 2 title they will become part of a bulleted list corresponding to the "top" title slide (elements of level 2).
- Texts formatted in 3 title will become a bulleted sub-list of the texts formatted in Title 2, those formatted in Title 4 will be sub-lists of the texts in Title 3, and so on.
Text formatted with styles other than "Title" will not be transferred to the PowerPoint slide, as well as images, objects and so on. Keep this information in mind when creating your source Word document (or editing an existing one).

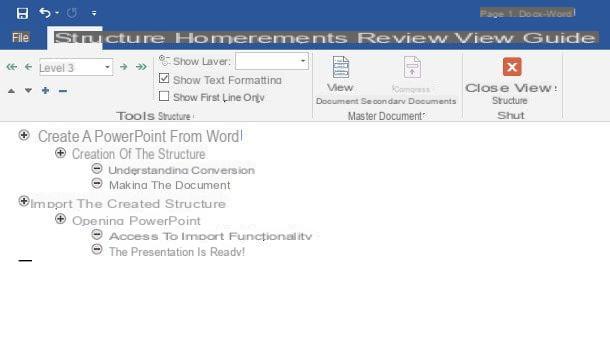
To simplify your work even more and have a "graphic" feedback on what will be the organization of the generated presentation, after having opened and / or created the Word document, click on the tab Show of the program and then on the button Structure, located on the left.
If all went well, you should be able to see the exact structure of the Word document, broken down into layers: from here, you can drag a layer to move it to a different point in the structure (the change will also affect its sub-layers ), or create new levels and sub-levels using the control buttons displayed above.
To exit Structure mode, click on the button Close tree view. When you are satisfied with the work done, click on the tab Fillet Word (top left), press the button Save with name and be sure to save the file in . Docx o .rtf (you can select it from the drop-down menu Save eat of the save window).
When you are done, quit Word, or close the document, going back to the tab Fillet and selecting the voice Close (you can't import a document open in PowerPoint).
Import the structure

Once you've created your presentation structure in Word, importing it into PowerPoint is super easy! First, start PowerPoint by calling it from the menu Home Windows, then proceed with creating a new presentation (possibly using the graphic theme you prefer), or open an existing presentation in which you are interested in importing the slides created with Word.
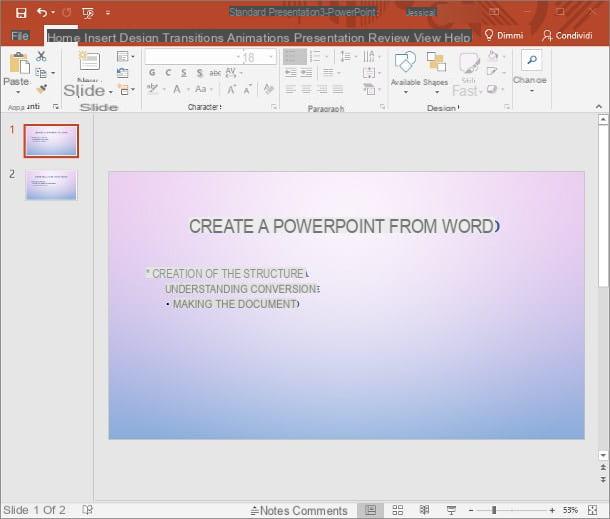
Next, click on the tab Home, then on the voice New slide located at the top (be sure to click on the text to view the creation options) and press the button Slides from the structure ... from the menu that is proposed to you. Using the panel of File Explorer, then select the Word file you have created or edited previously and, after a few moments, PowerPoint should start converting the chosen Word file, showing you immediately after the new slides generated.
At this point, you can make any changes you see fit to enhance or beautify the imported slides: add images, backgrounds and transitions, change the text style, and so on.
How to make a Power Point on Word for Mac
If it is in your interest to understand how to make a Power Point on Word for Mac, then this is the most suitable section of the tutorial for you: also in this case, it is possible to create the structure of one or more PowerPoint slides using Word, in a similar way to those seen for Windows. The only difference lies in the save format, which is slightly different: I'll explain everything in detail below.
Create the structure

The structure of a Word document to be used as a "base" for PowerPoint slides is completely identical to that seen previously for Windows: the title of the slides (element of level 1) must be formatted with style 1 title, the items of the main bulleted list (level 2) must be in 2 title, its sub-elements in 3 title, and so on.
Again, you can simplify your work and easily make the necessary changes using the mode view Structure accessible, also in this case, by pressing the button of the same name located on the card Show Word for Mac. You can exit this mode at any time by clicking on the button Close tree view.
When you're done, open the menu Fillet Word (top left), choose the item Save with name ..., indicates the name to assign to the file and the save path, then set the drop-down menu File format su RTF (Rich Text Format) and click on the button Save.
The structure must necessarily be saved in RTF since, currently, PowerPoint for Mac can correctly import only RTF documents and simple text documents (.txt). To conclude and ensure that the document can be used by PowerPoint, close Word.
Import the structure

Once you have completed building the structure in Word, start Power point and proceed to create one new presentation, or open the presentation to which you want to add previously created slides. Next, go to the tab Home PowerPoint, click on arrowhead down located on the button New slide, then press the button Structure… attached to the panel that opens.
At this point, use the screen of the Finder to reach the previously created Word document, click on the button Inserisci and that's it: after a few moments, the slides should be correctly generated. After this step, you can apply all the changes you want to your presentation, intervening directly from PowerPoint. Have you seen? It wasn't that hard!
How to make a Power Point on Word


