Do you want to improve the photos taken with your smartphones? With our guide in a few minutes we will tell you how to have Google Camera on Xiaomi Mi A2 and Mi A2 Lite, greatly improving the quality of your shots in all light conditions, especially in the evening where these mid-range smartphones perform significantly lower than top-of-the-range smartphones such as OnePlus 6 e Samsung Galaxy S9.
Before starting to give you all the necessary information to be able to install the Google Camera on your Xiaomi smartphones, I want to show you practically, with photographic examples, the kind of improvement you can expect. After extensively using both smartphones with and without the Google Camera, I can say without a shadow of a doubt that the improvements are there, and definitely important, especially in the evening where the details are often mixed and the blur dominates in all the photographs.
If some point of the guide is not clear to you, we have also prepared a video guide.
WHAT IMPROVES WITH THE GOOGLE CAMERA
Google's image processing algorithms, and in particular the HDR + mode, manage to make up for the small size of the photographic sensors present on modern smartphones, expertly mixing multiple images taken in sequence to obtain sharper and more detailed photos, perfectly illuminated where there are strong contrasts between light and shadow. Not only better photos during the day with strong contrasts or at night in critical light conditions, but also more natural selfies (or selfies) and where you can better appreciate the difference between the subject in the foreground and the background: the mode Portrait (Portrait) of the Google Camera works much better than the factory camera application on the Xiaomi Mi A2 and the Xiaomi Mi A2 Lite.
As you can see from the images, photos taken with the Google Camera have fewer dark (underexposed) or too bright (overexposed) areas, creating a more balanced scene in terms of lighting and less saturated colors than the camera application. stock. During the day or in environments with a lot of light, the differences are appreciable but not radical: a different matter for the shots at night or in insufficient light conditions.
The examples speak for themselves: photos taken with the Google Camera are sharper and more detailed, with more natural colors. If you zoom in on the writings you will notice how they are more defined and less soft, unlike those made with the default camera application.
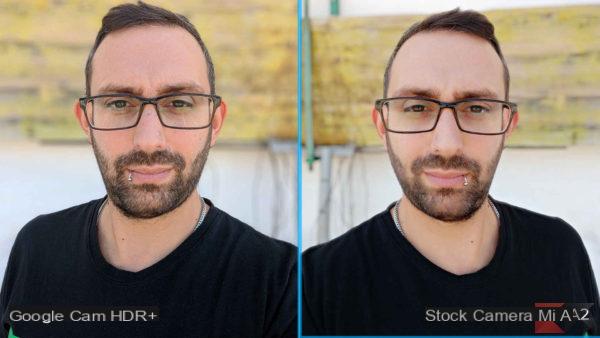
Even the self-portraits are clearly in favor of the Google Camera: although the artificial bokeh effect is more pronounced than the Xiaomi algorithm, the outline of the main subject is flawless even in difficult areas where there are no strong contrasts. As you can see from the photo on the right, the Xiaomi stock camera applies a beauty effect (which can be disabled) which, however, makes the photo more mordiba and less clear.
HOW TO INSTALL THE GOOGLE CAMERA
Now that we have shown you what improves with the Google Camera we can guide you step by step in the installation on your smartphone, be it the Xiaomi Mi A2 or the Xiaomi Mi A2 Lite. These two mid-range smartphones produced by Xiaomi are excellent terminals with a exceptional quality / price ratio, but with specific guides like this we can go to further improve their performance and adequately exploit the hardware to obtain better results in the photographic sector.
Before starting, you need to do three things:
- Install the USB DRIVERS to connect your smartphone to your computer;
- Install ADB and FASTBOOT;
- Back up your phone data.
The thing that we will never stop telling you when it comes to guides on modding your smartphone is the following: even if you are an expert user, never assume that the procedure can go smoothly. Following our guide to the letter, tried and tested to be 100% accurate, is essential: unfortunately the unexpected is always around the corner and we advise you to always make a backup of your smartphone before starting.
# 1 - Download the firmware
In order to install the Google Camera on our smartphone we need a fundamental component, that is the active Camera2 API. Unfortunately Xiaomi does not activate these libraries by default on its smartphones, so we are forced to have to intervene manually by activating them. This modification, even if harmless, needs system permissions to modify one of the phone's configuration files: the file in question is build.prop, to which we will add a string of characters that will enable the Camera2 API, allowing us to install and use the Google Camera.
Unfortunately, to obtain these permissions we need to unlock the device and obtain root permissions: the good news, however, is that with the Xiaomi Mi A2 and Mi A2 Lite this procedure is very simple and the risks of something going wrong are practically nil. , if you follow well our on how to install the Google Camera step by step, without skipping any steps.
Let's go to the tit http://en.miui.com//download.html and select our smartphone: Xiaomi Mi A2 or Xiaomi Mi A2 Lite.
Now we download the firmware of our smartphone by pressing the green button but be careful: the firmware version installed on our smartphone and the one we download must be IDENTICAL. So make sure that you have installed that firmware version on your phone that you can download from the site by checking the version number.
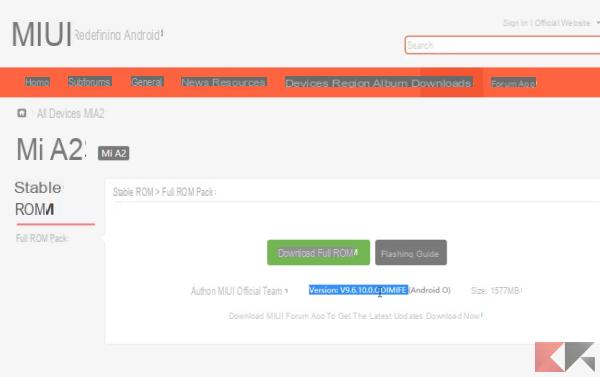
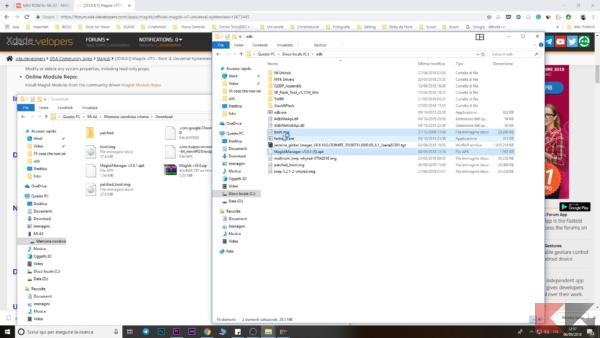
Once we have downloaded the ROM it will be in archive format: let's place it in a folder where we will put all the files we need. For convenience I always put all files in the folder C: ADB of my computer, simply because there are already the ADB and FASTBOOT commands that are used to install ROM or perform modding on smartphones, as in this case. The important thing is that all files are always in the same folder, no matter where.
# 2 - Extract the BOOT.IMG file
Let's open our firmware archive and search for the Boot.IMG file in the IMAGES folder. Let's unpack the file in our folder, in the example C: ADB.
# 3 - Download Magisk Manager
Let's go to the page https://forum.xda-developers.com/apps/magisk/official-magisk-v7-universal-systemless-t3473445 and download Magisk Manager: it is an APK file that we will have to install later on the smartphone and will allow us to have root permissions enabled on our smartphone.
# 4 - Transfer files to your smartphone's internal memory
Now that we have both the boot.img extracted from the downloaded firmware and the Magisk Manager APK we can transfer both files to our phone. With the Xiaomi Mi A2 Lite we will necessarily have to connect our smartphone via cable to the computer, since there is no memory expansion and therefore we cannot use a micro-SD memory; if instead you own a Xiaomi Mi A2 Lite you have the possibility to transfer the aforementioned files inside a micro-SD to be inserted inside the phone.
# 5 - Unlock the bootloader
An important premise before continuing with the guide: while unlocking the bootloader EVERYTHING on your smartphone will be deleted for security reasons so, if you haven't done it yet, I strongly recommend that you make a backup of all your data.
In order to enable the smartphone to unlock the bootloader you will have to go to the settings menu accessible both from the application drawer and from the notifications drop-down, just tap on the wheel. Once this is done, go to System - About the phone and tap on Build Number 10 times: by doing so we will enable the Developer Options menu in which we will have to enter to enable two settings.
The two options to enable within Developer Options are USB Debugging and OEM Unlock.
After these preliminary operations we can turn off our smartphone completely to enter Fastboot mode. To do this, with the phone turned off, we hold down the Volume down and Power keys at the same time until there is Mitu with the word Fastboot to welcome us: if you do not know who Mitu is, run immediately to our article dedicated to 10 things you don't know about Xiaomi!

From our computer we open the command prompt by going to the start menu and typing "Command Prompt", a black screen with character strings will appear. Let's go to the folder where we installed ADB using the commands “cd foldername” and “cd ..” to open a folder and go back one level, respectively.
Once we are ready, connect the smartphone to our computer with the supplied cable and make sure that the computer has detected the phone, a symptom that the USB DRIVER installation was successful. We type "fastboot devices" and press ENTER, doing so should result in a string of numbers and letters, indicating that a device has been recognized and is correctly connected. If not, install the USB DRIVERS for your smartphone and resume the guide from this point.
To proceed with unlocking the bootloader, type
fastboot oem unlock
We press ENTER and wait for the smartphone to finish the security procedure, i.e. the deletion of all data on our smartphone and start the phone normally.
# 6 - Patch the boot.img file with Magisk Manager
Now that we have unlocked the bootloader we can proceed to acquire root permissions: first, however, let's go to enable USB Debugging again from the Developer Options menu because after deleting the smartphone memory the command will be reset. Once this is done, go to the folder where we transferred the boot.img and Magisk Manager files and install the Magisk APK.

We install the application and once the installation is finished we open the app from the applications menu. We tap on Install and then Patch Image file by selecting the Boot.img file that we transferred previously. What the app will do is download a file from the Magisk server (you must therefore have an active data or Wi-Fi connection at this stage) and edit the boot.img file, so as to be able to replace the original startup file of our smartphone and acquire the root rights to finally be able to install the Google Camera.
Please note that the procedure can also return an error: in this case I recommend you restart your smartphone and try again, even several times, until you receive a message confirming the operation and you will find a new file in the same folder called "Patched_boot.img".
At this point we connect the smartphone to our computer and copy the “patched_boot.img” file from our smartphone. We restart the phone in fastboot mode by completely turning off the smartphone and holding down the Volume Down and Power keys: we open the Command Prompt and go to the folder where we have our patched_boot.img file and type the following strings.
fastboot flash boot_a patched_boot.img
fastboot flash boot_b patched_boot.img
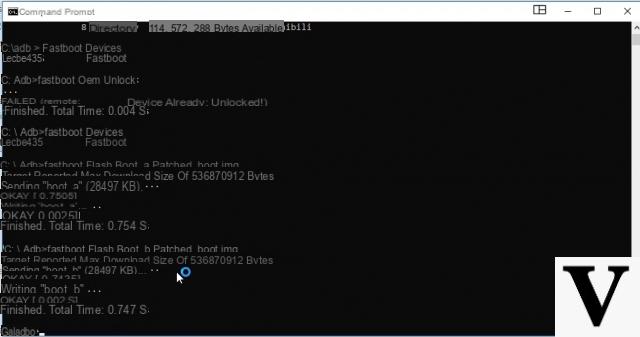
After these operations we restart the device normally by holding down the Power button.
# 8 - Enable the Camera2 API
Once the smartphone has restarted, the last step to take before installing the Google Camera is to enable the Camera2 API, essential for the proper functioning of the Google Camera. There are various methods to enable them, but here we show you the simplest one: just have the smartphone connected to the PC via cable with USB Debugging active from the Developer Options and open the command prompt window. We type the following commands by pressing ENTER at the end of each string:
adb shell
su
setprop persist.camera.HAL3.enabled 1
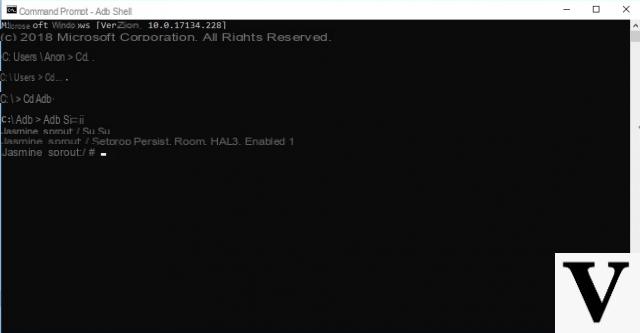
When we type the command su on our smartphone a pop-up message will ask us to enable root permissions for the operation we are doing: we accept and type the last command to end this step as well.
# 9 - Install the Google Camera on Xiaomi Mi A2 and Mi A2 Lite
Finally everything is ready to be able to install the Google Camera on our smartphone and start taking pictures of superior quality!
Let's go with our smartphone to the address https://www.celsoazevedo.com/files/android/google-camera/ and download the latest ARNOVA camera (at the time of this writing it is the version 8.2 available here).
Install the APK file and open it giving all the permissions and you will have finished the guide on how to have the Google Camera on Xiaomi Mi A2 and Mi A2 Lite.
# 10 - Have fun taking pictures!
Now you just have to enjoy the new photographic quality of your smartphone, especially in less than optimal lighting conditions or when there are strong contrasts in the scene. The Google Camera compared to the stock camera will give you more detailed and clearer shots, as well as higher level selfies with the foreground subjects perfectly outlined compared to the blurred background with a quality that is the envy of many top of the range.
If any steps are not clear to you, we have also prepared a video guide that explains step by step how to install the Google camera on Xiaomi Mi A2 and Mi A2 Lite. As always, for any doubt or curiosity you can leave a comment in the appropriate box.


