Index
- PkPdfConverter (Windows)
- Nitro Reader (Windows)
- PDF Image Extraction Wizard (Windows)
- PDF Toolkit + (macOS)
- SmallPDF (Online)
PkPdfConverter (Windows)
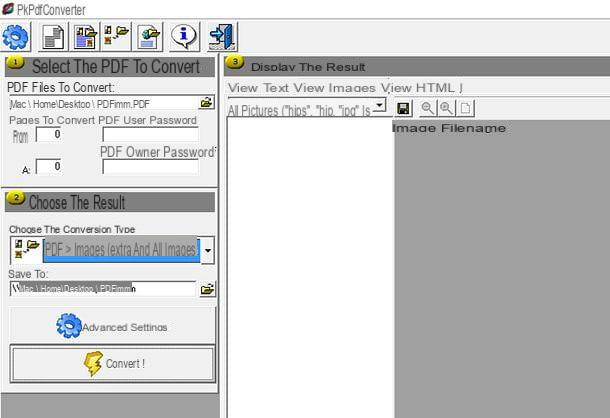
PkPdfConverter is a free and open source program that allows you to convert PDF files into text, HTML pages or images and to extract both the text and the photos present in them. It is extremely intuitive even for novice users and does not require any installation to be used.
To download PkPdfConverter on your PC, connect to the SourceForge page that hosts it and click on the item PkPDFConverter-1.0.1a.zip. A download complete, apri il zip file you downloaded to your PC, extract the contents to a folder of your choice and run the executable PkPdfConverter.exe.
In the window that opens, click on the icon of gialla poster located next to the item PDF file to convert (in the left sidebar) and select the PDF you want to extract images from, set the option PDF -> Images (extract all images) give menu to tendin Choose the type of conversion (still in the left sidebar) and click on the button Converted! to start the image extraction process.
By default, PkPdfConverter saves images extracted from PDFs in the same folder as the source documents. To change destination, click on gialla poster located next to the field Save in (always in the left sidebar).
Nitro Reader (Windows)
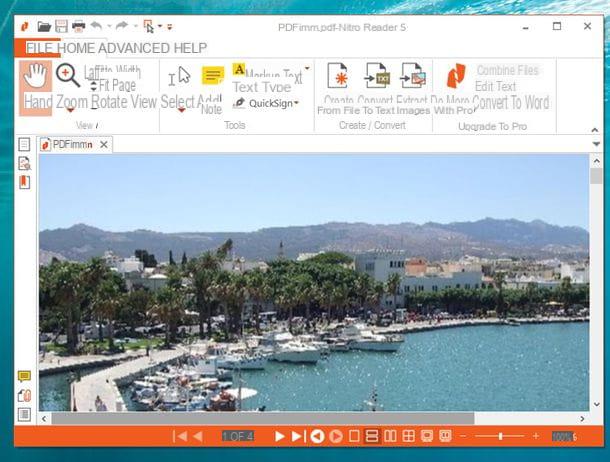
If PkPdfConverter failed to meet your expectations, try Nitro Reader: it is a free PDF viewer, available only for Windows, which includes many tools for editing PDF files. Among its many functions, there is also the one to extract the images contained in the documents.
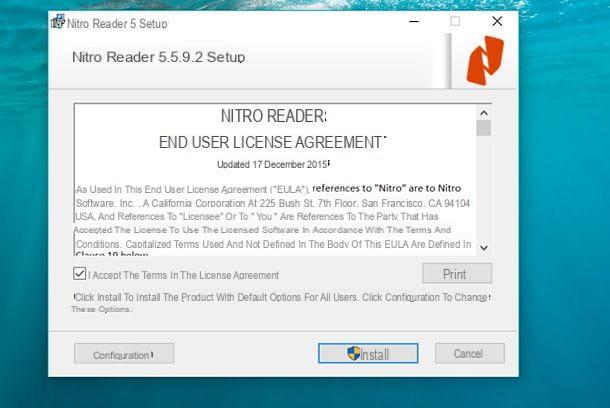
To download Nitro Reader on your PC, connected to the official website of the program, type name, last name e email address in the appropriate text fields (you can also use dummy data if you want) and click on the button Download Nitro’s Free PDF Reader. Next, open the file you just downloaded on your PC (nitro_reader5_64.exe), accept the conditions of use of the program by placing the check mark next to the item I accept the terms in the License Agreement and finish the setup by first clicking on install and then Yes e Finish.
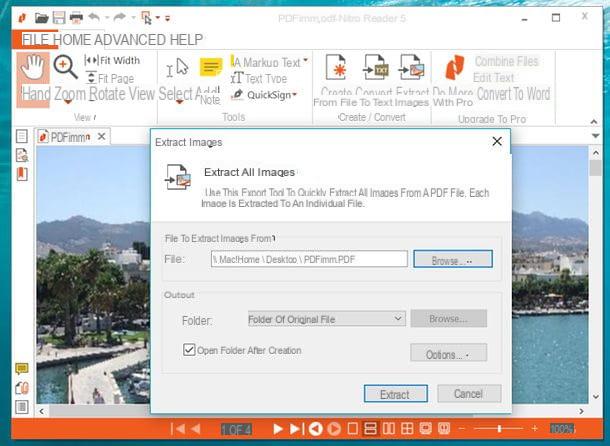
Once the installation is complete, you just have to start Nitro Reader through its icon that appears on the Windows desktop, open the PDF from which you want to extract the images (through the menu File > Open > Computer > Browse) and click on the button Extract images which is located at the top.
In the window that appears on the screen, expand the drop-down menu Folders to choose whether to save the images extracted from the PDF in the same folder as the source document (Folder of original file) or in a different folder (Specific folder) and click on your button Extract to start saving images.
At the end of the procedure, a File Explorer window will open automatically with the list of all the images that Nitro Reader was able to extract from the PDF.
PDF Image Extraction Wizard (Windows)
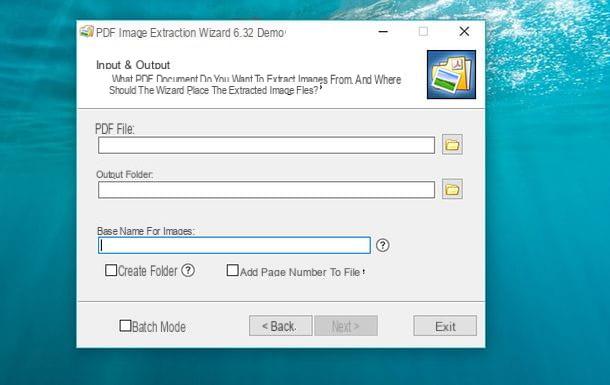
If the solutions mentioned above didn't fully satisfy you, you can give it a try PDF Image Extraction Wizard: a program for Windows exclusively dedicated to extracting images from PDF files. You can download it for free, but in its free version it allows you to extract a maximum of three images at a time. To remove this limit, you need to purchase the full version of the software for $ 14,95.
The first step you need to take to download the free version of PDF Image Extraction Wizard is to connect to the official website of the program and click on the yellow button Download, which is located in the center of the page. Once the download is complete, double click on it to open the file you just downloaded (PdfImageExtractionWizard_Setup.exe) and, in the window that opens, first click on the button Yes and then Next.

Accetta quindi the conditions of use of the program, meeting the segno di spunta accanto alla voce I accept the agreement, and click your cousin Next for four consecutive times and then on install e Finish, to finish the installation process and start PDF Image Extraction Wizard.
In the window that opens, click first on Next and then on the icon depicting a yellow folder placed under the heading PDF File, to select the PDF file you want to extract images from. Then click on the button with the folder icon located under the item Output Folder, to select the folder where you want to save the images extracted from the PDF file, type the name you want to assign to them in the field Base name for imagesclick on your Next, to continue with the guided procedure.
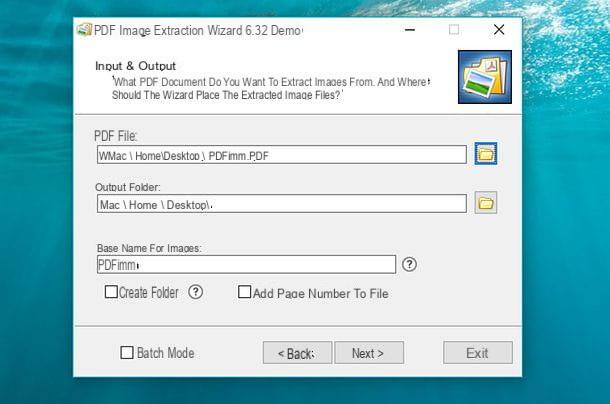
At this point, taking into account that this free version of PDF Image Extraction Wizard can extract up to three images per page, type the number of pages of the PDF file from which you intend to extract images in the fields First (home page) e Last (final page). If you intend to extract images from a single page, type the same number in both fields.
If the document you are extracting images from is password protected, type the necessary keyword to unlock it in the fields User password o Master password and first click on Next three consecutive times and then on Home e Finish, to extract the images from the document.
You can also choose to extrapolate the images according to their size, by putting the check mark next to the item Only extract small images (to extract small images only) or Only extract large images (to extract only large images) in the course of the wizard PDF Image Extraction Wizard.
PDF Toolkit + (macOS)
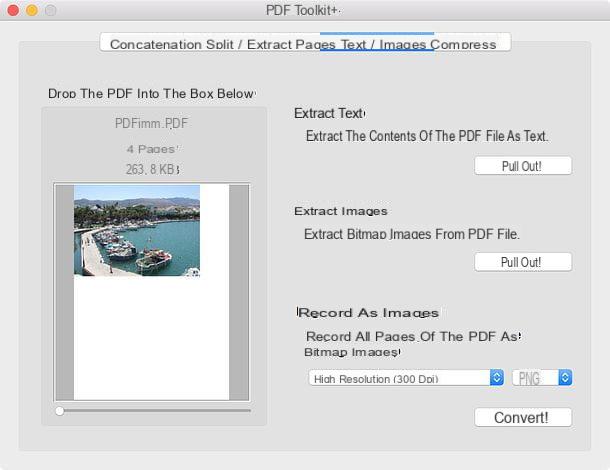
If you are using a Mac, you can extract images from PDFs using PDF Toolkit +. It is an all-rounder application for PDF files that allows you to optimize them, merge them, divide them and extract both text and images from them. Unfortunately it is not free, it costs € 2,29, but I can assure you that it is worth every penny of its price.
To purchase PDF Toolkit +, open the Mac App Store, search for the program within it and first click on the button with the price and then Buy app. You may be asked to authenticate by typing your Apple ID password. If you are reading this tutorial directly from macOS, you can open the Mac App Store page dedicated to PDF Toolkit + by clicking on the link I gave you earlier (on the program name) and then pressing the button See in the Mac App Store.

Once the purchase has been made, PDF Toolkit + will be downloaded and installed automatically on your Mac. At the end of the procedure, start the application by clicking on its icon in the Launchpad, select the tab Text / Images and drag the document you want to extract images from into the field Drop the PDF in the box below.
Superato anche questo step, pigia sul pulsating Extract! collocato sotto the dicitura Extract images (on the right), select the folder in which to save the images and click on the button Save to start copying files.
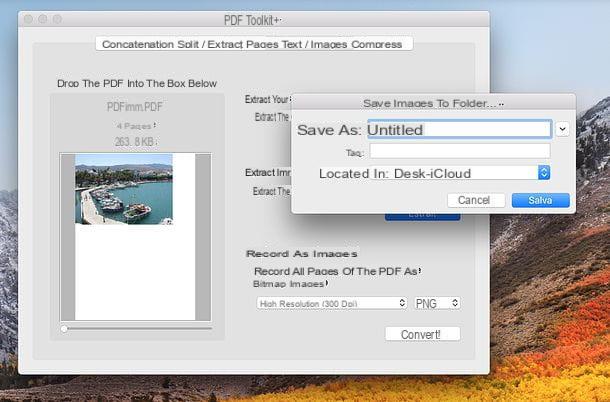
The images extracted from the PDF will be saved in a folder within the path you indicated to PDF Toolkit +.
SmallPDF (Online)
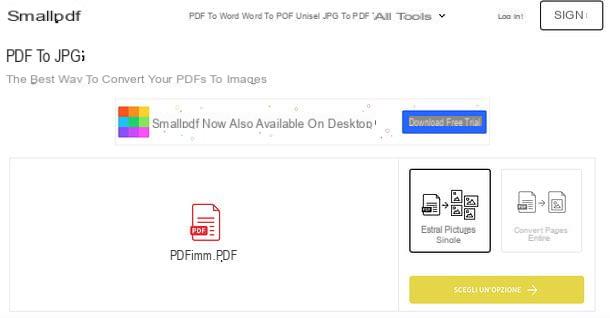
If you want to extract images from PDF but don't want to install new programs on your PC, you can rely on online services that allow you to do everything from the browser. Among these I point out SmallPDF, which can be used free for 14 days, after registering an account, after which it costs 10 euros / month or 90 euros / year.
To extract images from a PDF document using SmallPDF, connect to the page of the service dedicated to converting PDF to JPG and drag the file from which you want to extract the images into the browser window. Then click on the button Extract single images which is on the right, then go up Choose an option and, on the page that opens, click the button Download as zip to download a zip archive containing all the images extracted from the PDF.
Alternatively, if you prefer, you can click on the miniature found below and download the images individually or click on the icons of dropbox e Google Drive to save images to your cloud accounts.
How to extract images from PDF


