"Photogenic is born, not made". Have you ever heard this phrase? Was it you yourself who exclaimed it? If you answered yes, you obviously don't like being immortalized in photos and you don't consider yourself very photogenic. Yet it would be enough to pay attention to some details before having a photo taken to improve the situation and no longer fear being in front of a goal. You do not believe me? Then keep reading this tutorial and you will see that, by the time you finish reading, you will know exactly how to be photogenic.
In the next paragraphs, in fact, I will show you how you can greatly improve your photogenicity by paying attention to some factors such as lighting, location, choice of hairstyle, clothing and even the position of the head and the rest of the body. As trivial as it may seem to you, all these small details make the difference and determine the creation of a "good" or a "bad" photo (without forgetting the photo editing solutions, which can always come in handy).
So, are you still eager to know how you can go photogenic? Perfect! Make yourself comfortable, take all the time you need to concentrate on reading the next lines and, above all, implement the suggestions I will give you. Happy reading and have fun!
Choose the right lighting and location

Choose the right lighting and location it is essential to be photogenic. It is not possible to think of looking good in a photo without paying attention to these two aspects.
In the choice of lighting to use for your photo, please note the following factors.
- Choose an environment that is lit at the "right point" - if the environment in which you take the photo is excessively bright, the photo will be "burned"; while if the lighting is poor, it will be rather "dark". Therefore, if you are in an outdoor environment, try to avoid direct sunlight, while if you are indoors, try to move near a light source, such as a window or a lamp. If you really can't light the room, try adjusting the ISO sensitivity on your camera or smartphone (in the latter case you can do this either by changing the camera settings or by using third-party apps, such as Camera FV-5 or ProCam).
- Pay attention to the direction the light is coming from - it is usually better to avoid it coming from the front in order not to highlight skin defects or imperfect features, but it is equally important that the light does not come from the background to avoid the so-called “silhouette effect”.
- Have your photo taken at sunrise or sunset - in these moments of the day, in fact, there is a perfect light condition.
With regard to the choice of locationInstead, I suggest you pay attention to the following aspects.
- Avoid crowded environments - bars, restaurants, squares, markets and other places that are too crowded may not contribute to the success of a good photo for at least two reasons: first of all you may feel too observed (even if no one is actually "pointing" at you) and therefore you may feel tense and not comfortable, which could negatively affect the photo itself. In addition to this, taking a photo in places that are too crowded, you could risk finding disturbing elements in the background which, in addition to making the photo itself "messy", would risk diverting attention from the subject in the foreground, that is you!
- Avoid unsuitable environments - the bathroom at home and the interior of your car are locations that, for obvious reasons, should be absolutely avoided (unless you are in the bathroom of a super luxurious hotel or aboard a Ferrari!).
Choose the right hairstyle and clothing

Choose the right hairstyle and clothing it is very important to be photogenic. Well-combed hair, a well-groomed beard and carefully chosen clothing can enhance your features and greatly increase your photogenicity.
As for the choice of hairstyle and clothing, try to play in advance. For example, if you go to visit friends, they will most likely want to take some photos with you to have a reminder of the weekend they spent together. So bring suitable clothes with you and, of course, don't forget to visit the hairdresser!
When choosing clothes, remember to avoid clothes that are too loose: they could make you look fat. Also avoid tight, skimpy, transparent or provocative clothes - they may highlight some of your flaws and don't denote good taste. You will be amazed at how much your photos can improve simply by paying attention to your overall appearance!
If you don't really trust your personal tastes in terms of hairdressing and clothing, why not ask a family member or trusted friend for an opinion? Maybe he will be able to show you where you could improve (if you actually need it!).
Slightly rotate the head and the whole body

Slightly rotate the head and the whole body it can make you more photogenic. Try browsing any fashion magazine and you will notice that practically all models use this handy trick to enhance the features of their face and their entire body.
Therefore, avoid taking too rigid positions when you take a photo (as a soldier, so to speak) and relax: in this way you will avoid unnatural positions that would risk ruining the shot.
As for the garment, avoid looking straight into the lens: doing this may make your face look “flat” since you may be missing the natural shadows that give depth to your face. Still as regards the position of the head, try to tilt it slightly downwards and to the side, in order to hide the nostrils a little: your face will look leaner and more graceful.
Another trick that you would do well to pay attention to is to lean with your head slightly forward, towards the person who is taking the photo of you. Doing this can create an optical illusion that makes the rest of your body seem slimmer (to our brains, in fact, subjects in the foreground appear to be larger than those in the background).
Smile the right way

Do you want to be photogenic? Then you absolutely must smile correctly. By doing this, in fact, you will relax a good slice of your 36 facial muscles, you will enhance your features, the shot will appear much more natural and, as if all this were not enough, you will arouse positive emotions in those who look at the photo. Incredible: all this thanks to a smile!
Of course, you have to smile the right way, to avoid looking "fake". So make an effort to smile by showing your teeth (preferably those of the upper arch) and squinting a little: in this way the smile will seem more natural. Ah… I almost forgot! Avoid saying “cheese”: contrary to what you might think, saying this word at the moment of the shot could make your smile seem fake and unnatural.
Enhance photos with editing apps or programs
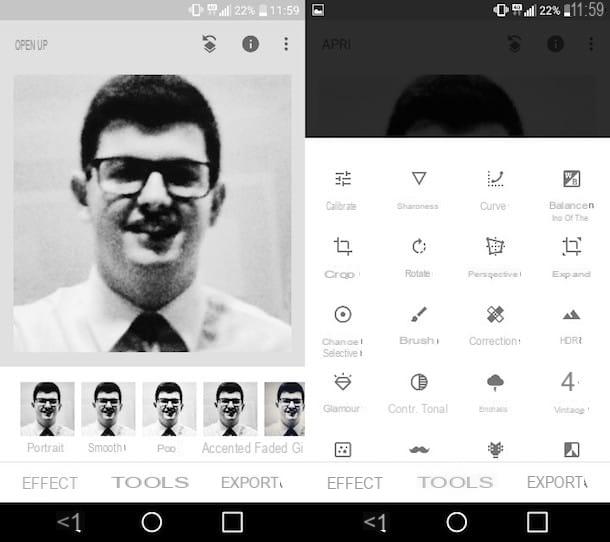
While putting into practice the tips I listed in the previous lines, your shots will not always be perfect. Fortunately, some photo editing apps and programs can help you save even the most “unhappy” photos!
In the next paragraphs, in fact, I will list some solutions that could be useful in which case you want to make some adjustments to the photos that are taken of you. Next to the name of each app or each program, you will find a brief description that illustrates its characteristics and the link to the various tutorials where you can find detailed explanations about their operation (where available). Make good use of it!
- Snapseed (Android / iOS) - this very famous photo editing app is developed by Google and provides users with a rich set of useful tools to manually act on the main parameters of the photos. As if that weren't enough, Snapseed features a clean interface that makes it more enjoyable to use and is 100% free. If you want more info about its use, read the tutorial in which I talk about the apps to retouch photos.
- Pixlr (Android / iOS) - Pixlr is also a completely free app that allows you to act with some ease on the main parameters of your shots. In addition to this, Pixlr integrates additional features, such as the one that allows you to create magnificent photo collages. I have explained to you in detail how this application works in the post dedicated to apps for retouching photos.
- Afterlight (Android / iOS / Windows) - this app integrates multiple tools that allow you to edit your shots and add frames, shapes and so on. Afterlight can be downloaded for free on Android and iOS, but to access all the tools included in it, you need to make in-app purchases starting at 0,73 euros (Android) and 1,09 euros (iOS). On Windows 10 Mobile you can buy Afterlight for 0,99 euros. If you want to learn more about how this app works, read the tutorial in which I talk about apps to retouch photos.
- VSCO (Android / iOS) - if you are looking for an app that allows you to retouch photos quickly and easily, VSCO might be the solution for you, as it allows you to retouch your shots using convenient presets. I showed you how VSCO works in the tutorial dedicated to photo editing apps.
- Pixelmator (iOS / macOS) - if you have an iPhone, an iPad or a Mac at your disposal, you cannot fail to consider this app characterized by a very "varied" set of tools that allows you to act comfortably on photos both from mobile (on iOS ) and desktop (on macOS). Pixelmator costs 5,49 euros on iOS and 32,99 euros on macOS. On macOS you can also buy Pixelmator Pro (€ 64,99), a sort of "enhanced" version of Pixelmator, designed especially for professional photographers.
- Adobe Photoshop (Windows / macOS) - I'm sure you've already heard of this hugely popular photo editing program. Adobe Photoshop, in fact, is appreciated by professionals all over the world because of the wide range of tools that make it possible to eliminate practically any defect that is present in an image. Since this is a program designed for professionals, to use it you need to take out a monthly subscription starting from € 12,19 per month. In the guide where I explain how to use Photoshop, you will find tips on how to use it best.
- GIMP (Windows / macOS / Linux) - This open source, cross-platform program is considered one of the best free alternatives to Photoshop. Sure, it doesn't offer all the advanced tools included in the latter, but it can be just fine if you don't need to make major changes to your shots. In the guide where I explain how to use GIMP you can find tips on how to use it best.


