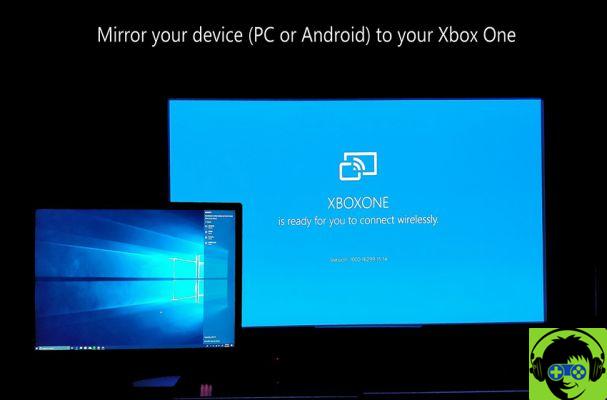
The Wireless Display app lets you project your Windows 10 or Android device's screen to your Xbox One.
To get started, simply search for "Wireless Display" on the Xbox One store and you can download the app. Once installed, here's how to use the Wireless Display app on your Xbox One with your Android or Windows 10 device.
How to use the Wireless Display app on Xbox One
The Xbox One Wireless Display app is actually the same streaming experience that you can find on a Microsoft Surface Hub or Windows 10. As noted above, it will let you project whatever is on your Windows or Android device. directly on your console running on a TV.
However, trying to project certain content on your Xbox will not work as expected; for example, Netflix, Disney + and Hulu will allow sound projection, but no image will pass through your TV.
Viewing your desktop or laptop computer on your Xbox will allow you to use your Xbox controller on that device if for some reason you cannot set up its Bluetooth connection.
When you open the Wireless Display app, a blue screen appears indicating that your device is ready to connect wirelessly.
Connect an Android device
To connect an Android device, first make sure your phone and console are on the same Wi-Fi network. Swipe down on your home page to see menu settings. You will need to click on the function titled "Smart View". This will attract devices that your phone can project to. You will need to find the name of your Xbox and tap it. If in doubt, on your Xbox go to Settings, System, Console Info and change the name to whatever you want.
Once your console and phone are connected, everything that appears on your phone will now appear on your console. To cancel the connection, simply swipe down on your phone and press the Smart View button which will now read as the name of your console.
Connect a Windows 10 device
To connect your Windows 10 device, open your display settings. You can easily do this by right clicking on your desktop and selecting "Display Settings". On the Display Settings page, scroll down to the Multiple Displays section and click “Connect to a Wireless Display”. This will open up a section to the right of your device for whatever is available. Click the name of your console to connect.
Once logged in you will want to select “change projection mode” under the console name and select “Duplicate” to project everything from your device to your console. To set everything up to allow you to use your controller as a mouse and play PC games with it, select “Allow mouse, keyboard, touch and stylus input from this device”.
You will have a bar at the top of the screen that says "Connected to (console name)". On the right, you can log out, optimize the connection for what you do, and detach the toolbar from the top of your screen. If you detach the toolbar, you can log out later by closing the application on your console or by going up the display settings.







![[Review] Osmo mobile, DJI's smartphone stabilizer](/images/posts/ee8d30fe53d2d51dc86eb4e3eadeb5a9-0.jpg)
