- Scanners evaluation
- Summary table
- 1. Rollei DF-S 100
- 2. Plustek OpticFilm 7400
- 3. Canon CanoScan 5600F
- 4. Epson Perfection V600 Photo
- 5. HP ScanJet G4010
- Summary of the benchmark
- Scan speeds
- Image quality
- Conclusion
The products we're going to talk about here are a bit of a dying genre. We have chosen two categories: flatbed scanners with illuminated cover, specialized in photography, and scanners entirely dedicated to the digitization of film media. The latter are becoming increasingly rare, many models having seen their production stopped. As for flatbed scanners, they lose part of their interest when you already have a multifunction printer ... But hey, if you want to digitize films and slides in quantity, you will not have much choice! Note that we have made a point of staying within a reasonable price range, ranging from around 100 to 300 €. Indeed, in terms of scanners, prices can soar beyond 600 € for flatbed models and 2000 € for dedicated machines ...
Scanners evaluation
We can mainly distinguish two families of criteria. The first encompasses everything related to imagery, both hardware and software. The second brings together the different constituents of the concept of ergonomics. In other words, when we digitize films and slides, the acquisition quality must be high and the task must be simple and fast. These common sense requirements are unfortunately not easily met, at least simultaneously. It should in fact be known that the digitization of films, negative or positive, takes a relatively long time, and for a variable result. So when we know that the operation will have to be reproduced several hundred times, there is something to worry about! The ergonomic criterion is therefore at least as important as the qualitative one. It includes the scanning speed but also the ease with which you insert the film or the slide into the support provided, or the accessibility of the acquisition software.In terms of imaging now, one of the main data is resolution, measured in DPI (dots per inch) or DPI (dots per inch). Indeed, the support 24 x 36 mm being small, it will require a consequent enlargement. Depending on what you plan to do with your scanned images, you will need to ensure that the scanner offers a higher or lower optical resolution. Knowing that a resolution of 300 DPI is necessary for good print quality, it will take 1200 DPI at the very least for 10 x 15 cm outputs (4 times larger than 24 x 36 mm), 2800 DPI for A4 and a comfortable 3600 DPI for A3. Resolutions greater than 4800 DPI are hardly anything other than marketing: often obtained by interpolation (artificial multiplication of pixels), they anyway lead to files that are far too large (more than 700 MB per image in 9600 DPI, 1,2 GB in 19 DPI).
Another important factor is the optical density expressed in DMax, which measures the extent of the dynamics of the acquisition device, that is to say its capacity to restore contrasting images without burning highlights or blocking shadows. The DMax ranges from 0 to 5, a high value being a guarantee of quality. Manufacturers rarely mention it on consumer products, it's a shame.
Finally, the last crucial point will be the performance of the anti-blemish treatment. This is because negatives and slides, which are very fragile, are easily scratched. And as maniacal as we are, dust remains omnipresent. The problem being that these defects, barely visible to the naked eye, stand out all the more as the magnification is important. And more generally, we will ensure that the acquisition software offers complete settings. In this area, not all scanners are created equal!
Note that flatbed scanners will only be evaluated on their performance in terms of digitizing film media, due to the orientation of the article and the presence of dedicated scanners.
The 5 slide scanners tested are:
- Rollei DF-S 100
- Plustek OpticFilm 7400
- Canon CanoScan 5600F
- Epson Perfection V600 Photo
- HP ScanJet G4010
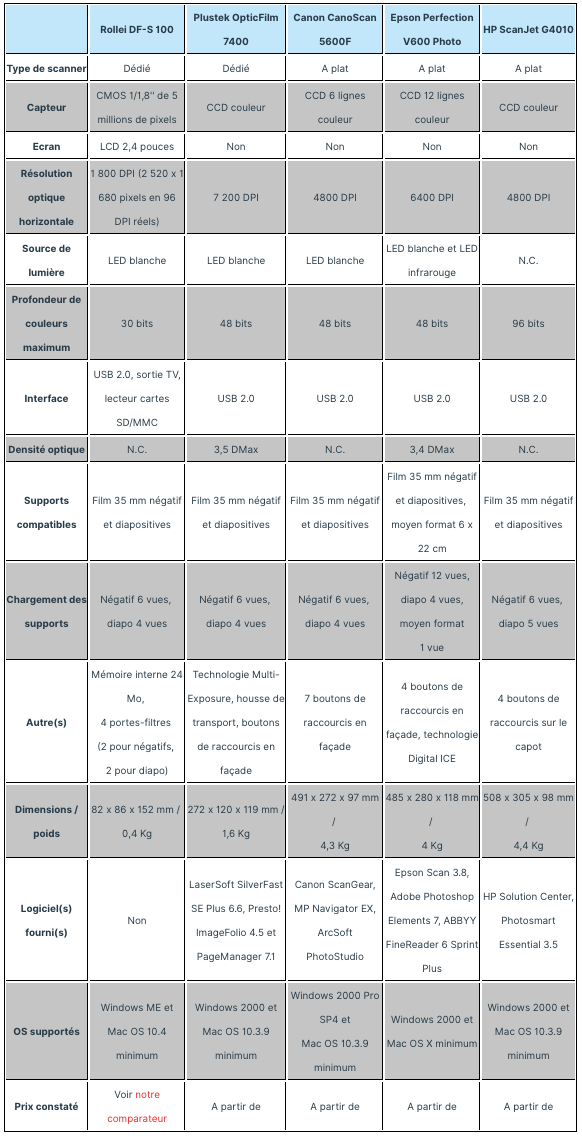
Summary table
1. Rollei DF-S 100
The German manufacturer, also present on the digital photo market, offers a very simple and affordable dedicated scanner. The opportunity to check what these small entry-level models are worth, which can also be found at other manufacturers such as Ion, Reflecta or Vitaquest.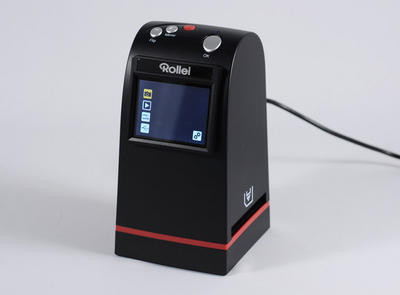
Presentation
The DF-S 100 is a fully autonomous compact dedicated scanner. You plug it into the mains or USB to the computer to power it, and then everything happens on the integrated 2,4-inch screen. No software to install on the computer therefore. Navigation is done via the three buttons on the top of the device (plus a red one to turn on the device). As for the storage of the scanned images, it is ensured by the 24 MB of internal memory or on SD memory card (not supplied) as soon as one is inserted in the reader of the scanner. The DF-S 100 also offers a TV output, to directly view the images acquired on television.


Navigation buttons, rear connectors with TV output and SD memory card reader
Rollei has delivered its product rather well: the box contains in addition to the scanner two film holders for negatives, two for slides, USB cable and power adapter, TV cable and a small accessory for cleaning the LED lamp inside the housing .


Accessory to clean the interior of the DF-S 100 and the contents of the box
This was necessary to make forget the basic technical sheet of the DF-S 100 ... Indeed, the Rollei scanner only embeds a 1 / 1,8 inch 5 megapixel CMOS sensor, reaching a supposed resolution of 1800 DPI . This is in fact interpolated, the scanned images in fact benefiting from a resolution of 2 x 520 pixels, for a document of 1 x 680 cm in 66 DPI ... which means that for a good quality impression in 44 DPI, the format will be limited to 96 x 300 cm, i.e. A21.


Image size actually captured, then scaled to 300 DPI for printing
In terms of color depth, the DF-S 100 samples its acquisitions over 10 bits per channel, or 30 bits in total. In theory only, since the images are they identified as being in 24 bits (ie 8 bits per channel). This is sufficient for most purposes anyway. For comparison, most digital cameras also encode their Jpeg images on 24 bits. But the most demanding users will probably prefer the scanner models offering a 48-bit mode, more precise for retouching. Furthermore, Rollei does not provide any information on the optical density of the DF-S 100.
Positioning of films and slides
Before digitizing your silver prints, you must place the negatives or slides in the appropriate film holder. The latter will then slide into the slot on the side of the device to expose the sights to light and the image sensor. The slider being notched, we pass without incident from one view to another. The screen also displays the real-time image.
DF-S 100 with activated film holder and real-time preview
Usually there is no problem with the slides, the plastic frame making the task easier. On the other hand, for flexible negative tapes, there are two important aspects to check: the ease of insertion of the films and the non-obstruction of the image surface by the support. Here things get complicated. To wedge a strip of film in the support, you have to place the perforations of the negative in the lugs. But also take into account that the first three views are separated from the next three by a black plastic bar. Suddenly, when you correctly hold the first view, the fourth is found truncated by the separator bar ... And if with a little bad luck the film is curled, its positioning becomes frankly painful, the second part of the support folding down from above and not from the side.
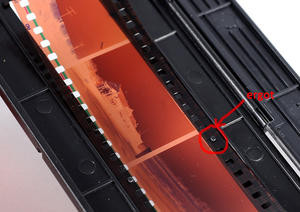


Lugs, porblem to wedge the film and film wedged as well as possible in the closed support
Scanning speed
There, on the other hand, it is clear that the Rollei DF-S 100 can hardly do better. When you are satisfied with the live preview, press OK. After 2 seconds of hourglass, the image freezes and icons appear suggesting you to rotate the image or save it. By choosing the last option, 2 more seconds and the image is scanned on a memory card!
Save, rotate, cancel or return to home: it's easy as pie and fast
Interface du DF-S 100
Clean, to say the least! A little too much. Some icons do not mean anything to you so much that it is imperative to resort to documentation. Fortunately, we quickly get around it: choice of film (color negative, black and white or positive), TV mode (PAL or NTSC), formatting of the memory card or internal memory and activation of the USB connection (in the if the DF-S 100 is connected to the computer, the option allows the internal memory of the scanner to appear in the explorer). That's all ! Note that two of the navigation buttons are assigned the mirror and rotation functions when you are in the acquisition phase. Otherwise, we will blame the screen for being really too dark and poorly defined ... but sufficient to understand what we are doing.


Main menu, settings menu and choice of film type
Image quality
Unfortunately the poor display quality observed on the 2,4 inch screen turns out to be roughly the one captured by the DF-S 100. Already, as we mentioned above, the images are not digitized. in 1800 DPI as advertised but in 96 DPI with interpolation. By zooming to 100% in the images, the lack of resolution is obvious (contours which puff like with a bad digital camera). Then, the digital images are totally desaturated and sorely lacking in dynamics. In contrasting scenes, the bright areas are burnt, the blacks completely blocked. On low contrast and dark poses, the result is dull, almost hazy.



Photos 1 and 100% excerpt, photo 2 and 100% excerpt


Photo 3 and 100% extract


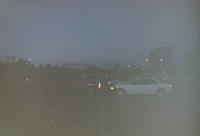

Photos 4, 5, 6 and 7
With slides, where the scanner should ideally focus, the few millimeters thick of the positive film mount creating a shift, the fixed focus of the DF-S 100 does not shine ... he acquisition already observed thus adds a small dose of vagueness! Finally, for both negatives and positives, the Rollei DF-S 100 does not offer any dust or scratch protection device: it will therefore be imperative to go through the image editing box!

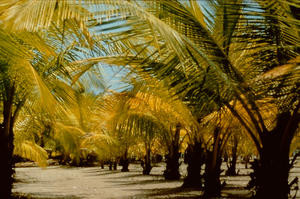
Slides 1 and 2
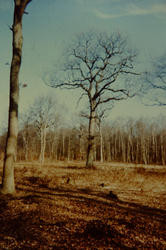

Slide 3 and 100% excerpt
Conclusion
The Rollei DF-S 100 is possibly intended for users with little or no technical knowledge wishing to obtain a result quickly without breaking the bank. Speed and simplicity are two important advantages, but they come at the expense of image quality: frankly, you shouldn't be watching! Do not expect to use your scans for prints larger than 13 x 18 cm. And image editing will be inevitable, regardless of the intended use of the scans. Ultimately, the DF-S 100 is more of a gadget for fun than a real scanning solution meant to bring a second life to your film images.Rollei DF-S 100
2Most
- Easy to use
- Fast scanning
- Space-saving / Reasonable price
- Screen (even if of poor quality)
The lessers
- Poor scan quality
- Painful positioning of negatives
- No anti-dust
- No editing software
0
Speed10
Ergonomics6
Software (s) 0
- Most
- The lessers
- Details
- Easy to use
- Fast scanning
- Space-saving / Reasonable price
- Screen (even if of poor quality)
- Poor scan quality
- Painful positioning of negatives
- No anti-dust
- No editing software
0
Speed10
Ergonomics6
Software (s) 0
2. Plustek OpticFilm 7400
Rather than testing another entry-level model like the Rollei from which there would be little to expect, we have gone up a notch here, while remaining within the budget initially set. This with the OpticFilm 7400, a dedicated scanner offering good value for money within the wide OpticFilm range from the Taiwanese manufacturer Plustek.
Presentation
Cubism lovers, you will be well served. The OpticFilm 7400 is a block, a sort of large blue plastic brick. After the design is clearly not an evaluation criterion, we will quickly pass on this observation. Like the Rollei DF-S 100, the OpticFilm 7400 is limited exclusively to scanning negatives and slides. And here too we put the silver images, arranged beforehand on the suitable support, in a side slot to carry out the digitizations one by one. But the comparison stops there. There is no integrated screen here, the OpticFilm 7400 is a full-fledged peripheral that can be controlled entirely from the computer to which it is connected via USB.

Slit through which the films are inserted
And it is above all in terms of technical characteristics that the OpticFilm 7400 stands out from the rest. CCD image sensor (more qualitative than CMOS), optical density and resolution of 3,5 DMax and 7 DPI respectively (the highest in the comparison), colors sampled on 200 bits, light source by white LEDs not requiring preheating ... Added to this is a complete software package, with in particular SilverFast SE Plus 48 but also the Presto programs! ImageFolio and Page Manager (the latter being however completely unnecessary with a dedicated scanner). Finally, note that Plustek provides a copiously shielded USB cable (signal protection against magnetic fields) and a cover to transport the scanner or simply put it away when you are not using it.
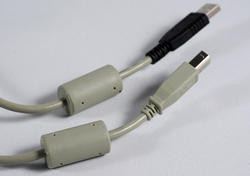
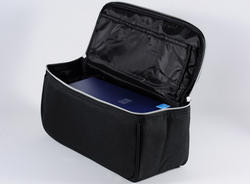
Shielded USB cable and carrying case
Positioning of films and slides
No need to wedge the slides, the locations on the support being perfectly sized, with a flexible side acting as a spring to ensure good support. On the other hand, for the strips of negatives it will be necessary to show more composure. Plustek had the bad inspiration to materialize all the views by black plastic bars, on which you have to wedge your film. The problem is that there is no stop or slide at the start of the medium to hold the tape. We are regularly on the verge of getting excited!
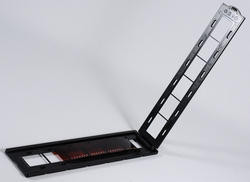
Slide and negative support
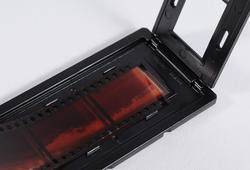

Absence of stop at the start of the medium and film stalled at best
A priori, it might be wise to cut these plastic bars to simplify the task. Good thing on the other hand: unlike the case of Rollei, the hinge of the film holder is here in the width, which facilitates the closing of the support especially with curved bands. We end up helping out, but other scanners in this review do much better in this area!
Scanning speed
The OpticFilm 7400 is quite fast overall. Before saying more, however, it should be noted that the speed of scanning depends on many factors. First, the resolution and output format chosen. But also all the image processing applied, which will take all the more time as the file is large. Three of them are particularly time-consuming: dusting, the Multi-Exposure option, where two scans with different exposures are put together to obtain an increased dynamic range, and the Multi-Sampling option, where the scanner performs between 2 and 16 selectable passes to reduce image grain. Initially, the measurements were therefore carried out with all these options deactivated. Here are the results (times given in seconds):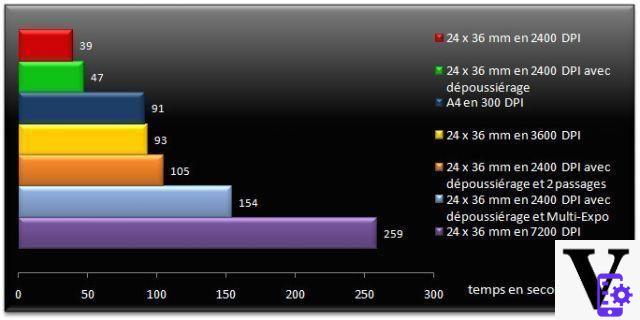
Note that for the scans where we activated dust removal (SRD technology, Smart Removal of Defects), we did not include in the results the time taken by the device to perform the preview dedicated to dusting, i.e. an additional 38 s. This occurs when the various settings are decided before starting the digitization and it allows fine control of the dosage of the SRD treatment. The standard preview only takes 13 s, a good performance although it should be borne in mind that the OpticFilm 7400 works one frame at a time.
Interface
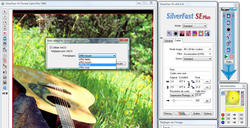
Apart from two buttons on the front of the OpticFilm 7400 (the first launches SilverFast, the second causes fully automated scanning), the nerve center of the scanner is the SilverFast software. Ergonomically, we have seen better. The multiple window layout with not always evocative icons is neither intuitive nor welcoming. But after a little adaptation time, you can easily find your bearings and the interface is finally functional. We particularly appreciate the generous size of the preview window. And beginners can start with the ScanPilot module, which guides you through the various steps to follow before scanning. On the other hand, having to launch a new, more precise (and slow) preview each time you want to adjust the dust control remains quite painful.
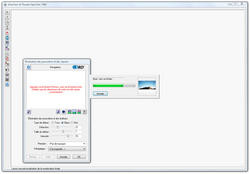
SilverFast interface and preview specific to the SRD option
Scans under the magnifying glass
The OpticFilm 7400 is clearly the comparison scanner which best reproduces the details of film images. The outlines are sharp, the scanned photos display a good level of contrast and benefit from a fairly fine and aesthetic grain. No need to go up to 7 DPI, a resolution that exceeds the potential of 200mm film anyway. In addition, you end up with an astronomical image resolution (approximately 35 x 10 pixels, or 200 Mpix) and a 6 MB file ... And you exaggerately bring out the grain of the film. 800 DPI (69 Mpix) or 200 DPI (3 Mpix) are the resolutions where the OpticFilm 600 delivers the best performance.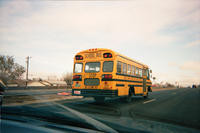


Photo 1 and 100% extract, then photo 2 and 100% extract


Photo 3 and 100% extract



No problem of focusing here with the slides, even if the manufacturer does not say anything about the presence of an autofocus system. The quality is always present.


Slide 1 and 2


Slide 3 and 100% excerpt
Software features
SilverFast provides a whole range of interesting functions and settings, which partly contribute to the good results of the OpticFilm 7400. In addition to the usual colorimetry treatments (level curves, luminosity, contrast, saturation, selective or global correction of the colors), SilverFast offers for example a very useful menu called NégaFix. The latter contains a wide selection of film types, which impact the rendering of the digitization according to the specifics of the chosen negative: brand (Afga, Kodak, Fuji, Ilford, ...), reference (Superia, Gold, Tri-X, HP5 ...), ISO (50, 160, 200, 400 ...), exposure (+ or - 3 EV) and tolerance. Frankly appreciable!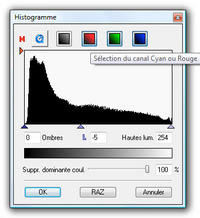

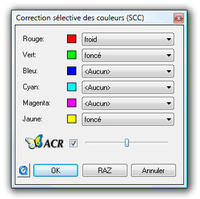
Three of the settings windows


NegativeFix menu
In addition, we have regularly opted for the Multi-Exposure function, despite the significant slowdown caused, because it visibly densifies the images. Or the AACO (Auto Adaptive Contrast Optimization), with more parsimony, to occasionally recover details in dark areas. The Multi-Sampling option, on the other hand, is more debatable: little or no difference is observed, while the digitization time is multiplied as many times as there are passages.


Left with single exposure, right with Multi-Exposure
AACO
The only disappointing point is the reduction of SRD dust which is quite difficult to gauge: either we do not push the processing enough and there is dust remaining, or we push it too much and the algorithm erases additional details from the image. dust ... Here is an image of what it looks like on a photo that we have deliberately sprinkled with dust:



From left to right, the photo without SRD, with automatic SRD and with manual SRD


Extracts compared between without the SRD and with the automatic SRD



Extracts compared between without the SRD and with the manual SRD
The last solution, efficient but demanding, therefore consists in operating manually using the correction mask system offered in the SRD browser. We then choose a selection tool (lasso, brush, etc.) and delimit the areas to be treated and those to be excluded, by adjusting the correction levels differently depending on the area. But we spend half an hour per image! The best solution is to clean your tapes thoroughly before scanning them. Finally, we regret that the SRD manages particularly badly the scratches of the negatives.

Mask system for dust correction
Conclusion
Sold around 200 €, the OpticFilm 7400 is a serious competitor. It delivers a very good acquisition quality, supported by a very complete software and perfectly imbued with the film universe. All quite quickly. There are still two complaints against it: the impractical negative support, and the dust reduction device that is difficult to dose and overall less efficient than Digital ICE infrared technology. If your negatives and slides are in good condition, you can go for it with your eyes closed! Otherwise, there are other options to consider.Plustek OpticFilm 7400
6Most
- Density / sharpness of scanned images
- Relatively fast
- SilverFast software / complete settings
- Reasonable size
The lessers
- Support of negatives to review
- SRD difficult to dose and perfectible
- Presto software! anecdotal ...
0
Speed8
Ergonomics6
Software (s) 9
- Most
- The lessers
- Details
- Density / sharpness of scanned images
- Relatively fast
- SilverFast software / complete settings
- Reasonable size
- Support of negatives to review
- SRD difficult to dose and perfectible
- Presto software! anecdotal ...
0
Speed8
Ergonomics6
Software (s) 9
3. Canon CanoScan 5600F
An essential manufacturer when it comes to imaging, film and digital, the Japanese Canon offers several models of scanners with device for films. It is the CanoScan 5600F, which is positioned just behind the top-of-the-range 8800F, which we tested.
Presentation
From this point on, we move on to the flatbed scanner family, of which the CanoScan 5600F is one. It can therefore scan all types of documents up to A4 format, but it is only the film part that interests us. On the other hand, it should be noted that the size of a flatbed scanner is inevitably more substantial than with a dedicated scanner. But as we will see later, it also has advantages. Main characteristic of these models: they have a luminous cover, that is to say which houses a lamp, allowing the backlighting of the films. In the case of the CanoScan 5600F, this cold cathode fluorescent lamp (which does not require a warm-up time) is hidden behind a removable white panel used for non-transparent documents.
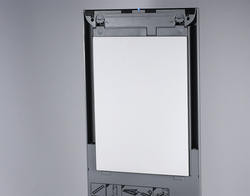
Cover raised and removable cover for non-transparent documents


Remove the cover to release the fluorescent lamp
Technically speaking, the CanoScan 5600F has nothing to be ashamed of: 6-line color CCD sensor, 4 DPI optical resolution and 800-bit color sampling. Nothing on the optical density on the other hand, it is unfortunate that a manufacturer like Canon does not communicate this type of data. The product is bundled with ScanGear, MP Navigator EX and ArcSoft PhotoStudio software. For the classic scanner part, we will simply note that the hinge of the cover can be raised to facilitate the scanning of thick documents, and that the CanoScan 48F has 5600 shortcut keys on the front (including 7 assigned to PDFs).


Normal hinge then raised, and buttons on the front
Positioning of films and slides
The device chosen by Canon is one of the most efficient. The support consists of two sliders embedded one in the other: the larger gray part accommodates the slides while the black one is intended for the negatives. The support comes to rest on the scanner glass, at the stop marked FILM. For the slides, no problem, just put each view (4 in all) in the spaces provided. As for the negative support (6 views), it has a rail on the hinge side which allows the film to be guided and wedged with precision. While the very wide edges correctly press the tape. In short, we place our films in the simplest way possible!

Slide holder and placement of the holder on the glass
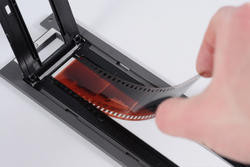

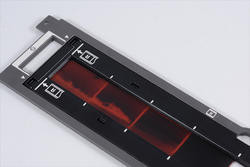
Inserting a negative strip in three steps
Scan speeds
The CanoScan 5600F performs the preview in just 22 seconds for a strip of negatives containing 4 frames. The Canon product, on the other hand, is less responsive when it comes to digitizing photos. The performance, quite clearly below that of the OpticFilm 7400, however remains within an acceptable average. The Reduction of Imperfections setting slows down scanning, but not as much as the Higher Quality setting, which does not change the results much. Here are the speeds recorded according to the different scans performed: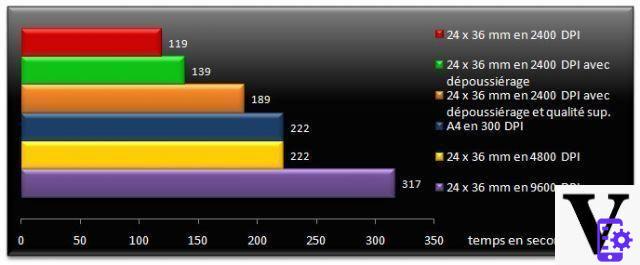
Interface
There are two ways to scan with the CanoScan 5600F: either you use the MP Navigator EX software, or you use the scanner's ScanGear driver. The first solution consists of a simplified interface used for the acquisition but also for the organization and the basic retouching of the images. Here the options offered are reduced to the essentials, without the possibility of checking the rendering beforehand.

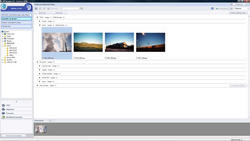
Scan options via MP Navigator EX, and image organization interface
Now, if you check Use the scanner driver in the MP Navigator EX interface or if you start an image acquisition via PhotoStudio, ScanGear opens. And there you can take advantage of the full potential of the CanoScan 5600F. The ScanGear interface is very pleasant and functional: on the left the zone reserved for the preview, on the right the banner gathering the settings, more or less exhaustive depending on the chosen mode is automatic, basic or advanced. The preview area also has three modes: normal, thumbnails or single view. We would have just appreciated that the single view mode enlarged the preview a little more.

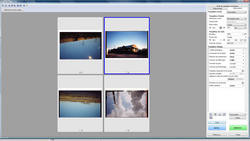

Normal, thumbnails, and single view modes
Scans under the magnifying glass
The CanoScan 5600F does not capture as much detail as the OpticFilm 7400, nor with the same sharpness. But the rendering is so clean that the reading of the images in real size, little disturbed by the grain or the parasitic noise, turns out to be precise. The scanned photos are ultimately very pleasant. The CanoScan 5600F also restores a very flattering colorimetry by default. Be careful, however: the scanner is highly sensitive to the cleanliness of the glass. At the slightest deposit, even almost invisible, you end up with white traces in the form of chromosomes on your scans. So do not hesitate to start a scanning session by cleaning with a suitable product.
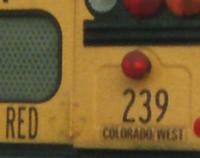


Photo 1 and 100% excerpt, photo 2 and 100% excerpt


Photo 3 and 100% extract



The quality on the slides is equally good, although Plustek retains its density advantage. Just be careful to place your slides in the support: the latter offering a little play, you can easily slip a slight bias in the frame.


Slide 1 and 2


Slide 3 and 100% excerpt
Software features
The software layer essential for scanning is the ScanGear driver. In the panel on the right, two options are particularly useful and effective: automatic tone (restores the original colors) and attenuation correction (densifies the contrast and colors of the image). We activate them almost every time! After that, you have to juggle between accentuating sharpness, reducing imperfections and reducing grain depending on the type of photo and the condition of the film and voila! Manual modules are therefore very rarely used (level curves, brightness, contrast, saturation, etc.).
Right panel and colorimetry adjustment module
If the size of the flatbed scanner is a drawback in certain respects, it is on the other hand an advantage for digitizing several views at once. Select the desired views out of the six that can contain the support, and for each make the appropriate cropping and adjustments (completely independently): you can then start scanning and go about other occupations for a little while!

Multiple scanning
Small disappointment, however: like the solution offered by the SilverFast software accompanying the Plustek scanner, the anti-imperfection treatment is either insufficient (there is still dust) or too violent (details of the image are erased) . Advantage for SilverFast: the very wide graduation of the effect allows precise dosing (ScanGear only offers three low, medium or high levels). But the advantage for ScanGear: film scratches are better managed.

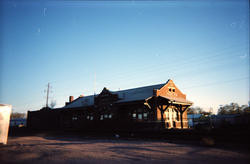
On the left photo without reduction of imperfections, on the right photo with high processing


Detail without and with reduction of imperfections ... details of the image are erased
Two words remain to be said about ArcSoft Photostudio 5.5. This image editor offers a whole panel of image editing, a bit like a Photoshop Elements (colorimetry, clipping, filters and effects, layers ...) but less extensive all the same.


Example of magic slicing
Conclusion
Less qualitative and faster than the Plustek scanner, the CanoScan 5600F nevertheless has a considerable advantage: it costs almost a hundred euros less! And in terms of ease of use, the Canon product also takes the top: more accessible software, more convenient film support, convenient multiple scanning ... Since the image quality remains very satisfactory, the CanoScan 5600F is thus a very good compromise to efficiently digitize old photos!Canon CanoScan 5600F
6Most
- Pleasant images / flattering colorimetry
- Well-designed negative rack
- Simple and efficient ScanGear software
- Price / Versatility compared to a dedicated scanner
The lessers
- Dimensions of a flatbed scanner
- Average scan speed
- Perfectible anti-dust
0
Quality d7
Speed5
Ergonomics8
Software (s) 8
- Most
- The lessers
- Details
- Pleasant images / flattering colorimetry
- Well-designed negative rack
- Simple and efficient ScanGear software
- Price / Versatility compared to a dedicated scanner
- Dimensions of a flatbed scanner
- Average scan speed
- Perfectible anti-dust
0
Quality d7
Speed5
Ergonomics8
Software (s) 8
4. Epson Perfection V600 Photo
Undisputed specialist in digitization, it was impossible to do without Epson. The manufacturer has no less than 5 references of photo scanners in its ranks! We chose the Perfection V600 Photo, mid-size model. It should be noted from the outset that the V600 is more expensive in our comparison (from 260 €). Is the price justified?
Presentation
The first thing you notice when you unbox the V600 is how thick it is, to say the least. As on the Canon model, a removable plastic cover is attached to the inside of the imposing illuminated cover, in order to scan non-transparent documents. When removed, it does not reveal a simple vertical light like on the CanoScan 5600F but a complex block mounted on a rack, with horizontal white light.


V600 hood raised, removable cover and light unit on rack
On the technical level, the V600 is very complete: Epson Matrix CCD 12 color lines sensor with integrated micro-lens, optical resolution of 6 DPI, density of 400 DMax and color sampling on 3,4 bits. The famous block of the light cover also incorporates infrared LEDs, used for the anti-dust Digital ICE technology. A major feature compared to all the other scanners in this review. We will see why later ... The manufacturer provides its scanning driver Epson Scan, ABBYY FineReader 48 (OCR character recognition software), as well as Photoshop Elements 6.0. Rather interesting! Note otherwise that the scanner has 7.0 shortcut buttons on the front and that the hinge of the cover is also adjustable in height to accommodate thick documents.
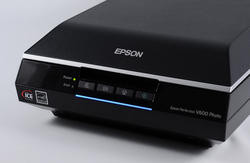


Front buttons and height-adjustable hood hinge
Positioning of films and slides
On this precise point, the Perfection V600 Photo will delight the most demanding users. Epson indeed provides two supports: the first accommodates 4 slides and 2 strips of 6 negatives, the second a medium format exposure 6 x 22 cm. With 24 x 36 mm negatives, in addition to the advantage of being able to scan two strips at once (this explains the width of the light block of the cover), the support is very practical to use. As on the CanoScan 5600F, the manufacturer has thought of providing its support with a small rail to easily immobilize the film. All you have to do is fold down the plastic attachment, which clips onto the support, and place the assembly on the scanner glass. A system of tabs identified by letters indicates the direction to be observed.
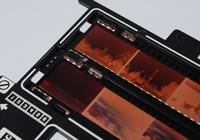

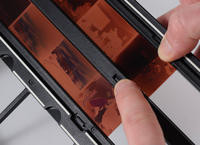
Positioning of two negative strips


Tabs A for negative, B for medium format and C for slides
Scan speeds
The Perfection V600 Photo is fast, at least the swiftest flatbed scanner tested, with a good head start. However, it is still a bit slower than the OpticFilm 7400 from Plustek. On the other hand, it will be noted that the various optimizations do not really affect the speed of execution of the scanner. Only the activation of Digital ICE technology visibly weighs down the results. The Perfection V600 Photo realizes the preview of 4 exposures in 28 seconds, it is a little slower than with the scanners of Canon and Plustek.
Interface
Rather than doing like Canon, namely offering two different software to carry out the acquisition with different levels of expertise, Epson has developed a driver that adapts. All you have to do is choose the appropriate mode from the drop-down tab at the top of the window: auto, office, leisure or professional. The program then targets the options it reveals and their level of complexity. A conception that seems much more relevant to us. In professional mode, the interface is split into two separate panes: one for configuring scanning, the other for previewing photos. We appreciate the different preview possibilities offered: normal (negative strips), miniatures (two zoom levels to choose from) and single view. In short, a software that is pleasant to use and efficient!


Auto, office and leisure modes


Professional mode, four preview choices
Scans under the magnifying glass
Does Epson's scanner do better than Plustek's? No. In terms of sharpness, image density, the Perfection V600 Photo is closer to the CanoScan 5600F. Does he do better than the latter? Overall, the two models are equal. The better dynamics of the V600 allows for a more detailed representation of highlights, which Canon's scanner tends to burn more. Likewise, the default Epson colorimetry is often more realistic than that reproduced by the CanonScan 5600F. This last point is debatable since some will prefer the flattering rendering of Canon images. In contrast, the Perfection V600 Photo scans show more grain and noise, especially when the sharpness is increased. Very smooth Canon images are cleaner. Finally, who can do the most cannot necessarily do the least: the maximum 6 DPI announced by Epson does not make the V400 more talented at 600 DPI. In this resolution, Canon images are even a little more detailed than those of the V4.


Photo 1 and 100% excerpt, photo 2 and 100% excerpt

Photo 3 and 100% extract


Regarding the slides, nothing special to add, except that the digitized images are crisp. For the rest, the observations formulated above are maintained.


Slide 1 and 2
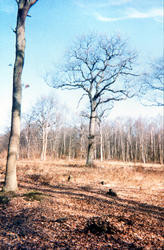
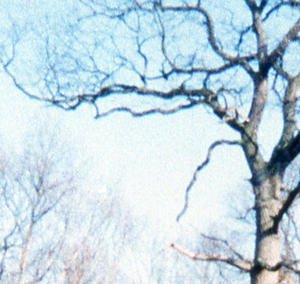
Slide 3 and 100% excerpt
Where the Perfection V600 Photo excels, however, is in dealing with dust and scratches. The performance of Digital ICE (Image Correction and Enhancement) technology is beyond comparison with those obtained by other anti-imperfection solutions encountered until now. The reason ? The process, thus baptized by its inventor Kodak, is based on the material action of infrared LEDs, which perform an additional passage (hence the relative slowness of the operation). As the infrared rays are blocked by all non-transparent obstacles, a mapping of dust, scratches and fingerprints is determined, a bit like an X-ray. The software can thus correct imperfections with precision, without risking to erase details of the image by being overzealous. The Digital ICE technology almost alone justifies the price difference of the Perfection V600 Photo.


On the left the photo without Digital ICE, on the right with Digital ICE



Comparative details without (left) and with (right) Digital ICE
Please note, the Digital ICE function does not work (or does not work well) with black and white silver halide films (silver particles are interpreted as dust) and Kodak Kodachrome (the cyan layer of the emulsion absorbs infrared). In black and white, only monochrome chromogenic type films are valid, such as Ilford XP2. Note that Epson Scan also offers its fully software-based dedusting process, in this case the Digital ICE box is grayed out: faster, however, it obtains the same type of results as competing solutions.
Software features
As we said in the ergonomics part, the Epson Scan acquisition driver is very pleasant to use. But it is also comprehensive and efficient. In terms of image adjustments, the user has options to check and configure on several levels (sharpness, grain reduction, color restoration, backlight correction, dust removal and Digital ICE) but also correction modules. manual (brightness, contrast, saturation, color palette, level curves, etc.). Nothing to complain about, except maybe that the color restoration option is a little less consistent in quality than Canon's Auto Tone.


Choice of color depth and different settings


Without and with color restoration
On the other hand, Epson Scan turns out to be the most efficient solution for performing multiple scans. With Canon's ScanGear, for example, you have to exit the acquisition driver to save the files, awaiting processing in MP Navigator or PhotoStudio (it all depends on the software from which you called up the scanning). Here, the recordings are automated and customizable, there is no need to quit and relaunch Epson Scan.

Recording settings
Finally, we will not forget to say that Photoshop Elements 7.0 provides with the scanner and a very good organization and image editing software (even if this is not the latest version, see Paint Shop Pro X3 / Photoshop Elements 8: Face to face).
Conclusion
Fairly fast, delivering quality images, formidable in the correction of dust and other imperfections, practical for chain scanning negatives and slides, the Perfection V600 Photo has only the disadvantage of the price, which is all the same more expensive. duplicate of the Canon scanner ... Is the difference justified? If the quantities to be digitized number in the hundreds, yes. The combined effect of the improved productivity of the V600 on the one hand and the lower need for retouching (effective Digital ICE) on the other hand will make your task easier, which is no less substantial. In the event that you only have a few dozen of your best negatives to scan, Canon's model would seem more reasonable.Epson Perfection V600 Photo
6Most
- Good picture quality
- Versatility / Productivity
- Epson Scan / Photoshop Elements 7.0 software
- Bluffing Digital ICE technology
The lessers
- Dimensions of a flatbed scanner
- Digital ICE slows down performance
- Imperceptible gain in resolution
- Price
0
Speed7
Ergonomics9
Software (s) 9
- Most
- The lessers
- Details
- Good picture quality
- Versatility / Productivity
- Epson Scan / Photoshop Elements 7.0 software
- Bluffing Digital ICE technology
- Dimensions of a flatbed scanner
- Digital ICE slows down performance
- Imperceptible gain in resolution
- Price
0
Speed7
Ergonomics9
Software (s) 9
5. HP ScanJet G4010
The last protagonist in digital imaging, HP naturally finds its place in this dossier. We had requested the top of the range ScanJet G4050, it arrived broken. The G4010, model just below, was therefore delivered to us as a replacement. A direct competitor of the CanoScan 5600F in terms of price!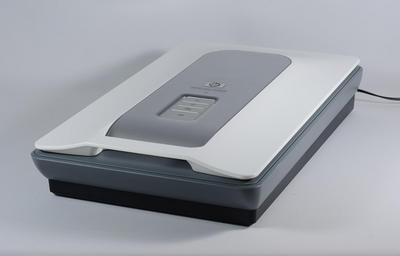
Presentation
The G4010 is the third flatbed scanner in this review. As thin as the CanoScan 5600F, however, it is the deepest of the three. Small peculiarity: here the negative and slide holder slips into the cover. No removable cover to remove. For non-transparent documents, just add an opaque plastic tab in place of the negatives.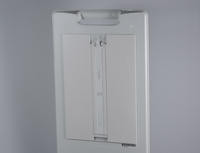

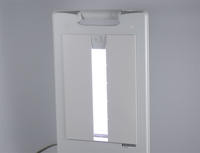
Hood raised, plastic tab serving as cover, and negative support removed
Technically, HP is not very talkative about its product. We had confirmation on the American site that the sensor was indeed a CCD but without further details. No information on the other hand on the type of lighting used, but it is obviously not with white LED (pink color and preheating). The optical resolution is well mentioned, 4800 DPI, but nothing on the optical density. And HP talks about a maximum 96-bit color sampling that we've never achieved ... when Scan at Higher Color Depths is turned on, images are 48-bit. Ditto for the so-called 6-color function, which we are supposed to activate in the parameters of the Solution Center but which remained untraceable ... The G4010 otherwise has 4 shortcut buttons on the top of the cover and a fully retractable hinge, practical for large documents.


Shortcut buttons and retractable hood hinge
Positioning of films and slides
The device used by HP is different, but above all it is worse than the competition. For slides, you have to remove the negative holder and insert its poses one by one into the slide integrated into the cover. Still passes, even though the slides tend to overlap and are difficult to pull out afterwards.
Slide layout
For negatives, on the other hand, you have to slide the strip into the two rails which run the entire length of the support. The problem is that the support is not rigid enough, so it twists easily as soon as you hold it. This causes the negative strip to slide badly. You must therefore help it by pulling on it, with your fingers that you cannot put anywhere other than in the middle of the film: soft cotton gloves are essential! And rebel when changing negatives ... In short, a very poorly thought out system! It's all the more annoying that the G4010's big brother, the G4050, uses a rigid plastic plate like that of Epson's V600 (with 30 views!). The only good thing is that the flexible plastic tab can be used to hide unoccupied views and thus reduce the risk of stray light. Lightweight...


Delicate insertion of the negative strip into the holder and addition of the opaque tab
Scan speeds
Considering the results of the ScanJet G4010, one wonders if our test product did not have a problem ... It is overwhelmingly slow. Already, it takes 45 seconds to perform the initial preview (25 seconds if you repeat it right after). But the worst is yet to come: 4 min 11 (i.e. 251 s) for a 24 x 36 mm scan in 2 DPI with all optimizations disabled, there it takes 400 s for the Plustek scanner, 39 s for the Epson or even 45 s at the Canon. Time which almost doubles if we activate the dust collection! And more than 119 minutes for a 30 DPI scan: the ScanJet G9 wins! A crippling fault.
Interface
There are two ways to call up the HP scan driver: through Solution Center or through Photosmart Essential 3.5 image management and editing software. Whatever the solution, a window opens offering you to choose from predefined, adjustable scanning modes (type of film, resolution, optimizations, recording, etc.). Why not, even if all the options offered at this stage will still be editable in the main interface.

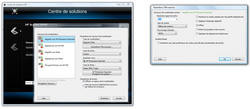
Solution Center, Photosmart Essential, and Scan Shortcuts
The latter is rather well presented, with a generous area for the preview on the left and a pane for the settings on the right divided into different tabs. Note, there are only two preview modes here: multiple views (strip of negatives) or single view. We appreciate the function that materializes the burnt and blocked areas in red and green, in the Lighten / Darken tab. But we deeply regret the lack of fluidity of the interface. The display suffers from jerks, generating shifts in all the operations which are normally carried out in real time: selection of zones, movement of the cursors, preview of the corrections ...


Multiple view preview and single view, with display of burnt and clogged areas
Scans under the magnifying glass
The black series unfortunately continues for HP in the area of image quality. Hazardous colorimetry and exposure, relatively small dynamic range, insufficient sharpness of the images (a sort of hazy haze), fine but important noise and colored in homogeneous areas ... The quality remains of course incomparably better than with the Rollei scanner, but the G4010 comes in dead last of the three flatbed scanners tested. Strangely enough, at 4 DPI, a kind of horizontal raster appears (only visible at 800%), as if the image is interlaced, causing the edges to shear. All this is a shame since the level of detail appears to be quite good.


Photo 1 and 100% excerpt, photo 2 and 100% excerpt


Photo 3 and 100% extract





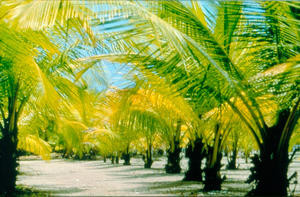
Slide 1 and 2


Slide 3 and 100% excerpt
Software features
The ScanJet G4010 is definitely full of nasty surprises ... For example, try scanning multiple exposures of the same strip of negatives in TIFF format. For each view, you carefully crop the image, administer corrections, and start scanning. First joke, the driver encapsulates all the scanned images in one and the same TIFF file. In Windows Photo Viewer, you will then see Page 1 of x appear. You will have to disassemble the different photos using third-party software (Xnview for example) or work around the problem by scanning in Jpeg. Second joke, the cropping was useless since all the photos show a black fringe on the left or on the right. It is therefore necessary to reframe in postprocessing ...

Cropping of a view during a multiple scan, and result: two TIFFs grouped together with black fringes, despite the cropping
The scanning interface is otherwise functional (except for the jerks): addition or deletion of selection, image orientation, cropping, choice of output format, levels, colorimetry and optimizations. In this last tab, we find the options Remove dust and scratches, Restore faded color (only for slides), Adaptive lighting (unblocking of dark areas), Refine (sharpness on 5 levels) and Moiré (only for printed documents ).


Different settings offered
Regarding the important correction of imperfections, it suffers from the same faults as most software devices: either it does not act enough, or it acts too much ... And as there it is only configurable on two levels (medium or high), the user has little choice ...


On the left photo without dusting, on the right with maximum dusting


Details without (left) and with (right) dust removal
Finally Photosmart Essential only allows simple image retouching: color temperature, black and white, sepia, unblocking shadows, red eyes, physical transformations (rotation, cropping, dimensions, symmetry). The application is especially dedicated to playful creations (albums, scrapbook ...) and sharing.
Conclusion
How not to be harsh with the Scanjet G4010? It sells for the same price as the CanoScan 5600F, but is undeniably inferior across the board. A problem with the test model? At this point, we very much doubt it ... In short, without a product to compare it to, we would not already have put a glorious note, but there, the Scanjet G4010 does not even deserve the detour.HP Scanjet G4010
2Most
- Nice design
- Fully retractable hinge
The lessers
- Image quality
- Excessive slowness
- Ergonomics (support / software) to review
- Too basic anti-dust
0
Speed2
Ergonomics4
Software (s) 4
- Most
- The lessers
- Details
- Nice design
- Fully retractable hinge
- Image quality
- Excessive slowness
- Ergonomics (support / software) to review
- Too basic anti-dust
0
Speed2
Ergonomics4
Software (s) 4
Summary of the benchmark
This page is simply meant to bring together the results of the two main points tested, namely scan speeds and image quality. Regarding the anti-dust treatments, we will not report here the images presented in each individual page since apart from the Digital ICE technology available on the Epson Perfection V600, all the devices are equivalent in their perfectibility. And the Rollei DF-S 100 is completely devoid of it.Scan speeds
Plustek OpticFilm 7400 :
Epson Perfection V600 Photo:

Canon CanoScan 5600F :

HP Scanjet G4010 :
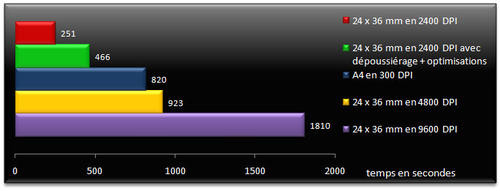
Scanners are presented from fastest to slowest. Two observations to make: the Rollei scanner does not appear in these results since it does not offer any adjustable scanning parameters. Note, however, that it digitizes a view in about 4 seconds. In addition, the values 4800 and 9600 DPI are not offered for the Plustek OpticFilm 7400, we carried out the tests with the closest values, namely 3600 and 7200 DPI. Also note that for inputs where only output format and resolution are listed, all optimizations have been disabled.
Image quality
1 Photo: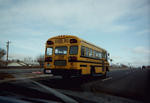


From left to right: Rollei, Plustek, Canon, Epson and HP
Extract 1 to 100%:


From left to right: Rollei, Plustek, Canon, Epson and HP
2 Photo:


From left to right: Rollei, Plustek, Canon, Epson and HP
Extract 2 to 100%:


From left to right: Rollei, Plustek, Canon, Epson and HP
3 Photo:
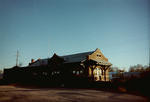


From left to right: Rollei, Plustek, Canon, Epson and HP
Extract 3 to 100%:





From left to right: Rollei, Plustek, Canon, Epson and HP
Slide 3:


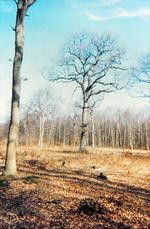
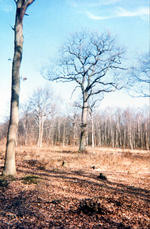

From left to right: Rollei, Plustek, Canon, Epson and HP
100% extract:


From left to right: Rollei, Plustek, Canon, Epson and HP
Photos 1 and 2 are scanned at 4 DPI with the three flatbed scanners and 800 DPI with the OpticFilm 3 from Plustek. Photo 600 and slide 7400 are scanned at 3 DPI with all scanners (except Rollei, constantly at 3 DPI).
Conclusion
Now is the time to conclude this long dossier. Three models stand out quite clearly: the OpticFilm 7400 from Plustek, the CanoScan 5600F from Canon and the Perfection V600 Photo from Epson. Three products that take different approaches, however, and will not appeal to the same users. The first really focuses on image quality but adopts a view-by-view operation and requires fairly fine adjustments which monopolize time, which thus counterbalances the good speed of scanning. And if your negatives are too damaged, especially scratched, the anti-blemish treatment will lack consistency. Since the OpticFilm 7400 is also a dedicated scanner, it is consequently less versatile than the other two, flatbed models.
The CanoScan 5600F offers a completely acceptable level of performance, albeit a bit slow, for a very reasonable price: it will appeal to those looking for a simple solution without compromising on quality. Finally, the Epson V600 Photo, even if it does not deliver an image quality superior to the CanoScan 5600F stricto sensu, on the other hand remarkably corrects the defects of film media thanks to its Digital ICE technology and is clearly more productive. The price difference can therefore be justified for users who need to digitize large volumes of film for which they are not very sure of the state of preservation.

The Rollei scanner has a playful side, probably seeing the image on the screen in real time, but its strengths end there. Let's say that if it was sold half the price, we could say that it is a nice gadget to bring out some old memories. But at more than 100 €, the gadget is expensive! Especially in view of the quality of digitization offered. There remains the HP Scanjet G4010, great disappointment of this comparison: too slow, not qualitative enough, not very practical to handle ... The frontal competition with the Canon scanner does not forgive.
Now, if you don't have time to convert your films, if the investment seems excessive to you in relation to the number of views to be digitized, you of course still have the possibility of entrusting the task to a third party. Starting with neighborhood photographers of course. We contacted a few and on average, it takes 0,4 to 0,5 € per scan of negative in medium resolution (1800 x 1200 pixels approximately), 0,6 to 0,76 € if you go up in resolution (Approximately 3300 x 2200 pixels). These prices are of course variable, depending on the quantities, as are the deadlines (at least 24-48h). Note that it is generally necessary to add 5 € for the burning of the CD / DVD and that the labs do not always carry out image corrections for this price. Which gives us as an indication 42,5 € for 50 scans of negatives in high quality with the CD. The slide is generally a little more expensive, starting at € 0,75 per view.
In addition, online stores sometimes offer the digitization of negatives and slides: Photobox, Art du Film Vidéo, Iconea ... The prices seem advantageous at first glance, but be careful, you must send your negatives or slides at your expense, pay the shipping costs for the CD and the return of your movies, and some options such as burning or image corrections may be billed more heavily as well. To be studied on a case-by-case basis, but if you have little work to do, you might as well go see a craftsman near you!


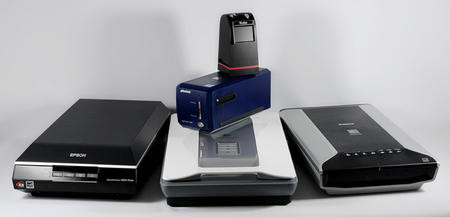
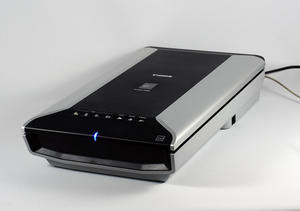 From left to right, the Rollei DF-S 100, Plustek OpticFilm 7400 and Canon CanoScan 5600F
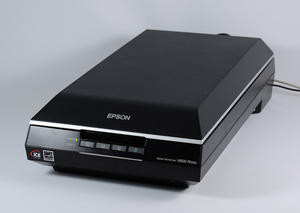

On the left the Epson Perfection V600 Photo scanner, on the right the HP ScanJet G4010


