For business reasons, you need to use the Word to work even when you are on the move, for example while traveling or business trips. It is, however, a completely new way of working for you and you are afraid that you are not up to the task. How do you say? This is exactly how things are and, therefore, you would like some more precise indications on how to use Word on mobile? No problem, I'm here to help you out.
First of all, know that if you have already used the Word desktop application you will be faced with a very similar interface, even if adapted for mobile devices, but then the operation of the application is so intuitive that it is super-simple even for who had never put their hand to its computer version.
That said, I bet your worry has already turned into curiosity and a desire to get to work, right? Then sit back, take a few minutes of your time and read this guide from top to bottom. Once you have finished reading, you will have all the skills necessary to use Word on your mobile without fear and you will realize that it is, in reality, a breeze. Let it bet?
Index
Compatibility and pricing

Before proceeding with the actual operation of Word, let's start with the basics: the Microsoft Word is one of the components of the Office suite and is available on both devices Android (6.0 and later) and on iOS / iPadOS (12.0 or later).
The app can be used at no cost, by logging in with a free Microsoft account, on devices with screens up to 10.1". If the screen, on the other hand, exceeds the allowable inches, a Microsoft 365 subscription (the paid plan, which gives access to all Office applications on both mobile devices and computers.
The aforementioned subscription can be subscribed directly through the app and charged to theaccount Play Store o App Store (and renewed automatically) or externally from Microsoft website. Its price, as far as the Personal version usable by one person only, it is 6,99 per month o 69 euro per year. Alternatively there is the plan Family for 6 people from 10 euros / month or 99 euros / year (with the first month free).
Are you curious about what it offers Microsoft 365? I'll explain it to you right away! By subscribing, in addition to Word, you can also have Excel, Power point, OneNote, Outlook e OneDrive to PC e Mac, 1 TB of storage in the cloud, functionality of advanced security (depending on the device), calls Skype to any mobile number and versions Premium di Word, Power point ed Excel on your mobile device.
The Premium version of Word differs from the free version by the presence of additional customization options: you can, for example, insert custom colors in forms, add shading, reflex styles in the pictures and WordArt, modify the elements of a graph on all three apps and do much more.
The app allows you to edit documents in .doc e . Docx and read (if shared via the app) documents .odt e PDF. As for storage, however, cloud services are also supported dropbox, Box, Datto Workplace, egnytes, MyWorkDrive, NetDocuments and others for Android; for iPhone are also available iCloud Drive Edmodo, HKT Cloud Storage, Accellion, LEAP and numerous other services.
How to download Word on mobile

Ready to move on to the operational part? After all the information I have given you it is time to download and start use Word on your mobile. As I explained earlier, you can use the app for free on both Android that of iPhone. Now I show you exactly how to get it and then use it to work.
How to download Word on Android
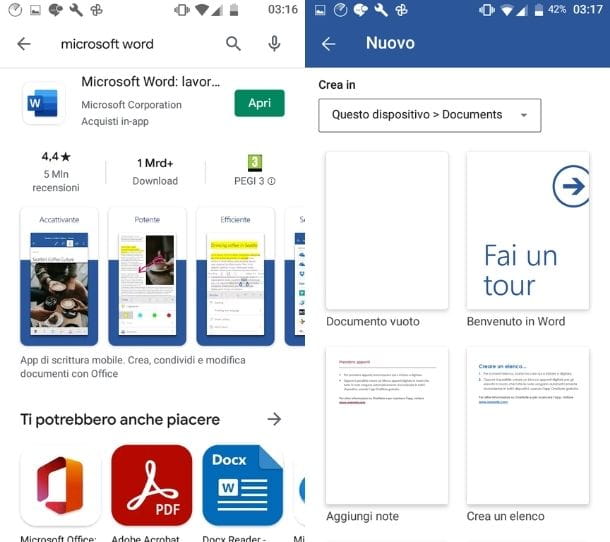
I bet you have a phone and ready to follow the instructions to install Word. Well: first of all, then unlock your smartphone and go Home screen, tap on the Play Store (the ▶ ︎ symbol colored).
Once open, type in the search bar located at the top "Microsoft Word", select the first search result and press the button Get. If you are reading this tutorial directly from your phone, you can press here and open the Word download page directly.
Wait a few seconds, the time it takes to download it, then press the button apri or, if you have already exited the store, look for the new icon in the Home screen or in drawer of your device and tap on it. Great, the Word app is now installed and running.
How do you say? Couldn't you follow the procedure because there is no Play Store on your smartphone? No problem, not all phones use it as their default store. If you own a recent model of Huawei, for example, it is completely normal that it is not present.
To get Word anyway, in this case, tap on the icon AppGallery present inHome screen and, in the screen that opened, type "Microsoft Word" in search bar placed at the top. Then select the official result, by tapping on the relevant icon, and press the button at the bottom of the screen Install.
Again, after a few seconds, the application will be downloaded to the device. If, on the other hand, you have encountered problems with the installation via AppGallery I suggest you read my tutorial on how to install apps on Huawei.
Now that the application is downloaded and open, you need to press the button Allow, to allow you to access the files, and enter Email address e Password of your Microsoft account, then confirming the operation by pressing the button Log in. If you don't have an account, you can create it for free by following the instructions I have given you in this guide dedicated to the topic.
The initial configuration is complete, you just have to start creating the first document by following the next chapters of the tutorial.
How to download Word on iPhone
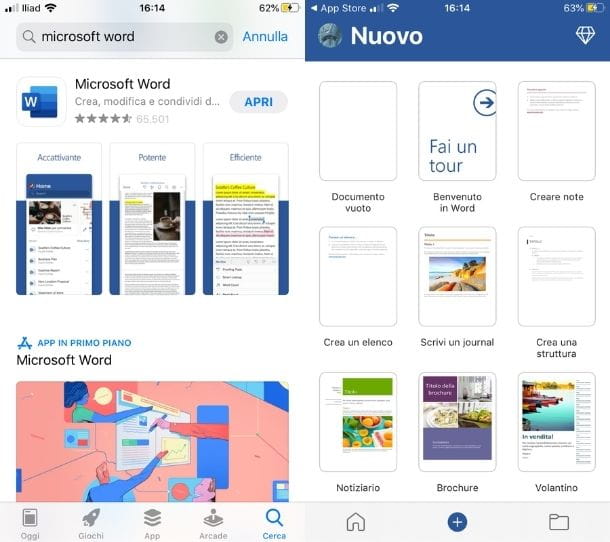
You want to install the Word app on yours iPhone? Then unlock the device, go toApp Store (the icon of the letter "A" on a blue background on the Home screen), tap on the tab Search, at the bottom, and type "Microsoft Word" in the search bar that appears on the screen.
At this point, select the first search result (after the advertisement), press the button Ottieni / Installa and, if requested, verify your identity via Face ID, touch ID o password dell'ID Apple, to download the app to your device. If you are reading this tutorial directly from your iPhone, you can also press here and directly open the Word download page on the App Store.
When the download is complete, click on the button apri, to open the app. Alternatively, go to the Home screen and press on the new Word icon that you find on it. Now all you have to do is perform the first access by pressing the buttons Allow, NEXT, Accept o Refuse (to choose whether to send diagnostic data), OK e Enableif you want to turn on notifications when someone shares a document.
Lastly, tap on the item Not now relating to the transition to the Premium version and that's it: now you can start working with the Word app on your "iPhone by". For all the details, read on.
How to use Word on your mobile
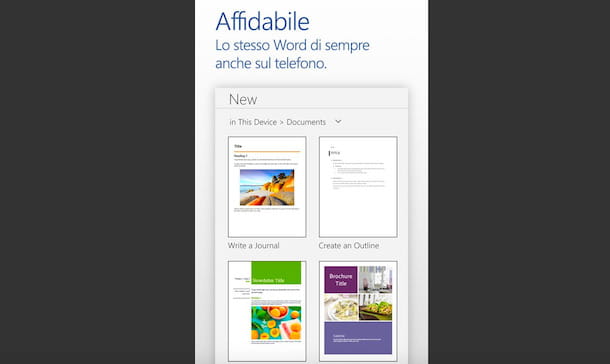
After installing the app, all you have to do is start using it. In the next paragraphs, in fact, I will show you how Word works on mobile, showing you all the main functions of the app and the correct way to use them to create documents, edit them, save them and share them.
Set up documents and styles

Now that everything is ready, you are ready to create your first document. To do this, tap on the sign + (top right on Android, center bottom menu on iPhone) and choose the option Blank document from the menu that opens. As you can see, already inserted in the system there are several models that you can use as needed, which you can open and edit as you wish.
Once this is done, you can start typing the text: tap on the document and the keyboard of the phone. Furthermore, to write at your best, you can fit the page to the screen deciding to enlarge or reduce the document; to make this change, pinch the screen with two fingers, then zoom in or out to your liking. This way, you will be able to do it zoom in, to work on a specific word, and back, to see the overall yield of the document.
Have you typed in your text and want to start editing it? Well, then double tap on one password or on one piece of text, to select them, press the icon with i three horizontal dots or arrow and, via the menu Home, make the changes you want: you can choose the text size and character, format in Bold, italic, stressed e barred, highlight words o color him e align the text as you prefer.
Once you have completed these first changes, you can start working on the style. In case you don't know, a document's style is, in essence, yours structure formed by titles, subtitles, paragraphs, lists and so on.
By applying a style to the text, the settings of that style are immediately done, saving you time and not making changes, every time, manually. To use this function, from the menu Home, select the voice Styles and choose the voice that reflects your need from those present.
Last but not least, you can edit the Paragraphs (underlining the text portion and tapping on the relevant item) acting on the return, On 'line spacing and removing the space before and after the paragraph.
Many of these functions that I have indicated to you, moreover, you can find them in the quick commands, that is, the set of icons above the keyboard. Through them you can speed up your work without having to go to the menus. All pretty simple to use, right?
For more information, however, you can check out my tutorial on how to write in Word.
Change the layout
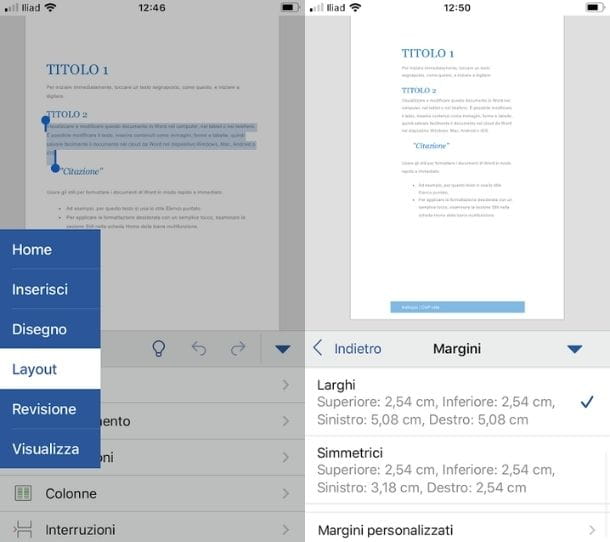
You created your first document, wrote the text, and changed the styles. Now, however, you need to log in to layout settings to obtain an even more professional result.
To proceed, tap on the menu Home (or in any case on the menu currently in use) and select the option layout, then, through the new menu opened, you can change the margini of the document (choosing from the options present by default or inserting custom margins) and le dimensions (the default is A4, but you can choose between Letter, A3, A5 and other).
As regards, instead, thetext orientation, inserting more column and page or section breaks, it's about Premium features available with subscription Microsoft 365. More details are also present in my tutorial on how to layout in Word.
Review documents

Have you drafted your document and want to revise it? Well, then tap on the menu Home and select the option from among the items in the list revision.
Once this is done, you can use the Correction tools, pressing on the homonymous item, and check that the option Orthography (which detects and corrects errors) is active, otherwise activate it by setting the relative lever to ON.
In addition to this, you will be able to use the function Smart search, by selecting a word and searching for it on the Internet, Word count, to count characters, Read aloud, to activate a voice in charge of reading the text, and finally, Comment to insert comments in certain parts of the document, after selection. The function revisioninstead, it is only available to those with a Microsoft 365 subscription.
Insert pictures and tables
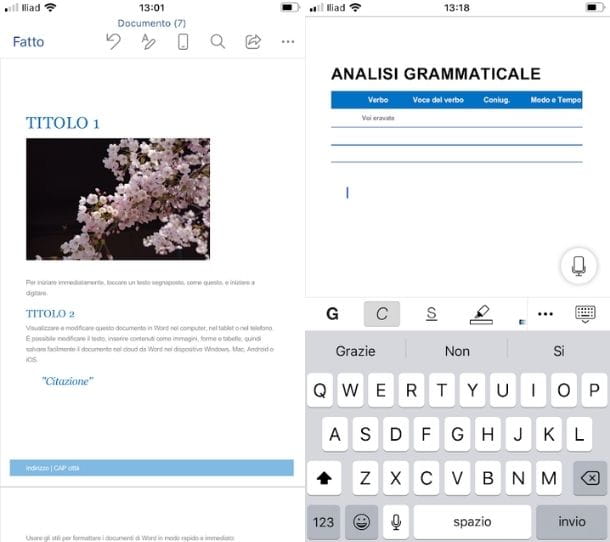
Documents can also be enhanced by using images and tables. For insert an image, all you have to do is press on the point in the document where you want it to appear, tap on the menu Home, and select the item from the available options Inserisci.
After that, tap on the item Images and select the image or photograph from yours Gallery or from Gallery. Alternatively, use the quick command pressing the icon Images to speed up the procedure.
Ora, tramite i BORDI of the image, you can enlarge it, reduce it and, by pressing on it, move it to any part of the text. Through the menu Image (which opens by tapping on the photo), you can also edit it style,alignment with the text using the option Wrap text, arrange it forward or backward with respect to the text by pressing on the option Arrange, cut it out and add a alternative text.
If you want some more information on Word images, and on their insertion through the app, I leave you to my guide on how to insert an image in Word.
To insert a table, on the other hand, you can follow the same path that I indicated for the images, by tapping, as a last thing, on the item Table. Once this is done, the table will be inserted automatically, and you can proceed with the changes.
The menu Tablein fact, it allows you to insert and delete lines e column, to divide and join the celle, to use predefined styles of tables and modify their options (such as the presence, or not, of the header row or inserting alternating columns highlighted) and so on. To insert the text inside it, instead, tap where you want it to appear and type it, following the tips I gave you previously and those contained in my tutorial on how to insert tables in Word.
To draw

An interesting feature of the Word app is that it can draw by touch or digital pen. To do this, press on the menu Home (or on the menu currently in use), select the item Design from the opened menu and press on the option Start Inking.
Once this is done, the tools you can use will appear: the rubber black pen Red pen and finally the pencil. By pressing on the icon of three horizontal dotsinstead, you can go back to the menu Design.
You just have to select the tool you want to use and, with your finger or pen, write the text by touching the screen of your smartphone.
When inking is off, the setting assumes that the mode is selected by default Select object that allows, in fact, to select the objects of the document simply by touching them. For more information on how to draw with Word, read my in-depth study dedicated to the topic.
Other useful features

Among the other useful functions of this app there is certainly the dictation which allows, through the use of microphone, to dictate the text instead of writing it.
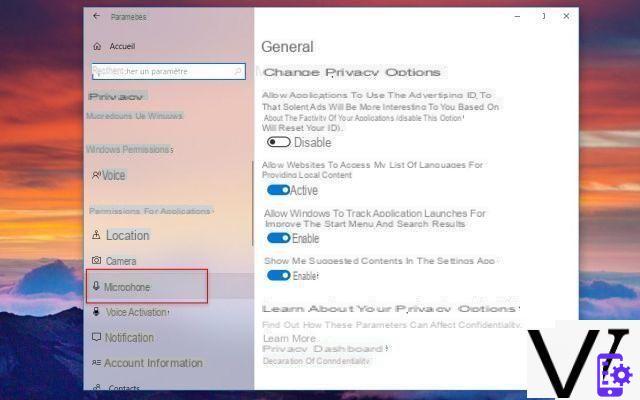
Once the document is open, or through the main screen of the same (reachable by tapping on the icon of the arrow facing down), tap on the icon Register. After that, allow the app to access the microphone and record your words by pressing the button Allow.
Su iPhoneinstead, press on keys OK e Go to Settings, look for the option Word (scrolling down the Settings tab), tap on it and set the lever next to the item Microphone su ON. Now close the Settings, go back to your document, tap the button Register and begins to speak.
The microphone will listen to your words and report them on the document, under dictation. To conclude the operation, press the icon of Keyboard from device Android, and on the voice Done (top left) up iPhone. For more details, read my guide on how to dictate in Word.
Among other useful functions, I also want to point out the possibility of inserting connections e forms within the document by pressing on the menu Homeby selecting options Inserisci and choosing the function you want to apply.
Save and share documents

Once the document has been created, it is necessary, as a last thing, to save it and, if necessary, share it with other people. The default setting of the devices Android expects changes made to a document to be automatically saved, its iPhonehowever, this function is not active or selectable.
In any case, to save a file it is necessary to use the icons placed in the top of the screen. If you use a device Android, fai tap sull'icona dei three vertical dots e seleciona le voci Save o Save with name (if you want to rename the file), after which you can decide whether to select the items Copy a link to the file, to copy it to the clipboard, or Export this file to ODT to change its format and export it to one of the available locations (in an active and connected cloud storage system or on your device). Once you have chosen the position, click on the button Export to conclude the operation.
To share it, instead, through the same menu, press on the item Share, select the option OneDrive and, on the new screen, invite other people to collaborate by entering theirs names o email addresses in the appropriate bar, alternatively choose whether to share it as a link o attachedby selecting the relevant items.
Su iPhoneinstead, press sui three horizontal dots (top right) and then on the button Save. In the new screen that opened, rename the file, choose the destination among On the device: iPhone, Files app (which opens, for example, iCloud Drive if you use it) or on a storage account. Once chosen, tap on the item Save to finish.
Do you want to share the document via iPhone? Then, from the top menu, select the icon Share (the square with an arrow), choose the position and press button Charge. Now, by pressing the icon again ShareYou can invite people to collaborate, create a copy of the link o send a copy via Outlook and other apps on the device, being able to change the format to PDF. See how easy it is?


