Is the number of screenshots already very high? We show you how to reset the screenshot counter in Windows 10. The operating system of the American company Microsoft offers significant improvements over previous versions.
Its interface is designed to be used with mouse or touch screen interaction or alternating between the two. Its start menu can be displayed at will, with the metro or classic design of Windows.
Plus, it includes new features that make the user experience much easier, more interactive, and even fun. For example, it allows the creation of 3D objects thanks to the application Paint 3D pre-installed on the system.
Perhaps one of the advantages offered by this latest version is the ability to receive updates continue of its features and functionality. One of the most popular features is screen capture.
How to take screenshots in Windows 10?
The function of taking screenshots is present in the Windows operating system since versions prior to Windows 10.
To use it you have to press the button ImprPant or PrntScrn which is located at the top of the keyboard and you will automatically have a screenshot of the entire screen.
To capture only a specific window, you can use the key combination Alt + PrintScreen, although more than one window is displayed on the screen, only the one active during the key combination will be captured.
Subsequently, you can go to an image editor like Paint and paste the image that has been copied to the clipboard and then save it with the image format you prefer.
With the Windows 10 version this feature is still active, but the ability to automatically save the image has been added, without the need to use an image editor or any other tool.
To do this, combine the keys Win + PrintPant, you will see that the screen dims slightly for a few seconds, this is what will indicate that the capture has been made and has been saved in the system folder.
You can also use the Snipping Tool to capture the screen. To do this you need to press the Win + Shift + S key combination at the same time.
Your screen will be momentarily blurred and you will see a small menu belonging to Snip & Sketch appear at the top of the screen; from there you can select the type of capture you want.
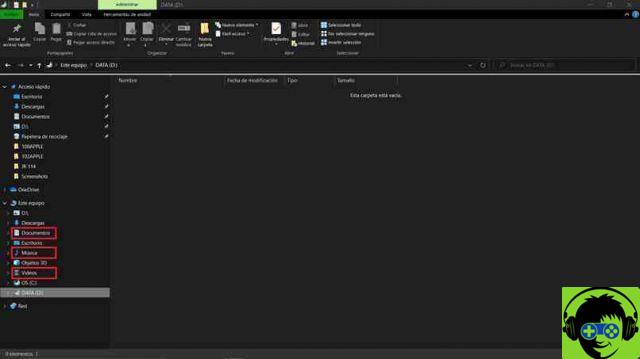
All the acquisitions made will be saved, by default, in the Screenshots or Screenshots subfolder located in the Pictures folder.
Reset the screenshot counter in Windows 10
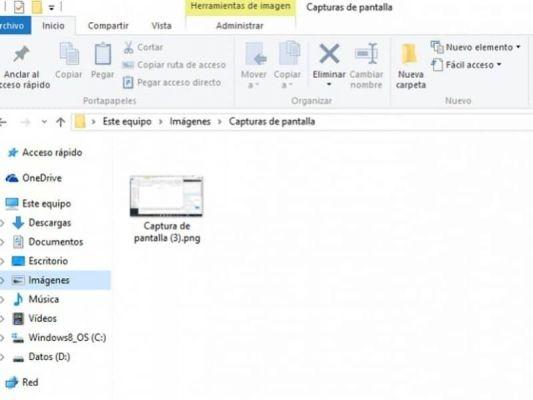
When you enter the Screenshots folder you will see that the images are saved with Screenshots (1), (2), (3) and so on as you make more captures.
You can handle this folder as you wish, renaming, trimming and even deleting the capture files. However, this action will not affect the screenshot counter.
This will continue to assign a higher number as more captures are made due to the log being saved in the system, so if you want it to restart you will have to do it manually by following these simple steps.
You must first access the images folder; the usual path for this folder is C: Users Username Pictures Screenshots, once there, delete or rename the Screenshot (1) file.
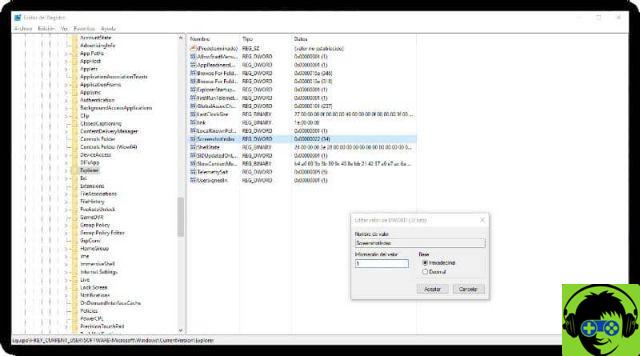
Next, you need to access the Windows Registry Editor. You can use Cortana's help or use the Win + R combination on the keys, type regedit and press the Enter key.
From there you have to access the path HKEY_CURRENT_USER Software Microsoft Windows CurrentVersion Explorer, locate the ScreenshotIndex option and select it to change the DWORD value.
In the edit window, go to the Value information box and change the current number to 1, also you can change the name you want to store the captures with.
Once the button is pressed OK, your changes will be saved automatically, no need to restart your computer. From this moment on, the new acquisitions will be saved starting from the value 1 and will subsequently increase.
Also find out how to take a screenshot and paste it into Word.


