Hi, I wanted to know if there is any “trash” folder on Android devices (I own a Samsung S8). I accidentally deleted a folder on my phone that has important photos and documents but I can't find any trash folders to recover them from. Is there any chance to recover the deleted files? Some idea?
There are so many questions like the one above. Windows and Mac users are in fact used to having an icon on their desktop "TRASH CAN”And often this folder allows us to recover files that have been deleted by mistake. But what about Android devices? Is there a Trash folder where data that is deleted is temporarily saved? Like recover data from the recycle bin on Android? Come empty trash on android definitively? To know all the answers, keep reading our article.
- Part 1: Is there a recycle bin on Android?
- Part 2: Where is the trash can on Android
- Part 3: Recover files from android recycle bin
- Part 4: Empty and delete data from the Android recycle bin
Part 1: Is there a recycle bin on Android?
Unlike computers based on Windows or Mac operating system where there is a "Trash can“, On Android devices does not exist a default "trash" folder. It is surprising and frustrating at the same time to know that there are no ways to restore deleted files on Android. But why is there no "trash" folder on Android and mobile devices in general?
The most likely reason is due to the limited memory available on an Android device. Unlike Mac or Windows computers which have huge storage potential, an Android device is usually equipped with memory ranging from 16GB to 256GB which is, relatively little to handle even a trash folder on Android. If there was a recycle bin on Android devices, the storage space would soon be consumed by unnecessary files. This low memory could then also cause stability problems and device crashes.
But for those who feel the lack of a "Trash" on android too much, it is possible to create it through an application. For more info read how to add trash on Android.
Part 2: Where is the trash can on Android
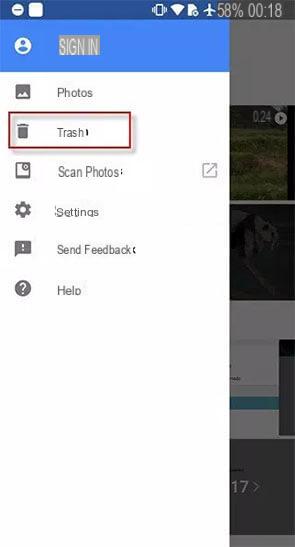
Although there is no Trash folder on Android it must be said that it is possible to use alternative features (also called “Trash”) present in the Gallery app and Google Photos in recent Android devices. This means that any deleted photos or video files will be moved to this recycle bin so that you can restore it if there was an error. Here's how to access this “trash” on Android.
Via the Google Photos app
- Grab your Android device and open the “Photos” app. Click on the icon "Menu”At the top left and click on the“ Trash ”option.

Via the Gallery app
- Launch the “Gallery” app on Android and hit the “Menu” icon in the top left corner and opt for the trash can from the side menu panel.

Note: if you cannot locate the trash folder with the previous steps you may need to try to find it in the Gallery app, as the location of the "trash can" may differ depending on the manufacturer and Android interface. We have accessed the recycle bin on the Android based LG mobile device.
Part 3: Recover files from android recycle bin
It is frustrating to know that there is no recycle bin on Android, especially when you have deleted files and are desperate to recover them. Fortunately, there are alternative methods to recover deleted files on Android. Among these data recovery programs for Android we point out two: UltData via Android e dr.fone – Recover (Android), powerful tools that allow you to recover almost all types of data types available on your Android device. Be it photos, videos, call logs, contacts or messages, with these software you will be able to recover everything without any hassle. Here's how they work.
#1. UltData per Android
UltData via Android is one of the most powerful deleted data recovery programs from Android devices. Unlike other similar programs on the market, this tool is capable of performing recovery even WITHOUT ROOT PERMISSIONS on your phone, which is definitely a big plus. To understand how UltData for Android works and download it for free, click on the link below and you will access the program page.
UltData for Android: Root-Free Android Data Recovery
#2. dr.Fone per Android
Step 1. Download and install dr.Fone for Android
Click on the link below to download the Windows or macOS version of dr.Fone.


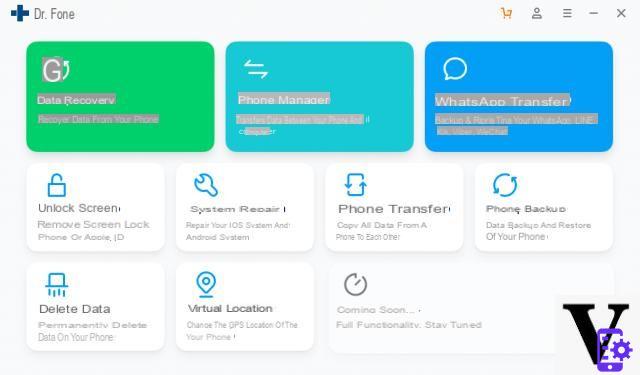
After installing the software you will see this splash screen:

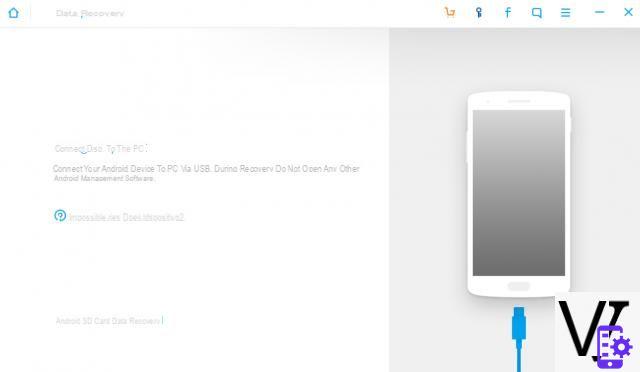
Click on the function RECOVERY on the left to access the new window that will ask you to connect your Android phone to the PC.

Before connecting the Android to the computer, you will need to enable USB debugging on it in order for the mobile phone to communicate with the computer. Once this is done, make the connection and dr.fone will recognize it.
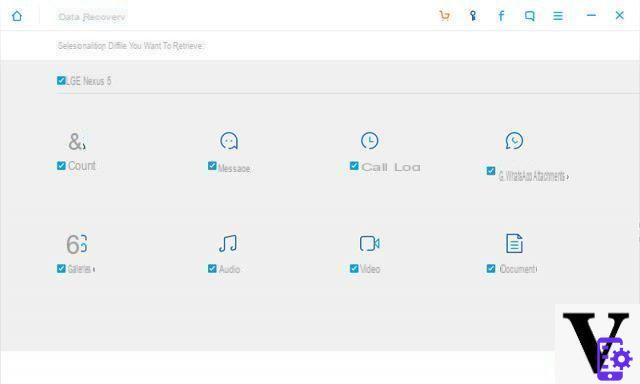
At this point you can proceed with the selection of the data to be recovered and with the scan.

During the scan you will immediately see all the data found by the program in the internal memory of the device. These files will be divided by type and those files that have been deleted but are still recoverable from memory will appear in red!

At the end of the scan, choose the data to restore and click at the bottom right on "RECOVER”To save them on your computer (you need to purchase the license to enable the data recovery and saving function.).
Part 4: Empty and delete data from the Android recycle bin
In case you have deliberately deleted some data from your device and you want to be sure that they have been permanently deleted from the memory, you may be looking for a recycle bin on Android to "empty". But as mentioned before, there is no recycle bin but the data that is deleted is not immediately removed from the memory but remains there until other data overwrites it. It is true that these deleted data are invisible but through data recovery programs they can come to light very easily. If you want to avoid this we recommend using dr.fone - Delete (Android) which has the task of going to search for all the deleted files still present in memory and "destroy" them definitively. Here's how it works.
To get started download and install dr.Fone on your computer (PC or Mac)


From the initial screen of the program, click on the "Delete" function

Then a window will open asking you to connect your Android device to the PC via USB cable:

Activate the USB Debugging mode on your mobile phone so that the program can detect the connected android device.
Once connected and detected, you will see a button DELETE ALL DATA. By clicking on this button you can start the final data removal phase. To proceed you will also need to enter a keyword.

Proceeding the program will begin to permanently delete all data from the phone.

On Android 10 (Samsung A40 device) simply go to the Photo Gallery App, select the menu with the 3 vertical dots, then Trash, the images of the files will appear, select them individually or always from the dots Menu, Edit, select them and Restore.
Be careful not to select Empty Trash ... ..
Simple enough 😉
-
Thanks for the advice!


