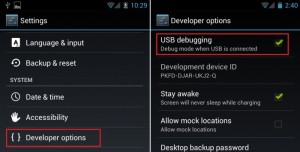
If you have a mobile or tablet Android, you have surely heard of the mode USB Debugging o Debug USB. This is a particular USB connection mode that allows the Android device, connected to the PC, to exchange particular information and useful data at the operating system level and allows you to perform various types of operations. This option, not surprisingly, can be activated within the "Developer Options", precisely because it is an advanced mode.
If you have installed a program on your PC that needs the USB Debugging option activated to communicate with your Android device, you have no other options: you have to activate it if you want it to be recognized by your computer and third-party software. Here you are how to enable USB debugging on android, based on the version of the Android operating system:
For Android 2.3 or earlier
Step1. Go to Settings
Step2. Click on "Applications".
Step3. Go to "Development".
Step4. Select the "USB debugging" mode.

For Android with version 3.0 to 4.1
Step1. Go to Settings
Step2. Search and click on "Developer options".
Step3. Click the "USB debugging" option.

For Android 4.2 or later
Step1. Go to Settings.
Step2. Click "Phone Info".
Step3. Click on "Version Number" repeatedly 7 times. Continue until a message appears telling you that you are in "developer" mode.
Step4. Return to the Settings tab.
Step5. Click "Developer Options".
Step6. Select the "USB debugging" option.

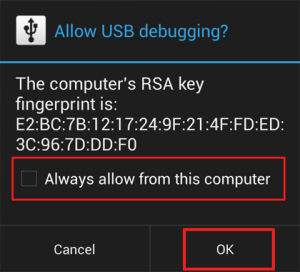
Final report: For Android devices with version 4.2 or later, once the USB Debug option is activated and connected to the PC via USB, a pop-up will appear on the device (first time only) asking you to confirm. Select "Allow from this computer" and then click OK to finish.

6.592


