
graphic design software GIMP allows you to create all sorts of effects. When we master theuse of layers , it is easy to make tint changes on the images. Among them, there is in particular the change of color of the eyes. Particularly useful, this effect is easy to implement, for a real "Waw" effect!
Want to change the eye color of the subject of a photo? No problem ! This quick tutorial shows you how.
Change Eye Tint in GIMP
Here are the steps on how to change a person's eye color in a photograph. If you are new to the field, prefer a subject with light eyes (blue or green) for easier modification.
1. Go to the section dedicated to layers (it is usually in the right column of the editor).
2. Right-click and select the "New Layer" option.
 © GIMP
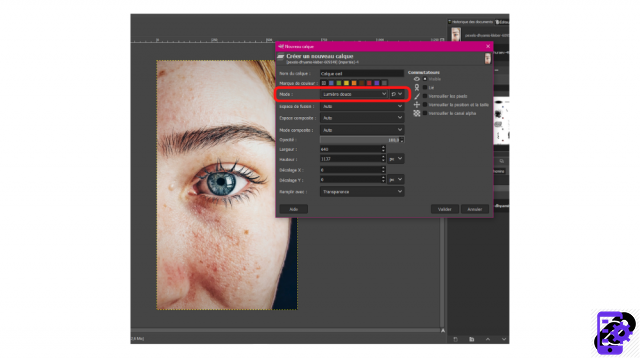
3. In the floating window that appears, give a name to the new element then in the "Mode" section, choose "Soft light" from the list offered to you.
 © GIMP
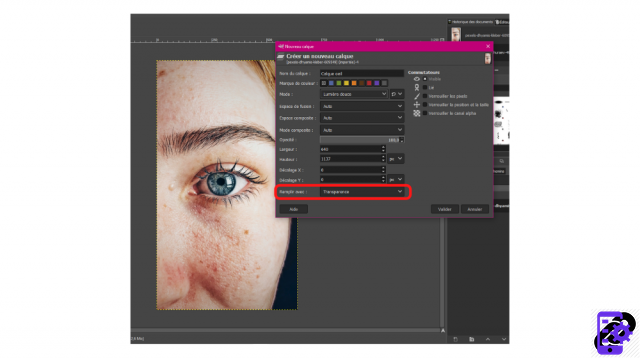
4. Still in this same menu, at the very bottom, find the “Fill with” section and select “Transparency”.
 © GIMP
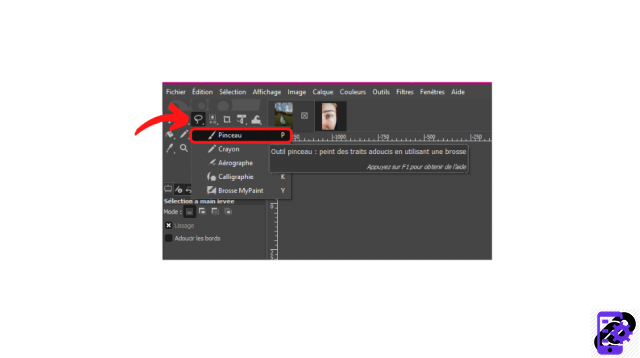
5. Activate the Brush tool. You will find it in the toolbox by right clicking on the pencil icon. You can also select it from the top menu by clicking "Tools" > "Paint Tools" > "Brush".
 © GIMP
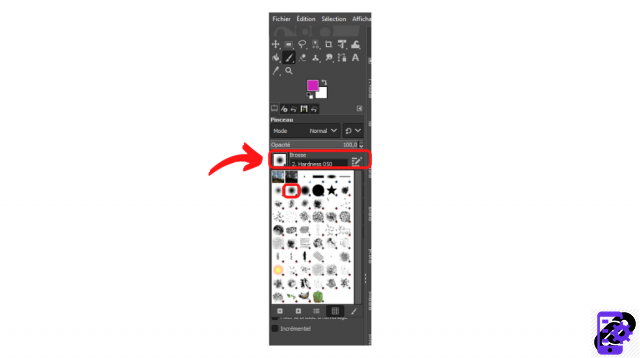
6. In the settings, located in the left column of the editor, click on the image next to the brush menu and choose a soft edge tool. Modify its size if necessary.
 © GIMP
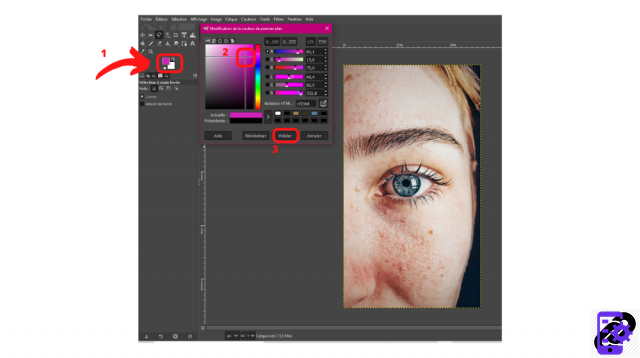
7. Select a color from the dedicated menu, located just below the toolbox and click on "Validate".
 © GIMP
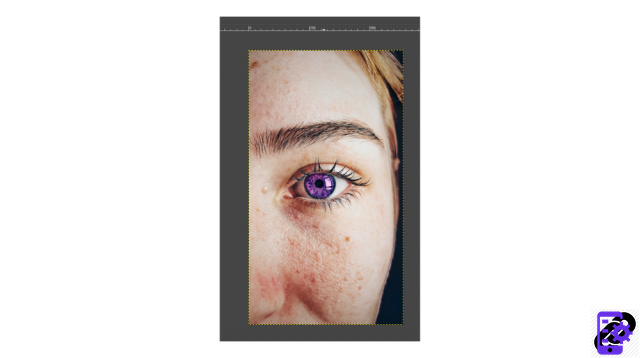
8. Gently color the eye.
 © GIMP
9. Lo and behold, the shade has changed. Congratulations, you have successfully changed your subject's eye color!
Image source: Pexels
Find all the tips and tricks that can be used in GIMP:
- How to smooth skin on GIMP?
- How to crop an image in GIMP?
- How to add text in GIMP?
- How do I change the size of an image in GIMP?
- How to crop an image in GIMP?
- How to use keyboard shortcuts in GIMP?


