Tired of having the the memory of your iPhone always full? Most of the available memory space is occupied by photo e video, in addition to the data of the various applications. Obviously we cannot delete photos and videos that may be important to us in order to make some space. Transferring all files to your PC is a solution, but not the best. In fact, it is always better to have photos and videos at hand, or from a smartphone, instead of having them on the PC saved in who knows what folder of who knows what directory. Because yes, sooner or later the photos saved on PC will get lost in the dark depths of memory.
So what is the best solution in these cases? Entrust ourselves to our loved one Cloud, loved by a few and snubbed by many. We will not use just any cloud service for our purpose, but we will rely on Google Photos. The reason for this choice? We explain it to you in our article and in our video!
Why did we choose Google Photos?
They are currently available many cloud services to store all our files without affecting the memory of our device. We have chosen to use Google Photos because it is one of the best and, moreover, it is unlimited, which is why we chose it for our purpose.
In fact, other cloud storage services pose gods limits to the cloud space free that we can use. So this is very inconvenient and limiting, especially if we often use the cloud and have a very large amount of data to save.
Fortunately for us, Google Photos comes to our aid, which proves to be the best solution, not only for users iPhone, but for all users.
So let's see how to free up and save space on the iPhone.
Free up and save space on your iPhone with Google Photos
The first thing we need to do, of course, is download the Google Photos app on our iPhone / iPad.
DOWNLOAD | Google Photos
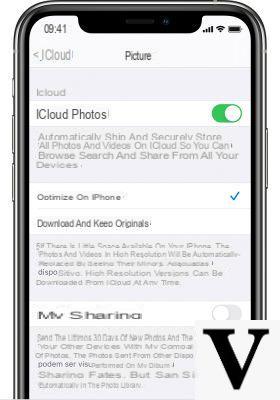
After installing it, let's open it and we will be in front of the first screen. In this screen we have to select the option High quality. Indeed it is precisely this option that allows us to enjoy one unlimited storage space. Also, this option reduces the file size, but still retains excellent quality.
The second option is original and keeps the files at full resolution, but there are limits on the storage space, which is 15GB.
Once this is done, click the button FINE.
At this point we must activate the backup of our photos and videos. So let's get into the Menu, by clicking on the icon at the top right, and enter the Settings, by clicking on the gear icon.
At this point we enter the section Backup and synchronization and select the option Backup and synchronization, by moving the toggle to On. If a message is displayed asking us to grant permissions to the app, we must go to Settings> Privacy> Photos and activate Google Photos.
controllare if all our photos and videos have been uploaded to the in cloud let's move to the tab Assistant. At the top we can see if our photos have all been uploaded or if the backup is still in progress, as in the case of our screens.
Conclusions
At this point we just have to clean up all the photos and videos in the Gallery. Thanks to Google Photos, therefore, we will have unlimited space, to have our files always with us, with great benefit of the memory of our iPhone.
Google Photos is also accessible from PC and any device: just connect to Google Photos homepage and you can manage all your images or videos.


