These days when we can't go out with the camera around our necks, we photographers and photo enthusiasts are probably photographing everything we have around the house.
This situation, however, could be an opportunity to fuel our passion and get involved in new shooting techniques.
And if we are photographing all the objects we have at home, a technique that is certainly important to know that of Focus Stacking. It is a technique that was born for increase the depth of field in a photograph and therefore have everything in focus. Inside the house we are probably not equipped with the lights or flashes necessary for a still life, so we will not be able to close the aperture sufficiently to have all the elements of our image in focus.
How to do a Focus Stacking
To create a Focus Stacking we will have to take a series of photographs by changing only the focus distance. It will be necessary to take a sufficient number of shots to cover the entire focal range of the lens we are using, and then merge them later in postproduction.
To put it this way, it might seem a very complicated technique, both for the shooting phase and for the editing phase. But let me reassure you immediately: thanks to modern technologies implemented in cameras, but also in software, there are a series of automated functions that come to our aid.
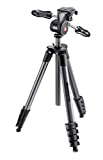
But let's get to the point and what it takes to proceed. To make my Focus Stacking I used the new Nikon D780, of which you will have a full test in the next few days, and a classic 24-70mm f / 2,8. You don't necessarily need a macro lens, but what we definitely need is a stable tripod that does not move even a millimeter between one shot and the next.
 Manfrotto MKCOMPACTADV-BK Compact Series Tripod with Head ...
- Independent controls to lock the movements separately
- Compact and easy to carry
- Also great for general photography
To make sure we do not move the camera ourselves, it is also good to have a system to shoot remotely, possibly wireless. Almost all modern cameras have connectivity Wi-Fi and Bluetooth, thanks to which you can communicate with a smartphone and a dedicated app. It's time to take advantage of this feature! Nikon delivers Snapbridge (available for both iOS and Android).

 Download
QR-Code
SnapBridge
Developer:
Nikon Corporation
Price:
Free

 Download
QR-Code
SnapBridge
Developer:
Nikon Corporation
Price:
Free
Having ascertained that we have what we need, we can think about the composition of the image and I suggest you use an abundant shot. In doing so we can always intervene with a cutout during postproduction. Do this especially if you are using a camera with a sensor with an abundant number of megapixels.

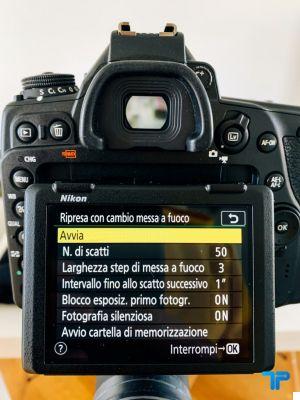
We can now kick off our series of images for making Focus Stacking. Nikon offers a function in the menu that will make our life easier: the shooting with focus change. This feature, also called Focus Shifting, will automatically change focus between shots. We will just have to decide how many shots to make the camera, the focus steps, the interval between one shot and the next and some other less important function.
We will certainly have to do some testing before we get the ideal result, but in this way the camera does most of the work. Keep in mind that the more shots you make the more work there will be in postproduction. As for the focusing steps, although the lower the number the greater the chance of success, I advise you to find a happy medium. Nikon offers a focus step width scale of 10 and I opted to set the value to 3. So narrow steps but not too much. I'm talking about Nikon's menu, but know that it is not the only one to offer these automatisms, with other names, but they are present on all the most modern cameras.
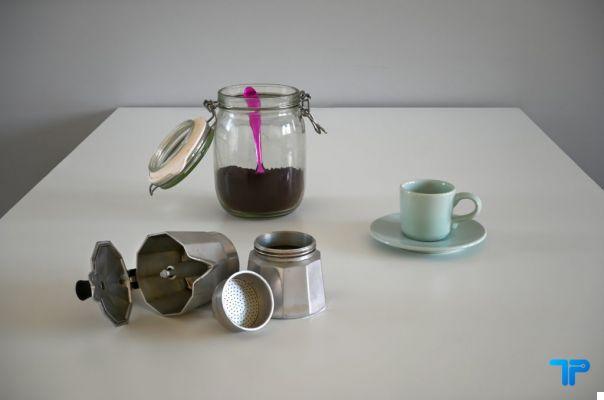
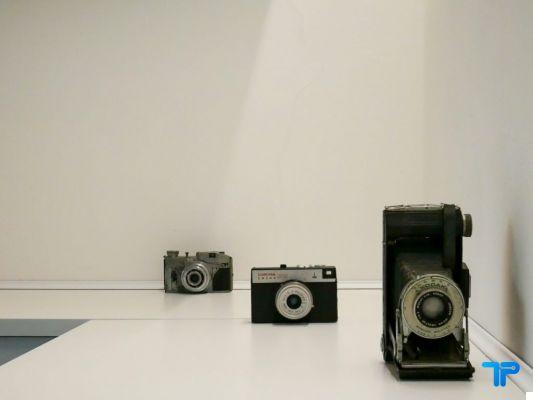
Some of the images used to compose the Focus Stacking


These functions, however, leave us the task of deciding the shooting settings and first I recommend you select the manual mode or that aperture priority because it is important that the latter remain fixed. In general we are using this technique because there is not enough light to close the iris and have such a large depth of field to keep everything in focus, so we will have to use the widest possible aperture. In my case, f / 2,8, in fact, as you can see in the images just above the depth of field of the individual shots is very small.
Once everything is set up, we start the sequence of shots by activating the focus shift shooting function and wait for the camera to finish taking the individual photographs.
The post-production
Once you have taken the photographs to put together to make our Focus Stacking it is time to move on to the computer. By downloading the photographs you will see a series of identical images except for the focus; from here begins the longest work!
To join the images I used Adobe Photoshop, but it is not the only software that can help you in the creation of a Focus Stacking. The first step to take once Photoshop is open is to select the item Automate found in the menu Fillet (File> Automate). Under the heading Automate we will find another menu and it is here that we find the function that we must select: Photomerge.

A window will open that will ask us to select the images to be merged and then we will not have to do anything else but upload using the button Shop by Department all the photographs you have just taken. On the left of the screen, several merge options appear under the heading layout: what interests us is that Automatica, the first. Among the options that we find below, however, none must be selected. Be careful because by default the Merge images item is usually preselected. Let's proceed by clicking Ok.

Photoshop will take some time to process these images and it will obviously depend on the number and power of our computer. Once the job is finished Photoshop will show us the result in a single file with as many layers as there were selected photographs. To proceed with the realization of our Focus Stacking we will now have to select all the levels and proceed from the menu Modification going to select Automatic layer merging (Edit> Auto-Blend Layers).

This will open the last dialog that we will have to deal with before obtaining a photograph in which all the elements are in focus. In the window we choose the blending mode by selecting Create series of images. Verify that both items below are selected and then press Ok. It will take some time, because this is the final stage where Photoshop will merge all the layers and all the subjects will be in focus. To do this, the well-known software will act on the layers with masks and this operation takes some time. But I go back to saying that it also depends on the number of files we initially selected for Focus Stacking.

Once the processor is finished, we will see the result of this long automatic postproduction, which will still keep all the individual levels and their masks visible. We will also be able to intervene manually if for some reason some details have not been merged correctly. Or in any case we can proceed with the postproduction of the file in a classical way until we obtain the result that convinces us most.

Focus Stacking directly in the machine
After explaining how to do a Focus Stacking more or less manually, I can also reveal to you that some cameras are able to do it directly on board. I have one at home Lumix G80, a mirrorless with a decidedly lower price than the Nikon used, but which among the many functions also offers that of Focus Stacking. It's super easy to activate, as you just move the control dial to the Post Focus item and shoot. It is also important to keep it steady with this camera, so use a tripod anyway. A few moments and that's it.

So why do all that work if there are cameras that do Focus Stacking in a few moments? The answer is simple. The control we can have over the shot taken with the small mirrorless is minimal and we will only get a JPEG file. But above all, what is achieved by the Panasonic functions is a 4K video in which the focus varies and from which an 8MP file can then be extrapolated. Here's the difference to what a Nikon D780 caliber SLR can do.
The fact remains that if we have no particular needs, using the mode offered by Lumix can lead us to experiment or get closer to a kind of photography that we may not have known how to deal with before. In my opinion it can represent the first step to deepen this technique. Now it's up to you, if you feel like it, test yourself and tag @technologicfansit on Instagram to show us your results!
 Panasonic Lumix DMC-G80MEG-K Mirrorless Digital Camera, ...
- Dual IS2 Dual Image Stabilizer
- Machine body in magnesium alloy
- 4K Photo and 4K Video features


