Sometimes it can take several hours to get the perfect shot to save on your mobile phone. If you have so many of these photos saved on your iPhone and now you want to transfer them to your PC (Windows 10/8/7 / Vista) to be able to process, share or archive them, you may find bitterly that it is almost impossible to transfer and download photos from iPhone to PC.
In this article we want to show you some quick and easy ways to move or copy your photos from iPhone to your Windows PC, just as if you were in the presence of a USB stick with photos on it to download to your computer.
This guide focuses on two methods for download photos from iPhone to Windows PC, The first WITHOUT ITUNES and the second with the use of iTunes.
# 1. Download Photos from iPhone to Windows without iTunes
TunesGO, this is the name of the iTunes alternative program to turn your iPhone into an external USB device that can be easily managed by a computer. With this program, once you connect your iPhone to your computer, you will have access to all types of files (photos, videos, music, contacts, messages) and you can easily import or export them to your PC.
To get started download and install the free demo version of TunesGO for Windows 10/8/7 / Vista / XP:

If you have a MacOS read how to download photos from iPhone to Mac
Once TunesGO is installed, take your iPhone and connect it to the PC via a USB cable. As soon as connected you will be able to see the image of the device in the main program window:

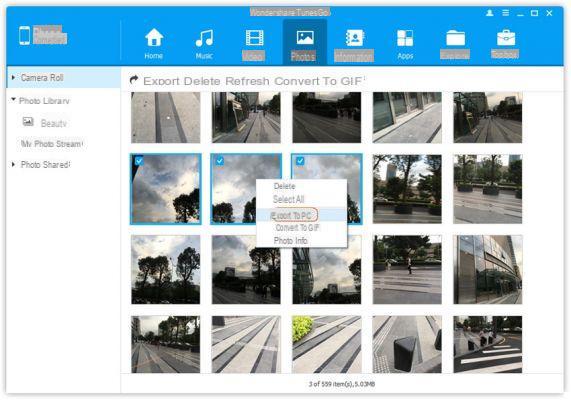
Now click on "PHOTO”And the program will list all the photos stored in the iPhone. These photos will be divided by type: “Camera Roll”, “Photo Album”, “Photo Stream” and “Photo Library”.

Camera Roll: Includes all the photos that have been taken by the iPhone camera and also the photos saved by third-party apps like those of FaceBook, Whatsapp, etc ...
Lireria Photo: Includes all photos imported from computers. You can add photos from PC to iPhone always via TunesGo and these photos cannot be deleted directly from iOS devices due to Apple's limitations.
Photo Stream: Store the 1000 most recent photos or photos from the last 30 days so you can access recent photos from any device connected to the same iCloud ID.
To transfer and download any of these photos to your Windows PC, all you have to do is select them and then click on "Export". A window will open from which you can choose to transfer the photos to your PC or iTunes.
#2. Download Photos from iPhone to Windows with iTunes
This method makes use of Apple's official transfer tool which probably all iPhone users should have on their PC. When you transfer photos from iPhone to PC via iTunes, iTunes automatically syncs photos between your computer and iPhone, i.e. it only copies photos that are on your phone but not on your PC. Below are the steps on how download photos from iPhone to PC using iTunes.
1. Download iTunes from the Apple website. Install it on your PC.
2. Connect your iPhone to the computer using a USB cable and click on the device icon located at the top of the iTunes interface.

3. Click on “PHOTO”In the side pane and on the main interface screen, check the box next to“ Sync photos ”.
4. Select "all photos and albums" or specific files and click "Apply".

Wait for the synchronization to finish. That's all!
Download Photos from iPhone to Windows PC (with and without iTunes) -


