Hi, here is my situation: I have an iPhone with iOS 12. I have all the contacts on my iPhone and I hope to be able to transfer them to the PC so that I can import them, later, in other devices. I know that iTunes can back up to computer, but not selectively (I only need to backup the address book). Is there any other way I can transfer my iPhone address book to computer in order to use them? I hope you can help me. Thanks!
Guide: How to Copy iPhone Address Book to PC or Mac
If you want transfer your iPhone Address Book on your computer in an appropriate format, you are in the right place. In order to do this, you need a powerful and professional program. recommends two software: one is TunesGo (Windows). It allows you to transfer contacts, music, videos, photos and SMS from your iPhone to PC. The other is dr.fone for iOS (Mac) or dr.fone for iOS (Windows). Both of them transfer contacts from iPhone to PC.
- Solution 1: Copy iPhone Address Book to PC with TunesGo
- Solution 2: Transfer iPhone Address Book to PC with dr.fone for iOS
Solution 1: Copy iPhone Address Book to PC with TunesGo
With TunesGo, you will be able to copy iPhone Address Book and contacts from Exchange, iCloud, Yahoo !, Gmail, and other accounts. Contacts are saved as single vCard files or multiple vCard files. Besides contacts, you can transfer music, playlists, photos, SMS, podcasts, audiobooks and more to your PC.

If you own a Mac, read how to copy iPhone contacts to Mac with FoneTrans for Mac
Please note: TunesGo is compatible with iPhone 12/11 / X / 8/7, 7 plus, 6s, 6 Plus, 6, 5c, iPhone 5S, iPhone 4 etc ... supports iOS 12/11/10, 9, 8, 7, 6, 5.
Step 1.Connect your iPhone to computer via USB cable
First of all, install and run TunesGo on your computer. Use a USB cable to connect the iPhone to the computer. After detection, your iPhone will be shown in the main window, like the screenshots below.

Step 2.Transfer iPhone Address Book to computer
From the top menu click on INFORMATION and then from the left click "Contacts" to see the contacts on the iPhone memory card and on the accounts, such as iCloud, Exchange and Yahoo !. In the contacts window, choose the contacts you want to transfer to your computer. Click "Export"> "Export Selected Contacts" or "Export All Contacts"> "to Single vCard File" or "to Multiple vCard Files". Then a popup will open. Choose the destination where to save your contacts.
Besides vCard files, you can transfer contacts to Outlook Express, Outlook 2003/2007/2010/2013, Windows Live Mail and Windows Address Book.
Please note: If you want to transfer your contacts from iCloud, Exchange, Yahoo !, etc… to the computer for backup, you need to select the accounts on your iPhone first. On the iPhone, click “Tools”> “Mail, Contacts, Calendar”> “Add Account ...”.

Solution 2: Transfer iPhone Address Book to PC with dr.fone (Mac) and dr.fone (Windows)
Both versions of these programs allow you to transfer contacts from iPhone to computer in two ways, but there are differences. One way is that it allows you to directly transfer iPhone Address Book to computer by scanning your iPhone. For the other way, you need to use iTunes. Sync and backup iPhone with iTunes, then use dr.fone to extract data from the backup and save your contacts. It's very simple. Follow the steps below and try the program.
Download the trial version to copy iPhone contacts to computer. Choose the correct version and try it!


- Part 1: Directly Transfer iPhone Address Book to PC (For iPhone 12/11 / X / 8/7 / 6S / 6/6 Plus / 5)
- Part 2: Copy iPhone Address Book to Mac / PC by Extracting iTunes Backup File (For iPhone 12/11 / X / 8/7 / 6S / 6/6 Plus / 5)
Part 1: Directly Transfer iPhone Address Book to PC
Step 1. Connect your iPhone to the computer
Launch dr.fone for iOS and connect the iPhone to the computer. From the main program screen click on "Data Recovery" and the following window will open.
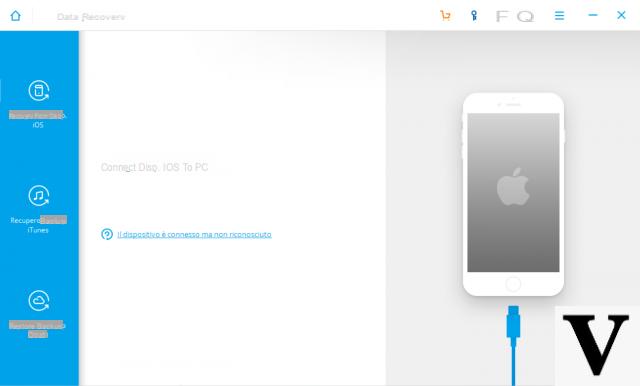
As soon as the device is detected the program will ask you which programs you want to recover and extract from the memory:
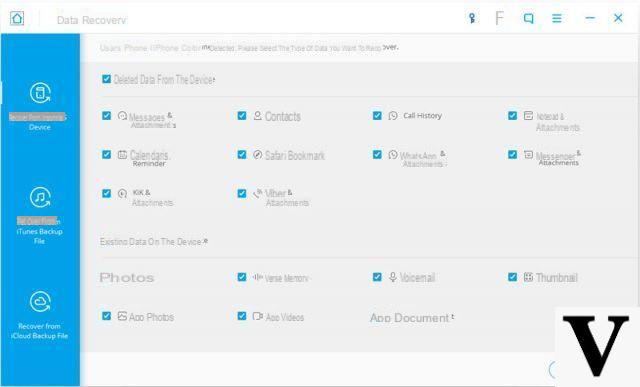
Step 2. Start scanning your iPhone
For older models of the iPhone you will be asked to put the device in scan mode. Here are the steps to follow to do this.
- Click the "Start" button on your iPhone.
- Press the "Power" and "Home" buttons simultaneously for 10 seconds.
- After 10 seconds, release the "Power" button, but hold the "Home" button for another 10 seconds.
If you are using an iPhone 12/11 / X / 8/7 / 6S / 6/6 Plus / 5s / 5C / 5 or iPhone 4S, you don't need to do this. You just have to choose the data to find and click START SCAN.
Step 3. Preview and Transfer iPhone Address Book to PC
After the scan, all the data on your iPhone will be found and categorized. The data found are not only those present on your iPhone now, but also those recently deleted on your iPhone. To separate them, use the button: Show deleted data only.
Click "Contacts", and then click "Recover" to save them to your computer. The file will be saved in three formats: CSV, VCF and HTML.

Part 2: Copy iPhone Address Book to Mac / PC
The second way is to copy the iPhone Address Book to the Mac or PC by extracting the iTunes backup, and it is available for all iPhone users.
Step 1. Sync iPhone with iTunes
Connect your iPhone to computer, and sync it with iTunes to generate the backup file.
Step 2. Scan to extract iTunes backup for your iPhone Address Book
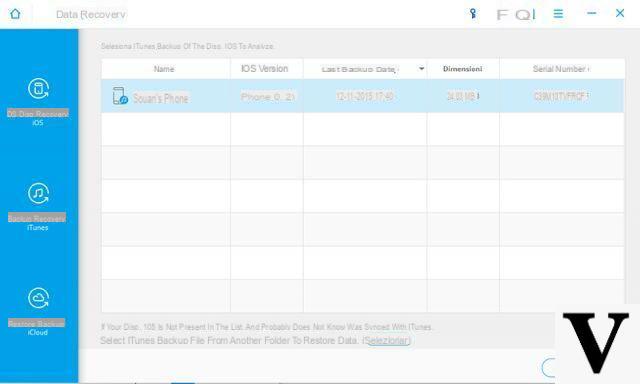
Get dr.fone for iOS (Mac), access the “Data Recovery” function and choose the recovery mode from itunes backup. The iTunes backup will appear in the list. Choose it and click "Start Scan" to extract it.
Step 3. Preview and Transfer iPhone Address Book to Mac or PC
When the extraction is complete, all the contents included in the iTunes backup file will be found and shown in detail. You will see the preview of all the data. Select "Contacts" and click "Recover", you will save the iPhone contacts on the computer.

what information is uploaded?
Thanks for the tip!
I couldn't solve anything with any application
-
If you say the problem you are having, maybe we can help you solve it.
thank you
I used the trial version the so-called TRIAL and I was really and completely satisfied with it and seeing this I move to the following version the PAID version
.
It helped me a lot thank you


