Are you looking for a Windows 10 guide that can touch on all aspects of the system? You have found it!
When Microsoft introduced Windows 8.1, many thought that the work undertaken - a little too lightly - with Windows 8 had been completed. They were wrong since what we will find in Windows 10, that is the latest generation of the Microsoft operating system, definitely puts the dots on the "i" to mission of concreteness and convergence that the big player from Redmond has been pursuing for some time.
It was supposed to be Windows Threshold first, then Windows 9, but what matters is that it is for all intents and purposes an operating system that completes the missing parts of Windows 8.1, ne refines looks and performance and remedies the negative judgments and innumerable criticisms.
Basically, the key difference between Windows 10 and its direct predecessor is flexibility: while Windows 8.1 "adapted" with some artifice between mouse / keyboard and touch inputs, it is clear that Windows 10 was designed from the start with total and absolute scalability in mind!
The operating system, in fact, is not only able to recognize and adapt (automatically or manually) to the type of input in use, but has a responsiveness that makes it suitable for virtually any size display.
Windows 10, more than an operating system, is a complete ecosystem that runs through desktop/touch (topic of this guide), Mobile (for smartphones and small tablets), IoT (for connected devices) e Xbox.
From this unification comes the new generation of those who were the app Modern, or the "Universal App": despite the aesthetics of their ancestors, these they are scalable for various form factors and able to be performed by virtually all types of Windows 10 platform.
As for the desktop aspect, universal apps can run both in window and full screen, like any other desktop application.
As it is simple to understand, in this guide Windows 10 will be analyzed and explained in detail Windows 10 for desktops, tablets and 2-in-1s (to which we will refer from this moment simply with "Windows 10"): we will start from the installation (both from scratch and from the previous operating system), we will study the new dynamics of the operating system, we will see the drivers and programs to install and much, much more.
Preliminary information
We always recommend doing an installation through one 100% genuine and original license, this is to avoid data loss or hacker attacks. We are aware that purchasing a license on the Microsoft store has a high cost. For this we have selected for you Mr Key Shop, a reliable site with free assistance specialized in in your language, secure payments and shipping in seconds via email. You can check the reliability of this site by reading the many positive verified reviews. Windows 10 licenses are available on this store at very advantageous prices. Furthermore, if you want to upgrade to the latest versions of Windows operating systems, you can also purchase the upgrade to Windows 11. We remind you that if you have a genuine version of Windows 10, the upgrade to the new Windows 11 operating system will be free. Also on the store you can buy the various versions of Windows operating systems, Office packages and the best antivirus on the market.
Versions
Exactly as it happens from Windows 8 onwards, once again Microsoft wanted to make a few editions available but from clear distinction and we, in this Windows 10 guide, want to clarify. These are:
- Windows 10 Home: exactly as the name suggests, this is the basic version dedicated to the home user; is suitable for PCs, tablets and 2-in-1s, has Continuum mode and the Cortana voice assistant (which we will talk about later), the new Microsoft Edge browser, Windows Hello technology and the possibility - on enabled devices - to log in by fingerprint.
- Windows 10 Pro: inherits all the features of Windows 10 Home and adds some features that can be useful to meet the needs of a small company: for example, tools for managing devices and apps, for protecting company data, for assistance and remote productivity are included and for enterprise cloud services. It is particularly suitable for approaching the CYOD (Choose Your Own Device) paradigm.
- Windows 10 Enterprise: is based on Windows 10 Pro and inherits everything, adding additional features dedicated to medium and large companies, as well as advanced options to ensure security against threats targeting corporate services, identities, applications, devices and information. Windows 10 Enterprise will be available exclusively for Volume Licensing users (VLK), can take advantage of continuous and constant updates if necessary or adopt the long-term branch (LTSB), so as to receive fewer updates over time in order not to impact the compatibility between applications, services and devices.
- Windows 10 Education: is based on Windows 10 Enterprise, inherits its functionality and is refined to meet the demands of school and academic environments - staff, administrators, faculty and students. It will be available for those who use the Academic Volume Licensing and can also be updated starting from Windows 10 Home and Windows 10 Pro.
Minimum installation requirements
To run Windows 10 correctly, your device must be equipped with:
- Processor da 1 GHz or higher;
- RAM: 1 GB per i sistemi a 32 bit, 2 GB per i sistemi a 64 bit;
- Display: minimum resolution 1024 x 600 pixels;
- GPU: DirectX 9 or higher support with WDDM 1.0 driver;
- Disk: 16GB for 32-bit OS, 20GB for 64-bit OS.
Clean installation
Installing Windows on your PC is not difficult at all: Microsoft has tried to simplify the procedure as much as possible to make this operation painless even for users less accustomed to installations. In this Windows 10 guide we will analyze all aspects.
The simplest procedure to install Windows 10 on our system is perform a clean installation using the Windows 10 DVD (either purchased or downloaded from the web and burned) or alternatively using a USB stick prepared for the purpose.
Before continuing, one thing must be clear from the outset: clean installation will format the entire disk and erase files previously stored on the machine we are about to move to Windows 10: making a backup of all important data is vital! If you do not have enough patience or space to move all the files the clean installation is not for you, you should update the previous version of Windows that may already be present on the machine (topic of the next section).
We insert the DVD or the USB key in the system on which to install and start it; it may be necessary configure the correct boot sequence to boot the DVD or USB stick. The procedure changes according to the BIOS in use, but we can get help from our dedicated guide.
Installation
At the first start we will be asked for some preliminary settings on the language, the time and currency format and on the keyboard layout.
We can very well leave town in all fields and click Next. In the next screen we will see a button in the center of the window Install.
We press without delay on it to start the actual installation. The installer will immediately ask us for the Product Key of our original license; if we do not have any license or want to activate our copy later, just press the Ignore button below to continue anyway.
In the next screen (which we arrive at both if we press Ignore and if we press Next in the previous step) we will have to accept the Microsoft user license to continue.
Enable the check mark on I accept the license conditions (after a careful reading of all the content) and click on Next. In the next screen we will find ourselves in front of the actual installer.
We have two ways of installation; for our purposes we must select Custom: install Windows only (advanced option). With this procedure we will carry out a clean install by erasing the entire contents of the hard drive to place Windows 10 on it.
The next screen is very important: we will see all the partitions on the hard drive.
If we have previously deleted all the partitions we will find only one entry, otherwise we can find two or more entries present. In the latter scenario we use the buttons at the bottom (New, Delete or Format) to arrange the partitions and get:
- a partition for the operating system (NTFS)
- a data partition (NTFS)
The operating system can leave half of the disk (approximately from 40 GB upwards), while the rest of the disk we will dedicate to data.
After partitioning, click on Next to start the automatic installation procedure.
We just have to wait patiently for the process to finish, which can take more than half an hour (on slower systems). The screen that will confirm the end of the installation is the following.
First start
Once the installation process is complete, restart the PC and remove the disk or USB key used: from now on it will no longer be needed. At the first start the system will finish its configuration with the following steps.
We will be asked again to enter the user license (only if we have not already fulfilled this need during the installation phase).
If we have a license enter it here for activation, otherwise we use the item Later in the bottom left (under the Privacy Policy).
In the next screen we will have to choose whether or not to use Microsoft's Quick Settings, which will set Bing as a search engine, set privacy for speech recognition and allow you to share some information with Microsoft servers (including system crash reports).
If Microsoft products are of interest to you and / or you have full confidence in the company, you can very well use the Use Quick Settings button; if you want to customize your experience with Windows 10, use the Customize settings button (present at the bottom left, under Other information).
Once these formalities have been completed, the system configuration will start, with various greetings and waiting messages (the process is completely in the background, just wait).
If you are already connected to the Internet via cable, critical updates for Windows 10 will be downloaded immediately, to make the experience with the new operating system better. This screen does not appear if we are offline or have a wireless network (configurable only later on the desktop).
After this phase there may be one or more system restarts. Before we get to the actual desktop, we will need to configure the last two screens.
In the first we will have to enter our Microsoft credentials or create new ones.
We can also ignore this step with the appropriate button (Ignore this step), but by doing so we will renounce the Microsoft synchronization with other devices of the Windows 10 platform (console, smartphone, other PC etc.).
In the last screen we will have to assign a name to the PC and set a password (if we have not synchronized the Microsoft account).
We have finished the installation! A screen will show the final configuration of the apps (in full Windows 8 style) ...
… .Followed from the actual desktop!
Upgrading from previous versions of Windows
It is possible to upgrade to Windows 10 starting from Windows 7 (Service Pack 1) or Windows 8.1 without losing personal data, settings and installed programs: it is possible to proceed with the update assistant during the free promotion year or by using an ad-hoc media, starting the installation file from within the previous operating system.
For obvious reasons we have opted for the second choice, however the two processes are extremely similar - except for the reporting mode, which in the update assistant is in the form of notification. In our Windows 10 guide we will also analyze this installation method.
Installation
Let's first create a DVD or a USB stick using the special tool offered by Microsoft:
Once this is done, we start the file setup.exe contained on the DVD or USB key from within Windows 7 or Windows 8.1; we will first be asked to download all available updates for the current operating system in order to increase compatibility; we advise you to proceed in order to run into subsequent malfunctions.
Once the previous operation is completed, the installer will prepare the current operating system for the update ...
... then you will be asked for the serial code of the Windows 10 operating system (which you can buy from the Microsoft Store; in the case of a free update via the Windows assistant, however, the serial code will be automatically read and reusable in the case of future installations).
At this point the installer will ask you how to proceed. You have three choices: the first is to keep personal files, installed programs and settings; the second is that of keep personal files only cleaning up the operating system, the third one is to eliminate everything (which in fact corresponds to performing the clean installation seen in the previous point). To avoid reinstalling drivers and programs, unless your operating system is down I recommend choose the first option.
Please note: it is possible to keep the installed programs and settings unchanged only if you switch to corresponding versions of Windows (i.e. from Home to Home, from Pro to Pro, from Ultimate to Pro and so on, while also maintaining the same architecture), otherwise the option - as happened in the image - will not be available.
A further check will be made on the current hardware and, if the requirements are all there, you can proceed to upgrade to Windows 10 after viewing a summary of the options chosen.
To proceed with the update, just click Install: the process is completely automatic, however it will require several reboots of the computer and could take up to half an hour.
Here's what will be displayed during the installation process:
First start
After the update process, we will finally be able to configure the new operating system: the welcome screen will allow us to decide whether to keep any local user of the old operating system or configure a new one (“They are not tests”). Since we have opted for a lossless update and settings, we will just have to move on.
Now we will have to choose whether or not to use Microsoft's Quick Settings which will set Bing as a search engine, set privacy for speech recognition and allow some information to be shared with Microsoft servers (including system crash reports).
If the Microsoft products are of interest to you and / or you have full confidence in the company, you can very well use the Use key quick settings; if you want to customize your experience with Windows 10, use the Customize settings button (present at the bottom left, under Other information).
Once these formalities have been completed, the second system configuration phase will start, with various greetings and waiting messages (the process is completely in the background, just wait). If you are already connected to the Internet via cable, critical updates for Windows 10 will be downloaded immediately, to make the experience with the new operating system better. This screen does not appear if we are offline or have a wireless network (configurable only later on the desktop).
We have finished the installation! A screen will show the final configuration of the apps (in full Windows 8 style) ...
… .Followed from the actual desktop!
The revamped Start Menu
Windows 8 has failed in the eyes of all also due to the absence of the Start menu, which has become indispensable for many (especially when compared with the Start Screen on a PC with keyboard and mouse). Windows 8.1 has put a "patch" by reintroducing a key to access the Start Screen more comfortably, but not even the shadow of a real Start Menu.
Windows 10 seems to want to meet everyone with a new Start Menu completely revised and corrected to merge together all the news of the 8.x releases mixed well with the classic approach visible on Windows 7 and below.
We can immediately see all the improvements applied to the new Start Menu (indicated at the top with numbers):
- In the Most Used session we will find, as we use the PC, the programs that we have opened several times during the Windows sessions;
- In the Recently added session we will be able to immediately access the programs we have installed in the last period;
- In the System Shortcuts session we can find File Explorer (expandable, it shows the last open folders or positions), Settings, the Stop button and the All apps button (the latter shows an alphanumeric list of all installed programs);
- In the Universal App session we find the old Modern apps already seen in Windows 8 "adapted" to be used within the Start Menu and possibly on the desktop.
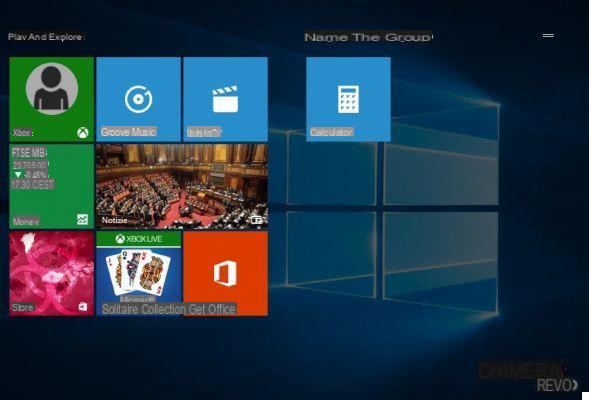
The Live Tiles with all the interactive information have not disappeared: now they are in effect Universal Apps that we can either place (and modify) on the Start Menu or start as a normal desktop application.
We can search for any program by opening the Start Menu and immediately typing the name of the software we are looking for; the menu will dynamically change shape showing any program searched (if any), similar alternatives already present in the system (in the image below it indicates Snipping Tool as an alternative to Greenshot) and related searches on the Web via Bing (to download on the fly any missing program).
And there's more! The search feature in the Start Menu is smart to the point of adapting to queries without having to call any specific program for numerous tasks and activities; for example by typing a mathematical operation the search engine will perform the calculation automatically (in the example below 10 × 2);
using the formula "meteo a" plus the name of the city we can obtain valuable information on the weather (in the example below Weather in Cava de 'Tirreni).
we can use the bar as a real-time currency converter (in the example below 10 euros in dollars);
or use it as a unit converter (in the example below 100 km / h to mph).
The Start Menu is highly customizable according to tastes and needs: for example we can remove all the Universal Apps and leave only a Windows 98-style bar (excellent for nostalgics), change the size of the menu itself and add / remove applications (we can "fix" a program of our own as indicated in point 4).
Also useful is the context menu of the Start Menu (right click on the icon), which follows what has already been seen on Windows 8.1: excellent for quickly accessing some system features as well as turning off / restarting the machine.
The renewed Start Screen (Tablet mode)
This time Microsoft wanted to get serious and, in addition to giving new glory to the desktop by reintroducing the Start button, it has also decided to redesign the Start Screen - that is the start screen useful for use by touch - from the ashes of that of Windows 8.1. In fact, Microsoft has introduced a real tablet mode able to transform the desktop in a large Start Screen, from which it is possible to use both apps and applications but which “redesigns” the user experience adapting it to use with your fingers.
It is possible to access the Start Screen by manually activating tablet mode from the notification area (image below) or undocking a Windows 10 tablet from its dock (the operating system will automatically ask whether or not to activate the same mode).
As I said earlier, Microsoft has done a really good job: the Start Screen is a mostly complete place that allows you to easily access the same functions of the Start menu with a more touch-oriented interface, as you can see from the image down.
But let's go in order: once activated, the Start Screen can be recalled immediately by tapping on the “Start” button on the screen or, if available, on the physical Start button of the device; present on the system tray (from which the shortcuts for programs, characteristic instead of the desktop view, will disappear), from left to right:
- il Start button;
- il Back button which allows you to navigate between the various screens;
- il Cortana button, which allows you to call up the voice assistant;
- il "Activity view" button, which allows you to view (and possibly select) active programs and apps;
- the classic system tray / notification with its indicators (battery, network, clock and so on).
In short, nothing transcendental and not already seen with the desktop; the absolute novelty is the practical toolbar on the left, which replaces the inconvenient charms bar and offers the user the possibility to have everything - absolutely everything - at hand.
Starting from the bottom, immediately above the Start button we find a appropriate button to show all the applications installed on the system (a sort of "Programs" menu):
Immediately above the Applications icon we find the classic key to access the shutdown options; the last button, the one in the upper left corner, is a gem: it allows you to immediately access the most used applications, to Explorer, to the settings panel and obviously the logout menu (accessible by clicking on your avatar).
Again, the Start Screen live tiles are fully customizable: they can be added simply by dragging them from the application list, it is possible to deactivate their animations, customize their panes and group them by categories simply by dragging them into a new virtual grid.
Clearly, the tiles of the Start Screen will keep the same structure and arrangement in the Start menu, and vice versa: this means that if you add them, move them, group them from tablet mode, the change will also be reflected in the counterpart in desktop mode (and vice versa).
Windows 10 Guide - Universal App
This is a novelty that concerns not only Windows 10 desktop / tablet but the entire ecosystem that revolves around this operating system: the Universal App, that we can somehow define as the natural successors of Modern apps, others are nothing but real apps that can be downloaded from the Windows Store (also now universal) ed run from desktop, mobile, Xbox and from any other device capable of running any of the versions of Windows 10.
They differ mainly from Modern apps for the APIs they use (UWP), for the installation format (appx) but, in practice, above all for the attitude of adapting to the "target" platform without the need to completely rewrite the code . Although aesthetically they resemble the look of the Modern apps of Windows 8.1, they are much cleaner and functionally complete:
For example, you immediately notice that instead of relying on the system menu - which instead happened with modern - universal apps have a dedicated menu (in this case on the left), expandable, which allows you to use its features (for example search or share) or to access the dedicated settings.
In Windows 10 the Universal apps can run in both desktop and tablet mode, full screen or snapped, and they can be “pinnate” (i.e. additions) both to the system tray and desktop mode Start menu and alla Start Screen (in both cases in the form of a Live Tile).
Windows 10 Guide - New Settings Panel
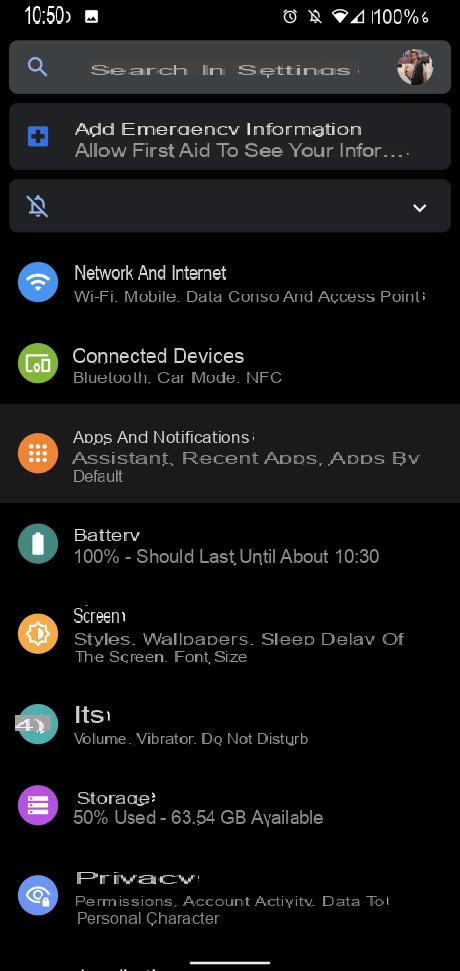
Remember the chaotic and redundant "PC Settings" that has so much turned up the nose in Windows 8.1? Well, even in this respect Windows 10 introduces a noteworthy improvement: it's called Settings and it's a brand new panel (it's actually a universal app, as it's also identical in Windows 10 Mobile) that allows you to manage them all (or almost) the aspects of the system and device in use.
Characterized by largely explanatory icons and captions, the Windows 10 Settings panel almost entirely bases its operation on a series of "On / off" slider in the name of convenience for touch devices, minimizing the entry of check marks and the presence of scroll bars (in that case, a thumb on the display could do more damage than anything else).
Although with considerable simplicity and great minimalism, the Settings panel still provides for the presence of links and clickable text that allow access to other sections of the panel, of the system or even to online content if the current setting requires it.
In short, the Windows 10 Settings could really represent a "replacement" to the classic "Control Panel" (which still exists, even if a little more hidden, within the operating system), however we are convinced that before the definitive transition a long, long time will pass (and that the control panel will continue to exist, in particular, on the Enterprise versions of Windows 10).
Windows 10 Guide - Desktop and Windows Explorer
The Windows 10 desktop appears at first glance quite similar to when already seen on Windows 8.1, but the improvements are present almost everywhere, starting with the new icons for the system paths ...
… Up to the new icons in the Windows system tray.
Among the latter, the new notification center certainly stands out (next to the clock) which replaces the Windows 8 Charm Bar: in addition to collecting notifications (both system and app) shows below some convenient shortcuts useful for managing the system on the fly; we will be able to turn on / off some features such as WiFi or Bluetooth, adjust the brightness, enable geolocation, enable battery saving on laptops, set night mode, access a VPN, search for wireless devices nearby, enable tablet mode or activate the mode airplane.
2 other prominent elements of the desktop are certainly the search bar and the Snap button.
With the bar we will be able to search on the fly on Windows and on the Web as already seen in the Start Menu (the search features are identical), with the addition of the features provided by the Cortana voice assistant (which we will discuss in the specific section).
If the bar is too large and invasive, it can be minimized "button" or removed completely using a context menu item anywhere in the bottom bar (right click-> Search-> Show search icon or Hidden).
The second new feature of the bar is the Snap button, which allows you to call up a screen where there are previews (Snap) of all open applications.
The screen also allows you to open numerous "virtual desktops" using the New desktop button, so you can intelligently organize both programs (which in this screen can be moved from one desktop to another) and Universal Apps.
The rest of the desktop faithfully follows what has already been seen in Windows 7 and Windows 8.1, with no apparent news from the point of view of the management of shortcuts and folders placed on the desktop.
Revamped the menus to adjust and customize the desktop: abandoned forever "the confusion" that reigned supreme in Windows 8.1, the items of the context menu (right click anywhere on the desktop) recall the new menu sections in a "Modern" style.
Here's what the Display Settings menu looks like (great for adjusting brightness or enabling other power saving features),
instead, here is what the Personalize menu looks like (useful for changing the desktop background or adding new system icons).
These menus could displace those who come from Windows 7, while those who have been able to try Windows 8.1 will be able to grasp the greater order and cleanliness among the various menu items. Nothing dramatic, however: you quickly get used to this new graphic style.
Unchanged the functionality to quickly recall the desktop: just click on the lower right corner of the screen to minimize all windows and show the desktop.
Windows Explorer
Explorer has also undergone a restyling in order to meet the difficulties of users in finding some items while navigating between files and folders.
The new Explorer looks like this
The Quick Access section appears, showing both user folders (Pictures, Videos, Downloads, Desktop, Documents, and Music) as well as recent folders and files used by the user. The behavior of the left side panel is unchanged, where both the Quick Access folders and the various system paths are located.
From Windows 8.1 the management of the “ribbon” menus has been resumed, this time also available as a pop-up pop-up (just click on one of the menus to open the ribbon).
Windows 10 Guide - The new Microsoft Edge browser
Microsoft Edge is the new default browser that, starting from Windows 10, undermines Internet Explorer (which remains installed in the operating system for compatibility reasons) and officially takes the throne of web browsing! Quite different from its predecessor, Microsoft Edge has all the appearance of a universal app and as such shares its aesthetics, as well as the important aspect of responsiveness, and combines these functional elements with a browsing experience that, albeit quite minimalist and immature (just think that the browser does not currently support add-ons or extensions), can satisfy all less pretentious palates.
What does the Microsoft Edge home screen offer us? Nothing more, nothing less than what you see in the image below:
The default welcome screen, which you see above and which does NOT have an address bar, allows you to start browsing by entering the URL to visit or a search key in the single text box (the default engine is Bing). Below, the elements we are used to seeing in modern browsers are all there: card selector, key for opening a new tab, keys of navigation (Back, forward and refresh) alongside the address bar, and on the far right we find a useful toolbar that allows us to quickly access various features.
In order, from the left, we find:
- the key for "Reading view", which allows you to eliminate the frills of the web page leaving only the main text box, to facilitate reading;
- il quick add button to Favorites;
- the key that allows you to call up your favorite hub;
- il quick share button, which allows you to quickly call up the system sharing menu and share the web page currently displayed;
- the classic three-dot button that allows you to access the browser's main menu.
The reading view
When the browser will be able to "recognize" the main content of a web page that a user may want to read (generally occurs in the presence of large pieces of text), the key Reading view is made clickable: already seen widely in mobile browsers and in the most recent versions of some desktop browsers, this other one does that automatically delete the accessory elements of the page (menus, banners, hyperlinks, images and so on) ed offer the user only the text field, so as to allow a smoother reading and faster loading.
Favorites / Reading List button
As already mentioned, you can add the open web page to your favorites by simply clicking on the appropriate star-shaped button in the toolbar: a overlay panel that will allow insert the page into a specific favorites folder created earlier, to the favorites bar (which we will find out later) or by create a new folder.
Always using the same button it is possible to add the web page to theReading list, that all Windows 8.1 users have come to know and now integrated with Windows 10 and Microsoft Edge.
Favorite Hubs
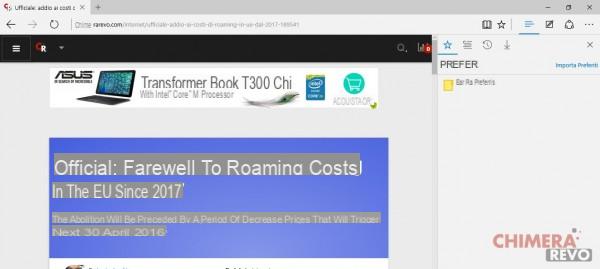
Contrary to what the name implies, the Favorites Hub incorporates four different parts of the browser: i Favorites, Reading Lists, History and Download Management. It can be accessed using the appropriate button on the toolbar (the one with the three horizontal lines).
In the Favorites section you can manage and organize your favorites, as well as import them from another browser - although it is not present, the final version is expected to include the possibility of importing from file; it is a shortcut to the related functionality in the settings.
From the Reading Lists section, you can view and manage the pages added for later reading:
The section History allows you to view the pages visited recently and in the past, with a link that allows you to quickly access the delete history functionality (which we will see later).
By right-clicking on each element, you can access some navigation and management items:
Finally, the Download section allows you to view and manage the files downloaded via the browser and their history:
Notice how to the side of the various panels there is an icon in the shape of "Pin“: Actually clicking on that icon the Favorites Hub comes hooked to the browser, it will no longer be closed (if not by clicking on the appropriate button) and it display space of the web page will be reduced accordingly, as seen in the image below:
The web note
Going on to discover our (only) push button panel, we come across that little button that the browser defines as "Create a web note"
This is an extremely useful feature (and available as an extension for some popular browsers) that allows you to add text notes, highlighter strokes or underlines on the fly of different colors:
Once the work is complete you can save the page with all additions on OneNote, in your Favorites, or in a reading list...
… Or share it with an app via the system menu.
The Microsoft Edge Main Menu
We preferred to leave the most interesting aspect of the browser for last: the main menu, reachable via the key (now well known to users of Windows Phone 8.1) which depicts three dots aligned horizontally. By clicking on it you can access the basic functions of the browser such as opening a new tab, window, saving the page, printing, accessing the development console and so on. In short, a menu reminiscent of Internet Explorer except for his own Settings section, which we will talk about in depth in a very short time.
The structure of the various settings, as expected from such a minimal browser, is extremely concise - most of these are based on on-off sliders - and characterized by a remarkable simplicity of understanding.
By clicking on “View advanced settings” you can further refine other browser behaviors such as the Flash blocker, cursor navigation, popup blocker, search suggestions and anything else.
Theme, password manager & more
In the previous section we saw a nice "Theme" entry, and it is there that we discover how the Edge browser is available - for the first time in the history of Microsoft browsers - at the moment with two different themes (Light or Dark), in line with the concept of convergence: the dark theme is mainly designed to save energy in devices with battery, moreover the same thing already happened in Internet Explorer on Windows Phone 8.1.
Let's take a look at the Development Tools section, very similar to that of Internet Explorer ...
… But with particular attention to the section Emulation, which allows you to view a web page in emulable conditions (page orientation, browser, localization and more).
Lastly, but only in order of list, Microsoft Edge lands in Microsoft Edge - again with an absolute record in the history of Microsoft - a real password manager, which allows you to save, organize, view and possibly delete the access credentials to websites. Although this is something already seen in other competing applications and of extremely minimal, it must be admitted that such a thing has been missing at Microsoft for years and that ... it was time!
Windows 10 Guide - The main news for network, security and multimedia
What does Windows 10 have in store for us? What are the main innovations on the networking, security and multimedia side? Here is a short list of the news that is worth reporting to our readers:
New command prompt
We can make a smoother selection of the text to get to a copy-paste with the usual keyboard combinations Ctrl + C / Ctrl + V (which is very rare on text shells)
Integrated PDF printer
Windows 10 integrates a tool to convert any document into PDF format through a convenient "virtual printer" that can be selected from any program that supports the Print button among its options.
Total integration with OneDrive
OneDrive in Windows 10 follows the model of Dropbox or Google Drive: files and folders saved in the cloud are immediately downloaded completely locally. The user remains free to choose whether to exclude certain folders, but all OneDrive content becomes immediately available offline even without a network (as long as it is synchronized).
Native MKV and H.265 support
Windows 10 is a big step forward for those who watch movies on PC or use the PC to send videos to TV: Windows Media Player introduced native support for .mkv files ("Matroska" format) and the ability to decode H.265 videos. This implies that movies that come with this container or codec (but H.264 is also supported) can be played without having to install anything else.
Windows Store
The store integrated into the operating system has changed almost completely from Windows 8, becoming much more complete: since Windows apps can run on all platforms supported by Microsoft (PC, tablet, smartphone, Xbox), the store has become the reference point for all devices: soon there will be real AAA games (“swap” between PC and Xbox One), a vast catalog of audio and video content available for purchase or rental, and much more.
Wireless network connection
After the very bad experience with Windows 8.1 (where it was actually difficult to understand how to manage wireless networks) we have a welcome return to the past with a new graphic style: the Windows 8 sidebar disappeared, here we have a nice "floating" list for the Wireless networks which incorporates what was seen in Windows 7.
DirectX 12 e WDDM 2.0
The new generation of multimedia API (Application Programming Interfaces) DirectX, up to version 12, is a Windows 10 exclusive: we will never see them on Windows 7 or Windows 8.1. In order to take advantage of them, the hardware must be compatible, but the list shown by Microsoft seems reassuring: we start from the Fermi series (GeForce 400) for Nvidia, Radeon HD 7000 for AMD and integrated GPUs on Intel's Haswell processors.
Windows 10 also introduces the WDDM (Windows Display Driver Model) 2.0, a significant update to facilitate communication between the operating system and the GPU (especially if we use virtual machines).
Virtual reality support
Windows 10 also includes an additional set of APIs that can be used by a special 3D gadget called HoloLens; with these futuristic glasses we will be able to generate a virtual reality (VR) environment in which applications can show themselves in the form of holographic elements superimposed on the surrounding environment.
Windows Hello e Passport
Windows Hello is the name of the biometric recognition system that debuts in Windows 10 with the goal of send passwords to the attic forever, replacing them with authentication through iris, face or fingerprint recognition (in theory we can integrate all three together for maximum security). It can be used for local log-in to the computer / tablet / smartphone: just the user sits at his station and the biometric sensors will do the rest: the device will unlock automatically.
With the system called Passport we can integrate biometric accesses even in third party software and can be used to access websites under precise conditions and with precise constraints.
Biometric information is only stored locally and never transmitted to third parties. Authentication on external services works through asymmetric cryptographic keys, with a high level of security even in case of violations of remote servers that guard the keys (useless without local keys).
Continuous updating
Windows 10 introduces a substantially different approach to updating than in the past: the continuous update seen on smartphone platforms is also taken up on PC, where in our opinion it is even more important: not only security patches, but also new features and substantial changes to the operating system that can arrive "at any time" with the continuous and silent update of Windows 10. Goodbye notifications, goodbye popups and goodbye “I disable all Windows updates”: it will no longer be possible to do so.
The user no longer has the freedom to disable the automatic installation of the updates (but rest assured: the download does not take place if a data connection with maximum traffic thresholds or "pay-as-you-go" tariffs is in use), nor to choose which updates to install and which ones to reject.
However, there are some important differences between the various editions of the system:
- Windows 10 Home: The user can choose whether or not to be notified before the automatic restart required to complete the operation.
- Windows 10 Pro: the situation is almost identical to the Home version, but the administrator may decide to delay the update for some time (until the release of a later update or in a better period, but the update will still be installed after 2 postponements). Furthermore, this edition has access to Windows Update for Business, a free service through which IT staff can decide which machines should receive updates first, in which time slots and on which days: the aim is to minimize interruptions for workers or avoid "hot" periods such as the end of the month or the closures of fiscal quarters.
- 10 Windows Enterprise: dedicated to the most scrupulous and precise public in terms of updates, this release allows the use of a parallel update channel (called Long Term Servicing Branch), in which only security fixes are published where the goal is to minimize the risk that some novelty in the system (other than a security bugfix) creates incompatibility on “delicate” systems designed for business, without exposing the infrastructure to security risks.
The voice assistant Cortana
Those familiar with Windows Phone 8.1 already knew it, but those who hear about it the first time in Windows 10 will have a new ally ... indeed, a new ally: it's called Cortana and is the system voice assistant, the one to whom you can ask everything (or almost everything) and who will carry out the operations you entrust her with such grace. In some cases it is possible carry on real conversations with her: try for example to ask her what her name is, how old she is, thank her or make her a marriage proposal (“Cortana, Marry me!”).
Cortana is also an example able to monitor flights, to report the traffic situation, to set alarms and appointments (try to tell her "Wake me up in 10 minutes"), to search the Internet on your own (using Bing, of course), recognize songs being played (try to tell her "What song am I listening to?") and much, much more.
It is possible to perform the initial configuration of Cortana by clicking on the appropriate text box on the system tray (or on the Cortana icon on the Start Screen); in addition to assisting you, Cortana will gradually learn what interests you most and will show you a report when invoked.
Cortana can be invoked manually using the system buttons or the Windows + C key combination, or it can be configured to recognize the "Hey Cortana" invocation, which will allow you to activate it with your voice without touching anything and whatever you are doing. All the options related to Cortana are available in its settings (just type “Cortana Settings” in the Start menu or in the Start Screen).
But, like everything, even using Cortana has a "price": it will be necessary authorize you to use location services, as well as storing and sending to Microsoft for interaction your search strings, voice commands, app usage history and everything that can be useful to improve the user experience. And this still needs to be clear, although Microsoft does anonymize the data before processing. You can still disable or restore Cortana at any time and delete the data collected on the device and on the cloud using our special guide.
Windows 10 Guide - Driver Installation
Windows 10 brings with it drivers for a very large number of peripherals: Difficult to find any unrecognized device in the default driver pack that accompanies this new system.
Compatibility surprised us positively: the good results already achieved on Windows 8.1 were largely surpassed by Windows 10, as we can see in the Device Manager menu immediately after a clean installation (without adding third-party drivers).
All recognized perfectly without the aid of any program! In any case, I recommend starting Windows Update immediately after a clean installation of Windows 10: any missing drivers (such as proprietary drivers for the touchpad instead of the generic ones already active) will be automatically retrieved online by the Microsoft signed update tool (Start Menu-> type Windows Update-> open Check for updates).
The tool can also update the drivers of the video card, chipset and other important devices for the correct functioning of the system (driver for WiFi or Bluetooth adapters).
Alternatively we can rely on DriverBooster (guide) or SlimDrivers (guide), two free programs, to recover the drivers possibly missing and not available through Windows Update.
The indispensable programs
Windows 10 by default offers the minimum to be able to browse the web and play multimedia files without necessarily having to rely on third party programs (just use the new Microsoft Edge browser and Windows Media Player to realize this).
Despite all the system can certainly appear to users bare of some programs indispensable in domestic use. Windows for example is unable to open RAR compressed files (while handling ZIP files without problems), does not support reading PDFs and Office documents (rightly requires Office on the system).
In order to maximize the usability of the system, I recommend install our free must-have software pack:
- VLC: valid multimedia player for audio, video and streaming contents;
- LibreOffice: free and complete office suite;
- Google Chrome: alternative browser with extensions and synchronization with Android;
- Mozilla Firefox: secure and fast open source browser;
- PeaZip: open source compressed files manager (RAR and others);
- Skype: VoIP client for free calls and video calls;
- Spotify: unlimited streaming music;
- IrfanView: photo and image reader with advanced filters (read here);
- GIMP: free and open source photo editing program;
- KeePass Password Safe: completely offline password manager with browser integration;
- Foxit reader: free and lightweight PDF reader;
- qBittorrent: practical and fast open source BitTorrent client;
To choose an antivirus solution that suits our needs on Windows 10, I recommend reading our antivirus guide.
Windows 10 Guide - System Backup, Restore and Cleanup
Exactly as it happens from Windows 7, even in Windows 10 there are the classics "Backup & Restore " e File History (both available from the classic system control panel, in the "System and Security" section): the first allows you to create backups of the operating system and of the files stored on the hard disks, to be restored if necessary with an extremely simple procedure; as usual it is possible to define in detail the files and folders to be kept and it is possible to set an external disk, a separate partition or an optical reader as the saving path provided that the capacity of the device is at least equal to the one expected from the backup. This tool also guarantees backward compatibility with Backups created in Windows 7.
The tool allows you to create an entire system image or recovery disk.
Also File History maintains its "classic" use: once configured, it is able to keep track of previous versions of files on disks, which can be quickly restored from the contextual menu for each file.
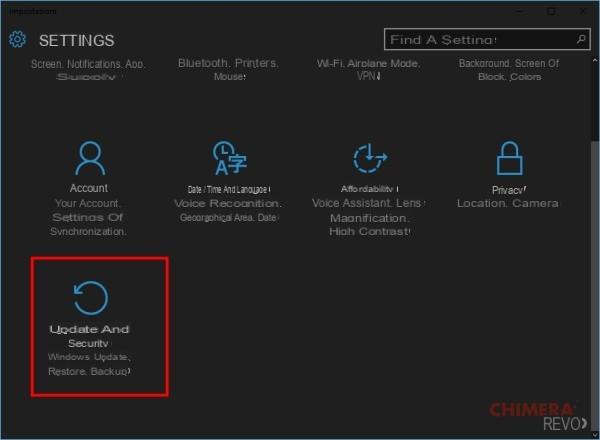
In my opinion, the most practical option for backing up files in Windows 10 is functionality Backup offered in the system settings panel (Settings> Update and security> Backup) which, with a simple and intuitive interface, can guide the user in creating backup copies of files (using basic File History seen above).
As regards instead the operating system recovery, exactly like Windows 8.1 too Windows 10 allows you to perform various operations without using the support: from Settings> Update and security> Reset, you will be able to access options to "clean up" the operating system.
In particular, you will be able to Reset your PC deleting programs, installed apps and settings, without touching personal files or by also deleting all personal files (also wanting on disks other than the system one). The operations will be managed completely by the operating system, asking for confirmation and details with practical and intuitive notification and choice windows.
If you are not satisfied with the backup and recovery systems offered by the operating system, you can take a look at our dedicated guide.
Windows 10 Guide - Performance Comparison
How does Windows 10 fare compared to its predecessors, Windows 8.1 and Windows 7, on the RAM, CPU and hard drive consumption side? In order to make the comparison we have installed all three systems on the same virtual machine, so that we can see from Activity management how they behave as soon as they are installed.
Here's Task Manager on Windows 10 right after a clean install.
About 700MB of RAM at rest, CPU spikes, and heavy hard drive usage in the early boot phases. The consumption of RAM remains practically constant until we open programs, while the consumption of CPU and disk gradually decreases after 5 minutes.
Here's Task Manager on Windows 8.1 right after a clean install.
The consumption of RAM is practically identical, but less pronounced peaks of CPU and disk, which progressively decrease within the first 2 minutes of starting.
From the graphs and personal experience after constant use of Windows 10 we can say that:
- Systems use practically the same amount of RAM, this shows the excellent optimization work carried out in recent years by Microsoft which has tried to keep the consumption in memory unchanged despite all the innovations introduced in the 8.1 and 10 releases;
- Windows 10 uses the hard drive a lot in the initial boot phases: as well as from the activity manager this can be seen with a constant use of Windows 10 (on a real machine): the system could take a while to react in the first 5-10 minutes from start-up, this is because there are so many things to manage (including instant update every time Windows Defender starts). Windows 10 actually appears to be optimized for use on SSDs where these reaction times completely disappear due to the high writing and reading speeds;
- The three systems handle any multi-core CPU very well without the slightest problem
Doubts or problems? We help you
Remember to subscribe to our Youtube channel for videos and other reviews. If you want to stay up to date, subscribe to our Telegram channel and follow us on Instagram. If you want to receive support for any questions or problems, join our Facebook community or contact us on Instagram. Don't forget that we have also created a search engine full of exclusive coupons and the best promotions from the web!


