We have already seen how to take screenshots on Mac, or how to capture Android screen. Well, now it's the turn of the operating system Windows and we will try to understand how make professional screenshots on it. For Windows PC there are dozens, indeed hundreds of programs for capture the PC screen, but almost all of them are limited only to photograph the screen computer without being able to make changes and optimizations to the image taken. When we talk about a "professional" program by screenshot we mean a program that does not just capture the screen and save the relative image, but a program that also allows you to modify the captured image, add text, arrows, shapes geographic, etc ... in order to complete the screenshot with all the necessary information and details.
Usually you take a screenshot when you want to show someone a certain thing done on your PC, so the insertion of text, arrows and other objects becomes essential to make the captured image "talking". Below we want to report a beautiful program that allows you to do all this. The program is called Screen Recorder and is just not capable of PC screen capture but also to record everything that happens on the desktop (for example to create video tutorials, record video streaming, record webcam, record screen and webcam simultaneously, and much more.)
Take Professional Screenshots on Windows / Mac with Screen Recorder
Download the free demo version of Screen Recorder for Windows or Mac from the following link:


If you have a Mac read how to take professional screenshots on Mac.
After installation you will see the following window warning that this is a trial version. In any case, the SCREEN CAPTURE function is unlimited even in the trial version of the program.

Click, as shown in fig. above, on the button Order Later to open the following screen (Screen Recorder toolbar)

On Mac you will see a similar interface:
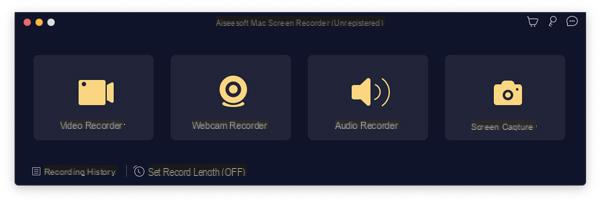
The first button "Video recorder”Refers to the“ PC screen recording ”function and creates video.
Then there is the "Audio Recorder" button which instead allows you to record audio and music coming from the speakers of your PC or from the microphone.
On the right is the button SCREEN CAPTURE, which is what interests us for the article in question. By clicking on this button, the program will be ready to take a screenshot on your PC screen. A pointer will appear as shown in the following image:
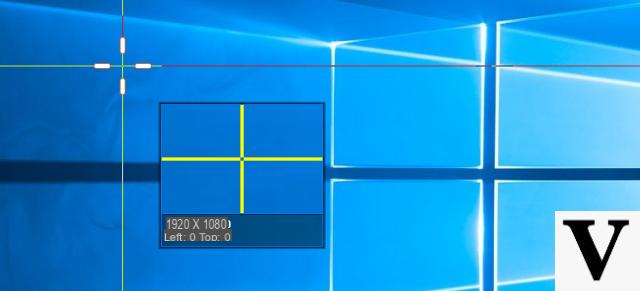
By clicking the left mouse button (and holding this button down) you can start selecting the part of the screen to "capture" and photograph. The area to be captured will be highlighted as seen in the following figure:
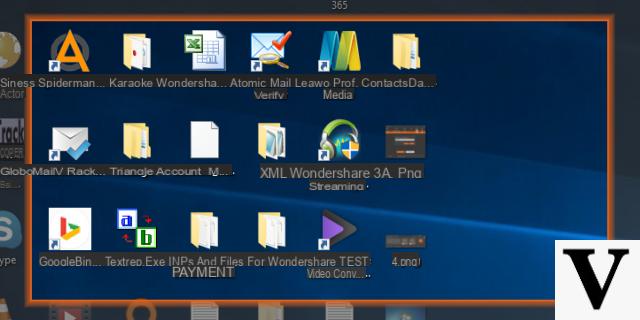
When you have highlighted the area to capture, release the mouse button and you will see the selected area ready to save (in image) with a toolbar below that will allow you to optimize the image and complete it before saving:
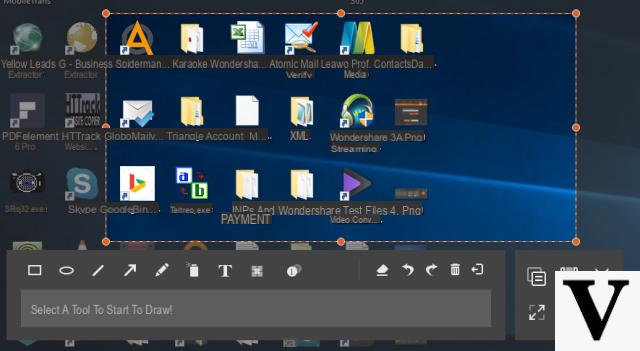
The tools available to customize the screenshot are so many. As you can see in the figure below, we've put in a little bit of everything to give you an idea of how many things you can do. You can add simple text, insert arrows, highlight parts of the screen using rectangular or circular shapes, insert numbers (useful for showing the steps to follow in a given operation), and so on.

For each of the operations described above, you can choose the color and size.
When the screenshot is complete, just click on the disk-shaped button to save the image in PNG format.
NB: To take screenshots and capture screens in a simpler and faster way, without having to click on the button every time SCREEN CAPTURE you can use the following key combination:
CTRL + ALT + F9
That's all! What are you waiting for? Download Screen Recorder now and create PROFESSIONAL screenshots on your Windows PC. The screenshots created will all be of high quality and can be uploaded to your website, sent via email, shared via social networks, sent via Whatsapp, and so on.
Take Professional Screenshots on Windows and Mac (PC Screen Capture) -


