Microsoft's word processor offers several original layout options to personalize your documents. They are particularly useful for decorating a cover page or a promotional document... Among these options, Word allows you to write curved text thanks to the mythical WordArt format.
This tutorial walks you through all the steps to write curved text by inserting a WordArt text box and applying the wavy option.
Write curved text on Word with WordArt
- Select the portion of text to which you want to apply the curved option.

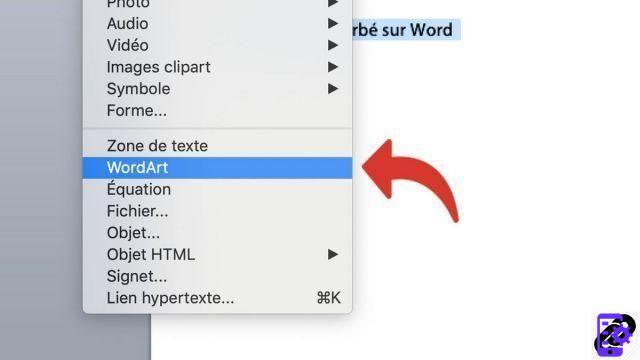
- Click on the button Insertion at the top of the screen.

- Click on WordArt. Note: on newer versions of Word, click the tab Insertion > WordArt.

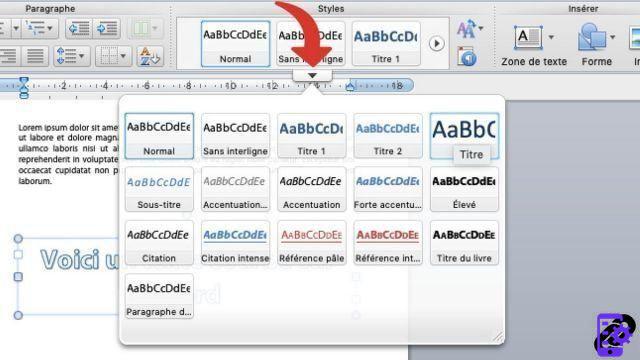
- Select a word art style. Note: you can select a plain style and customize it with Word's text editing options.

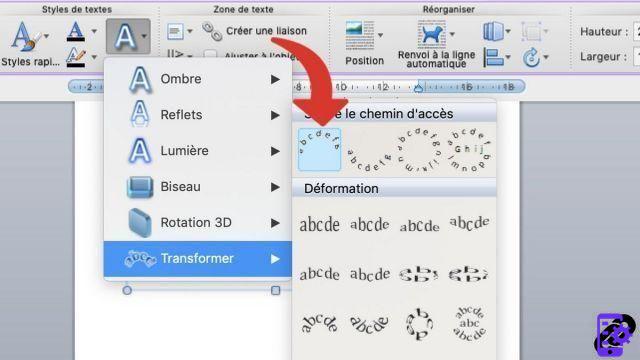
- In the tab Size, click on Effects.

- Select option Transformer.

- Choose the forms which will guide the curve of your text.

- Once the effect is applied, you can customize the curve by long clicking on this thick headed and moving the cursor.

Curved text has many customization options. That said, it doesn't integrate easily with other graphical elements, such as images. If you want to get curved text exactly as you imagined, sometimes it's necessary to go through third-party graphics editing software (like GIMP or Photoshop) before inserting the result into Word as an image.
To download :
Microsoft Word for Windows 10 | Microsoft Word for MacOS
Find other tutorials on Word:
- How to reverse a text in Word?
- How to create a hyperlink in Word?
- How to deactivate a hyperlink in Word?
- How to show or hide non-printable characters in Word?
- How to write in a picture in Word?


