Many of the functions of Windows 10 they are not known by less experienced users, for this reason once the need to share a folder on the network with other devices occurs, the average user tends to panic and not understand anything. Thanks to this guide you will be able to discover once and for all the correct method of action that will lead to sharing folders on the network on Windows 10.
Preliminary information
We always recommend doing an installation through one 100% genuine and original license, this is to avoid data loss or hacker attacks. We are aware that purchasing a license on the Microsoft store has a high cost. For this we have selected for you Mr Key Shop, a reliable site with free assistance specialized in in your language, secure payments and shipping in seconds via email. You can check the reliability of this site by reading the many positive verified reviews. Windows 10 licenses are available on this store at very advantageous prices. Furthermore, if you want to upgrade to the latest versions of Windows operating systems, you can also purchase the upgrade to Windows 11. We remind you that if you have a genuine version of Windows 10, the upgrade to the new Windows 11 operating system will be free. Also on the store you can buy the various versions of Windows operating systems, Office packages and the best antivirus on the market.
The procedure
Before starting with the wizard it is good to make preliminary checks on the network settings to find out if you are browsing on a public or private network. To do this, proceed as follows:
- Right-click at the bottom right on the taskbar where the connection icon is present
- Select Open Network and Sharing Center
- click Change sharing settings forward present on the left side of the page
- Make sure the network is set to private (in case it is not, just follow this guide to change the setting)
- Scegliere Enable network discovery
- Scegliere Enable file and printer sharing
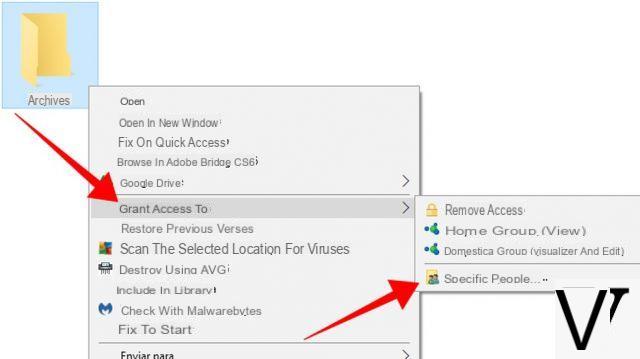
At this point the road to sharing your folders will be completely cleared, it will be enough to create / find a folder that will become the one shared on the network and proceed as follows:
- Right-click on the chosen folder, then click Property
- Go to the tab sharing and check the box Advanced sharing
- click Share the folder
- Select the item Permissions to modify the list of users who will have access to the folder (including the authorization to modify the files inside the folder itself)
- click Apply and then OK to finalize the procedure
At this point the folder will be visible on the network within the path // "host name" / "folder name" and if the share is password protected, whoever decides to access it will need to know the credentials of that PC in order to view the files contained therein. This check can be disabled from Sharing options through a modification of the section "Disable password protected sharing”By setting it to All.
Sharing troubleshooting
While following this guide step by step, once you have completed the steps you may face a situation in which the folder is still not visible on the network from an older device. The problem is due to the version request v1 del server SMB which in the latest versions of Windows 10 is activated only in versions v2 e v3. To activate the v1 version you will have to:
- Open the Control Panel
- Click on the section Programs
- click Programs and features
- click Turn Windows features on or off
- Check the item SMB 1.0 / CIFS file sharing support
- Restart your PC for the changes to take effect
Doubts or problems? We help you
Remember to subscribe to our Youtube channel for videos and other reviews. If you want to stay up to date, subscribe to our Telegram channel and follow us on Instagram. If you want to receive support for any questions or problems, join our Facebook community or contact us on Instagram. Don't forget that we have also created a search engine full of exclusive coupons and the best promotions from the web!


