There are many applicable filters in GIMP . One of them is Gaussian blur. This effect, created by mathematician Carl Friedrich Gauss, veils the entire image. To refine this effect, we define a radius that allows you to extend or reduce the blur.
Available in most graphic design software, Gaussian blur can reduce the definition of an image in a few clicks. It can, for example, be useful for blurring a background or correcting skin imperfections in a portrait. Do you want to use this filter in one of your creations? No problem: this tutorial explains how to apply it.
Create Gaussian Blur in GIMP
Above all, it is important to clearly define the area to be blurred and to separate it from the one that must remain sharp. Here are the steps to follow:
1. Add a layer to your image by right-clicking on its thumbnail, in the dedicated section. Select "Duplicate Layer". The new element appears in the list of layers. Don't forget to rename it, for clarity.
 © GIMP
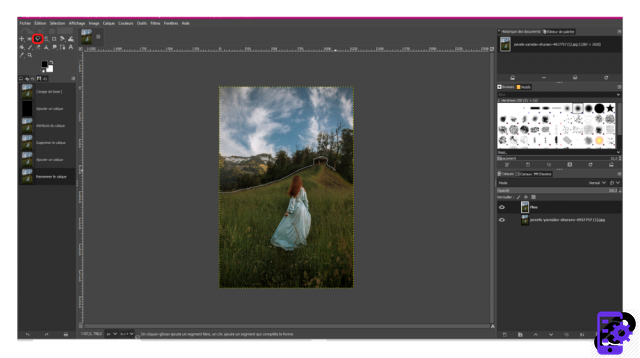
2. Select the new layer you just created. Then, in the toolbox (located in the left column of the editor), click on the lasso icon. This is the freehand selection tool.
 © GIMP
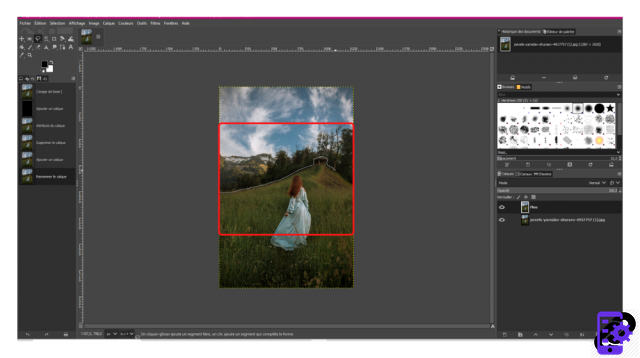
3. Make a selection within your image by circling the area to be blurred.
 © GIMP
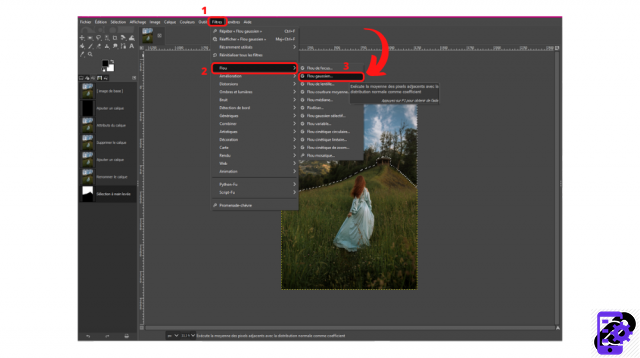
4. In the top menu, click on “Filters”.
5. In the drop-down menu that appears, hover over the “Blur” section and choose “Gaussian Blur”.
 © GIMP
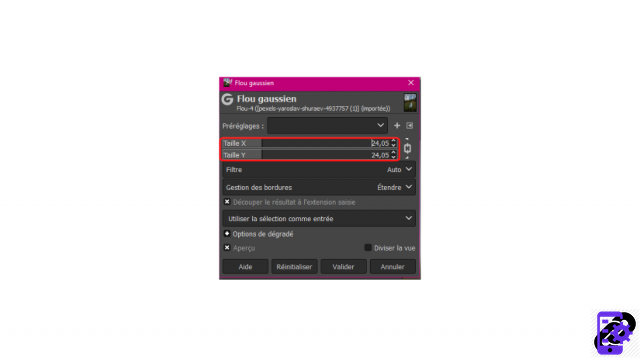
6. A settings window appears. Play with the radius (the “Size X” and “Size Y” fields) to configure the level of blur.
 © GIMP
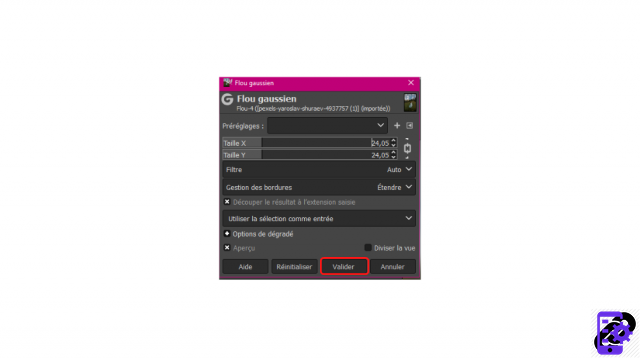
7. Click on “Validate”.
 © GIMP
And now, the selected area has been blurred. Congratulation !
Image source: Pexels
Find all the tutorials for using filters in GIMP:
- How to choose a filter in GIMP?
- How do I sharpen an image in GIMP?
- How to create a halo on GIMP?
- How do I create a distortion in GIMP?
- How to change your photo to black and white on GIMP?
- How to create a bichromatic illustration on GIMP?


