 Photoshop DOWNLOAD PHOTOSHOP
Do you have photos on which you want to change the sky, but clipping is not your specialty? Since version 2021, Photoshop offers to make this modification very easily in 1 click.
We will find out how to do it step by step.
How to change the sky of a photo in 1 click with Photoshop?
1. Click on Publishing and Sky Replacement
In Photoshop, open your image, go to Edition, a drop-down menu appears, click replace the sky as shown below.
A window then opens with different options.
 replace the sky
2. Select the new sky of your choice
In this dialog box, by clicking on the image at the top left you will be able to select a new sky.
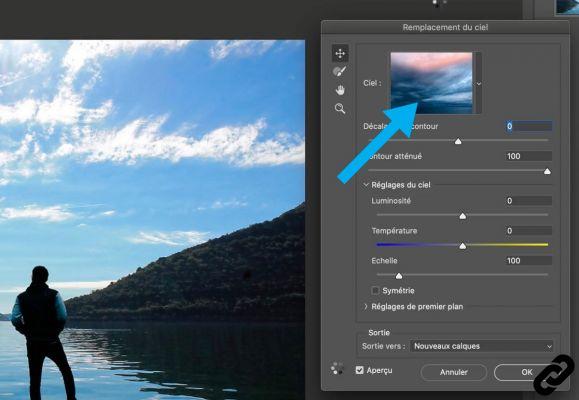 new sky
Several categories are available, click on the style of your choice.
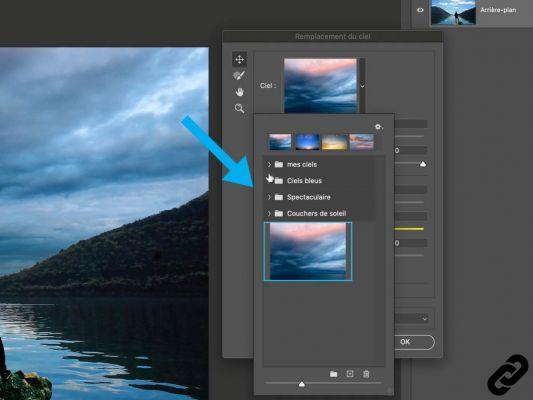 Choose your sky
3. Add your own sky
Click on the toothed wheel and fetch the image of the sky that you previously downloaded from your computer.
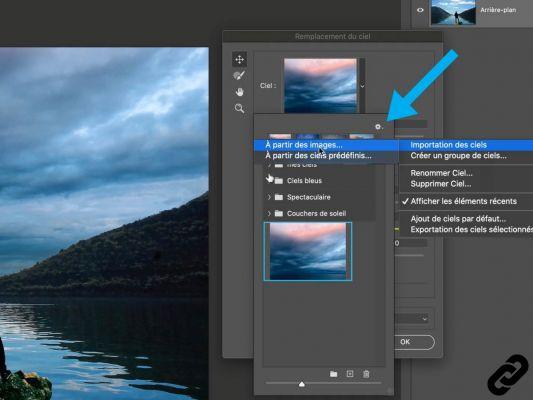 Import skies
4. Adjust the settings to adjust your creation
Parameters are available to adjust the new sky and modify it according to your needs.
Move the sliders if necessary.
Press [ OK ] to assign the new sky to your image.
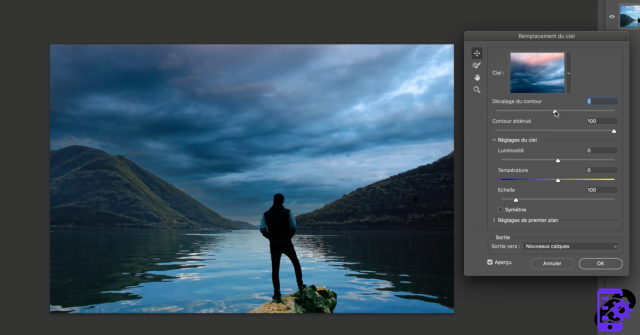 Parameterization of the target
5. New layers have been created on your document.
You can then interact with it if needed.
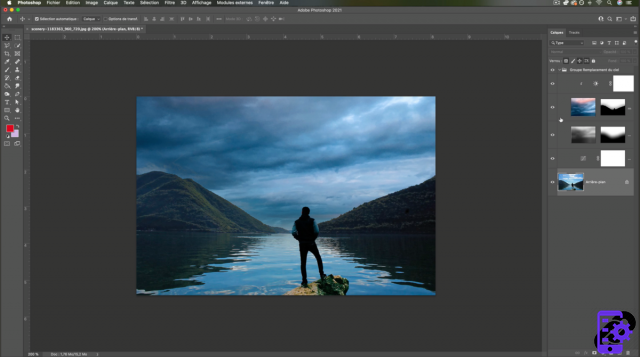 New adjustment layers
You can do this manipulation on all your photos and give them a creative touch.
You now have all the keys in hand! It's up to you
Photoshop you are passionate about and you want Learn More?
Come and discover the complete Photoshop Initiation training.
More than 10 hours of videos, creations and practice.
-20% for all Expertsconnecting readers.


