Bichromatic illustrations are divided into several parts: one area is desaturated, while the other retains its colors. This effect is quite popular in graphic design. Sure, GIMP makes it easy to manage duotones. Just combine the selection and saturation tools.
To create a bichromatic illustration, the principle is simple: select an area within an image and desaturate it. Do you want to know how to create a duotone within a photograph? This tutorial explains everything in detail.
Create a Duotone Within an Image in GIMP
Here's how to create a bichromatic illustration in the editor:
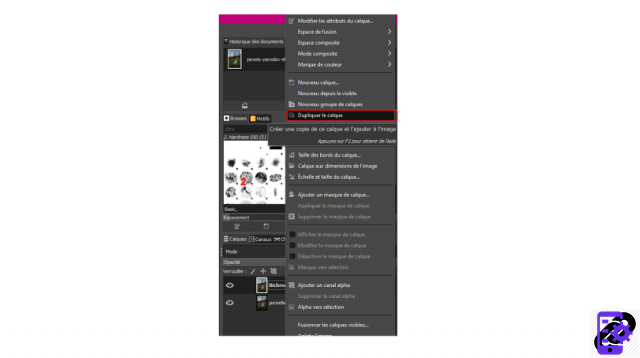
1. First, create a new layer and make a selection. To do this, go to the dedicated section, on the right of the software. Right click. A floating menu appears: click on the “Duplicate layer” option. Immediately, a new item is added to the list.
 © GIMP
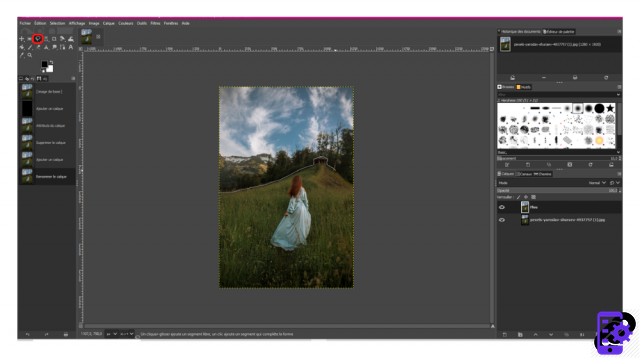
2. Select the new layer and, in the toolbox, choose the "Freehand selection" functionality (it is also possible to choose another selection mode, according to your needs).
 © GIMP
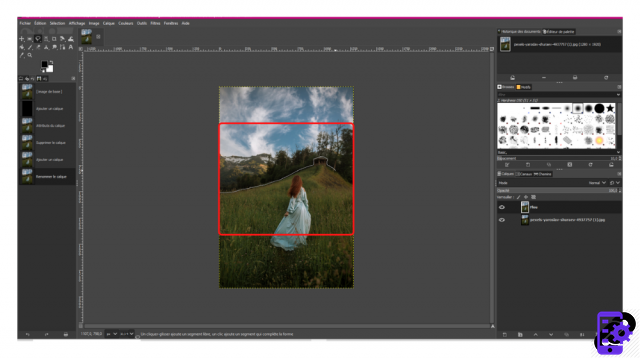
3. Make a selection by clicking on the image and moving your cursor around the area to be worked on.
 © GIMP
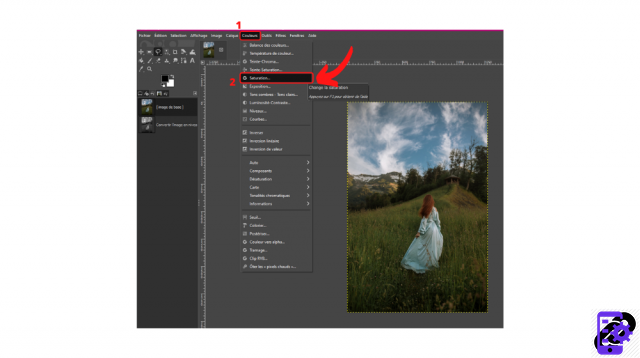
4. Is it all good? Go to the top menu of GIMP and click on “Colors”. In the drop-down menu, click on the “Saturation” option.
 © GIMP
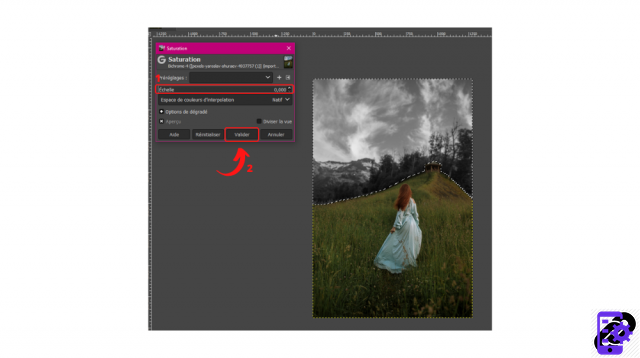
5. A floating window appears. Play on the tick available in the "Scale" section to desaturate the area: just push the slider to your left for it to go black and white.
 © GIMP
6. Click on "Validate" to apply the changes.
7. There you have it, in front of you a pretty bichromatic illustration!
If you want to see the effects of your changes in real time, don't hesitate to check the "Preview" box.
Image source: Pexels
Find all the tutorials for using filters in GIMP:
- How to choose a filter in GIMP?
- How to Create a Gaussian Blur in GIMP?
- How do I sharpen an image in GIMP?
- How to create a halo on GIMP?
- How do I create a distortion in GIMP?
- How to change your photo to black and white on GIMP?


