The high resolutions offered by cameras and mobile phones create large images. It is not always easy to insert them in a document, in a web page or an e-mail. He it may then be necessary to modify this parameter to adapt it to its needs.
Fortunately, the GIMP software allows you to resize all kinds of images. Want to know how to use this feature? We tell you everything you need to know on the subject in this detailed tutorial.
Resize an Image in GIMP
Here are the steps to change the size of an image in GIMP:
1. In the top menu of the editor, click on “Image”.
2. Then select the option “Image scale and size”.
 © GIMP
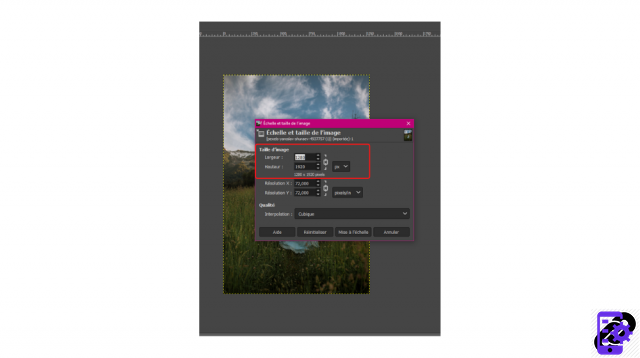
3. A floating menu appears: it is this that will allow you to modify the dimensions of the creation.
 © GIMP
It is also possible to access this menu by right-clicking on the photograph and selecting, again, “Image” then “Image scale and size”.
Once the menu is available, you will find, in the “Image size” section, several elements on which to act to give the creation the desired dimensions:
The width and height of the document: by default, they are indicated in pixels but other units of measurement are available (inches, millimeters, points, picas, feet, etc.). A padlock keeps the proportions of the image: by clicking on it, you can change the width without changing the height and vice versa.
Resolution: just like width and height, you can reduce or increase the values of this parameter (for printing, for example).
It's all good ? Once the changes have been made, don't forget to click on the “Scaling” button to save them. The image then takes the desired dimensions.
Image source: Pexels
Find all the tips and tricks that can be used in GIMP:
- How to smooth skin on GIMP?
- How to change eye color in GIMP?
- How to crop an image in GIMP?
- How to add text in GIMP?
- How to crop an image in GIMP?
- How to use keyboard shortcuts in GIMP?


