Halfway between the forum and the Facebook page, Facebook groups are booming. And for good reason, whether you are an entrepreneur or simply passionate about a theme, you can develop in a few minutes a real virtual place where the invited members can discuss among themselves. This step-by-step tutorial will help you create the perfect Facebook group!
Create a group on Facebook
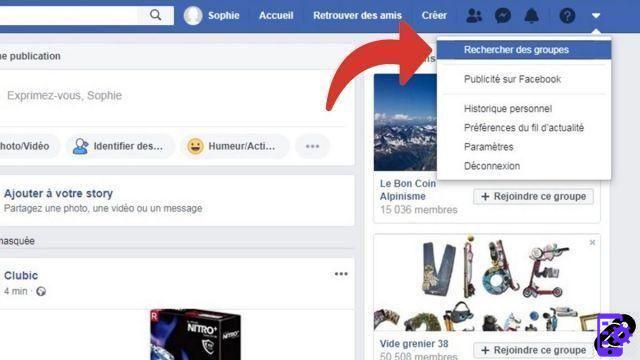
- Open Facebook, click on the Menu at the top right (it's the down-pointing arrow next to the ? icon), then click Find groups.
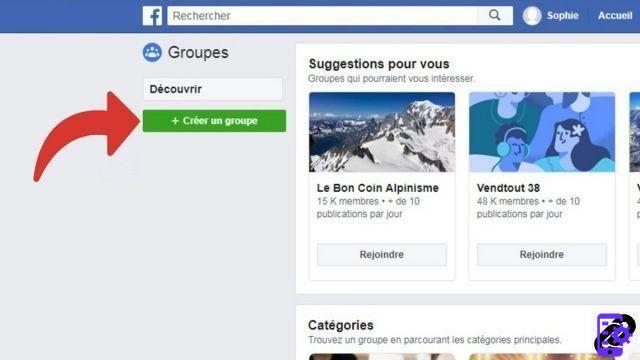
- In the new page that appears, click the green button Create a group located in the right column.
- Complete the fields of the dialog box that appears on your screen. Give your future group an attractive name, choose its privacy from the drop-down menu and invite your friends. Finally, click on Create.

Your group is now online. But your work doesn't stop there: feel free to customize the many settings! From the description of the group to the cover photo, through the creation of a good functioning charter to pin at the top of the group, everything must be in your image to attract as many members as possible!
If you are a professional, know that this is the ideal place to create a close link with your prospects and transform them (more or less quickly) into customers!
Find other tutorials on Facebook:
- How do I remotely log out of Facebook?
- How to leave a group on Facebook?
- How to delete a group on Facebook?
- How to create a page on Facebook?
- How to delete a page on Facebook?











![[Review] Samsung Powerbot VR7000: the robot vacuum cleaner from Star Wars](/images/posts/6bc44de38605b5c0fa12661febb1f8af-0.jpg)


