In order to stand out his videos on YouTube and prevent others from appropriating your content, adding a watermark is allowed. This small image in JPEG, BMP, PNG or GIF format is visible to some content creators. It is located at the bottom right of the video and is an additional identification tool.
When you post content on YouTube, you want to make sure that your videos are not used by malicious people. Discreet, but dissuasive, the watermark is a first rampart against infringements of copyright. The watermark has dimensions of 150x150 px. It can be an image or a small text, transparent or opaque. Want to add a watermark to your YouTube videos? This tutorial tells you everything you need to know on the subject.
Add watermark to YouTube videos
To add a watermark to your videos, here are the steps to follow:
1. Log in to the YouTube Studio home page.
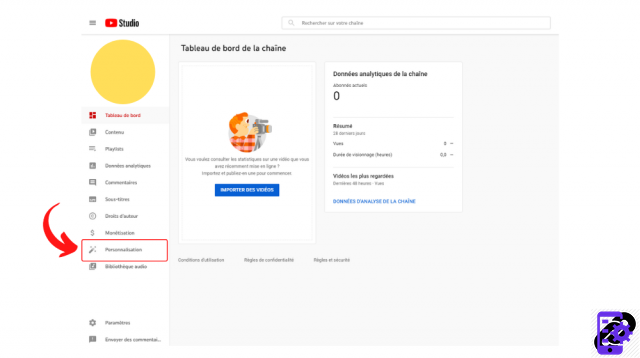
2. In the left column, click on the "Personalization" section (it is illustrated by a magic wand icon).
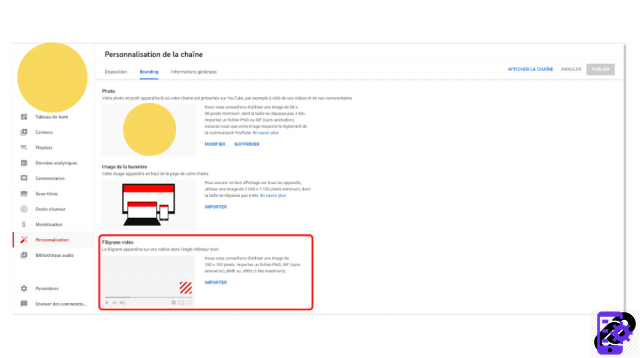
3. Tap the “Branding” tab. Below “Photo” and “Banner Image” you will find the “Watermark” section.
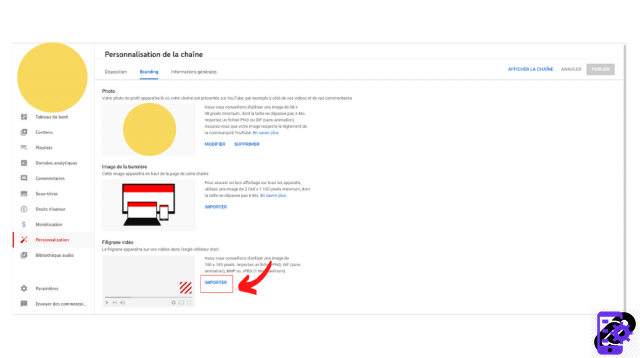
4. Click on “Import”, select an image corresponding to the conditions set by YouTube and click on “Open”.
5. In the "Customize Video Watermark" menu, make adjustments if necessary and then click "OK".
6. Choose when you want the watermark to appear. You have three options: “End of video”, “Start to be defined”, and “Entire video”. If you choose the second option, specify a timecode. Don't forget to confirm the changes afterwards by clicking on the blue "Save" button visible at the top right of the "Channel customization" menu.
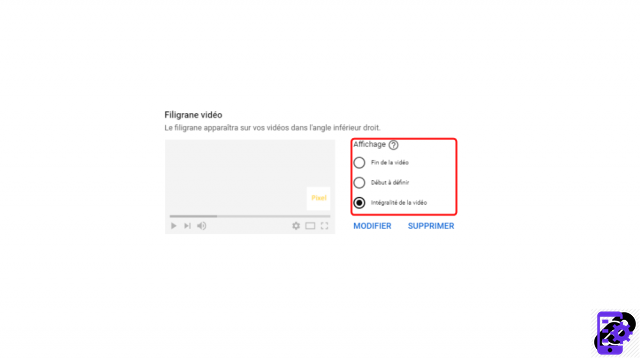
The watermark will now appear at the bottom right of the screen of each of your videos. You can of course modify or delete it at any time by returning to the section mentioned above.
Find all the tutorials to master all the features of YouTube:
- Our complete YouTube file: tips, advice and tutorials
- How to properly manage your YouTube channel?










![[Review] Samsung Powerbot VR7000: the robot vacuum cleaner from Star Wars](/images/posts/6bc44de38605b5c0fa12661febb1f8af-0.jpg)


