Maximizing the statistics now shown will unlock the "Great Shape" trophy. Fortunately, as with Pumpkin Seeds, none of these collectible items are missing. Precisely for this reason, you can make them yours at any time in the game's storyline.
Prayer Bead #3 - Outskirts Wall - Stairway
You will get it from the miniboss general Tenzen Yamauchi, whom you will meet immediately after the Chained Ogre, in a courtyard with many riflemen. Eliminate all minor enemies first, and then turn back, so the boss will lose sight of you. Once this is done, carry out a sneak attack to take one of the lives and attack him until he is killed. With all the minor enemies out of the way, you will be alone against him.
Prayer Bead #4 - Ashina Outskirts - Ashina Castle Gate
This prayer beads, unlike the previous ones, will be found in the game world. After defeating the main boss Gyoubu Oniwa (the one on horseback), cross the battlefield where the fight took place, and climb up the stairs. You will arrive at a building where a friendly samurai wants to talk to you; ignore him for now.
In the room where this NPC is located, cling to the wooden beams. As soon as you reach the upper beams, you will have to make a double jump to the penthouse. In the attic, you will find a golden trunk, inside of which there is this prayer beads, the best hidden so far.
Prayer Bead #5 - Ashina Outskirts - Ashina Castle Gate
This prayer beads grain will be released from the Flaming Bull miniboss, which you won't want to miss. After defeating Gyoubu Oniwa (main boss on horseback), you will reach the Flaming Bull on the way to Ashina Castle.
Hirata Summer
Prayer Bead #6 - Summer Path
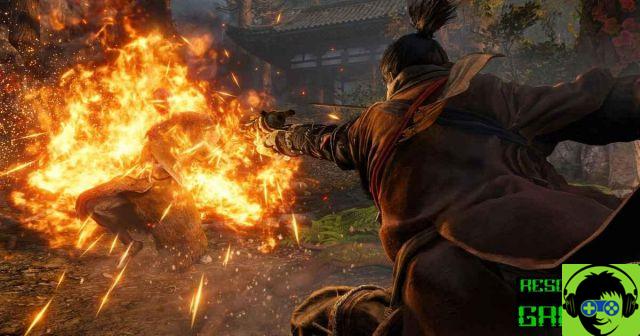
You'll get it from Misen's Shinobi Enshin hunter, a Miniboss from the game. To unlock the Hirata Estate region, you'll need to talk to an elderly woman in a destroyed house, which you'll find in the "Outskirt Wall - Gate Path" and "Outskirt Wall - Stairway" areas. This character will give you a bell, which you can use on the altar where the sculptor is (Temple in Ruin).
After the idol of the property path, follow the road until you reach a bridge with two enemies wearing shields. Cross the bridge and you will find yourself in a garden. There you will find this boss, a man in a white tunic wielding a spear. First you will have to eliminate the smaller enemies, then you will have to run away and come back, so that you can carry out a sneak execution on the boss when he is near the bushes.
Prayer Bead #7 - Hirata Estate - Main Hall
This item will be released by the miniboss Juzou the Drunkard. From where we fought the last miniboss, the Shinobi Hunter, we'll have to go back to the bridge we came from. So, jump in the water and swim against the current, until you can grab a tree branch on the left.
After a while, you'll find an area where you'll have to jump over the walls of a well. This path will take you into the Main Hall area, you will recognize it because you will see many buildings on fire. After crossing a pond, you will find this new boss. Talk to the samurai who is in the pond in front of the enemy in question and he will fight with you, making it a lot easier for you.
Prayer Bead #8 - Hirata Audience Chamber
You can collect this prayer beads in the building just behind the Juzou boss (take the Hirata Audience Chamber idol for reference). After entering the building, on the left side, where the two guards are patrolling, you can lean against a wall with a banner on it. In this way, you will arrive at a hidden wall passage. Behind it, you will find a room with a large chest, inside which you will find this collectible item.
Ashina Castle
WARNING: At some point in the plot, some minibosses in this area will disappear, to make way for new enemies. Before proceeding any further, make sure you have defeated all the enemies on this list, so you can get all the prayer beads in this area. If not, you can always retrieve them with a New Game+
Prayer Grain #9 - Ashina Castle
You will have to defeat the Kuranosuke Matsumoto miniboss to get this grain. From the first idol in Ashina Castle, go upstairs, where you will find four riflemen and this boss. Kill the infantrymen first, then go back and make the enemy in question lose track of you.
As soon as things calm down, go back to the boss and carry out a stealthy execution, so as to take his life. Climb the rooftops to catch him from behind.
Prayer Bead #10 - Ashina Reservoir
You'll get it from the miniboss Seven Achina Spears - Shikibu Toshikatsu Yamauchi. After entering Ashina Castle, take the path on your left, open a gate and go down. At this point, you will find the idol of the area called "Reservoir". From the idol in question, jump on the two branches of the tree on your left, and you will land in an enemy camp between a rifleman and a drummer.
Take out the second enemy, and then take the same hidden path you saw in the prologue, and climb up the hill. This will lead you back to the temple where you first saw the Divine Heir in the prologue. From this area, you can sneak in and kill this boss. Where you took his first life, finish him off in combat by breaking his guard as quickly as possible (you can also use firecrackers to stun him).
Prayer Bead #11 - Ashina Reservoir
You'll get it from the Lone Shadow Longswordman miniboss. From the idol of the Ashina Reservoir area, cling to the two branches of the tree on the left and you will land in the area before, between a rifleman and a drummer. Go to the area immediately behind this second enemy, walk to the hill and look to the right. Use the grappling hook to reach the other side of the cliff and you will reach an area with a friendly samurai standing near a hole in the ground. Jump into that hole to find this boss.
Prayer Bead #12 - Abandoned Dungeon Entrance
Unlike previous prayer beads, this one can be purchased by a merchant for 1400 Sen. You will find the NPC in question sitting in a tent next to the idol of the Abandoned Dungeon Entrance area. To get there, go back to the entrance to Ashina Castle.
From the area where the idol of Ashina Castle is located, jump from the left side of the bridge and use your grappling hook to hold on. There you can eavesdrop on two enemies on another wooden bridge. Cross the bridge and follow the path straight ahead to the dungeon.
Prayer Bead #13 - Upper Tower - Antechamber
This collectible will be behind a secret wall. From the Anticamera idol, go to the next room, where you will meet a new kind of enemy: a Samurai in blue robes, wielding the katana with both hands. Two of these enemies are patrolling the area, while two others are sitting in a room on the right.
Go to where the two are sitting; in this room you will find a banner lying on a wall, between two statues of samurai armour. Leaning on it, the wall will turn on itself, revealing a hidden room. There you will find a chest with the prayer beads you are looking for.
Prayer Bead #14: Upper Tower - Ashina Dojo
This prayer beads grain will be released by the Ashina Elite miniboss - Jinsuke Saze. Go back to the first idol of Ashina Castle (the idol will be called "Ashina Castle"), then take the path on the right and jump on the rooftops. Follow the smoke signals to enter the tall tower in the middle of the area (the tallest building on the map, you will be able to distinguish it from the others).
Once inside the tower, there will be some samurai in blue robes. In a room on the right (on the top floor), you will find 2 or 3 more of these enemies, and you can use the handholds to pass through a hole in the ceiling. From this point you can continue climbing to the Ashina Dojo, located at the top of the tower.
Senpou Temple, Mt. Kongo
Prayer Bead #15 - Senpou Temple - Shugendo
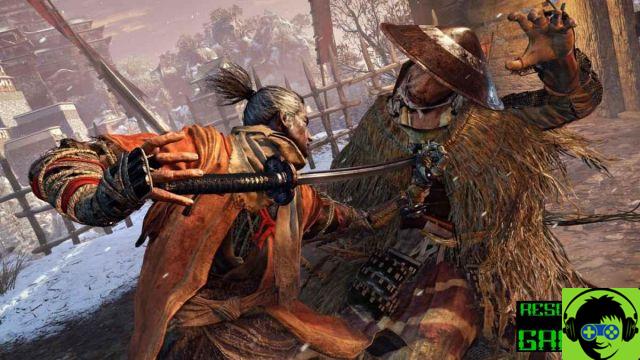
This grain will be given to you as soon as you defeat the mini-boss called Armored Warrior. Fortunately, you'll encounter this enemy right after the second idol in the Senpou Temple region, and you can't miss him. The boss is intent on guarding a bridge, and you will have to get rid of him by breaking his posture as quickly as possible.
Prayer Bead #16 - Senpou Temple - Temple Grounds
This grain will be drugged by the Long-arm Centipede Sen'un miniboss. This clash will take place after the third idol in the Senpou temple region, called Temple Grounds. Follow the path with the wolves and hostile monks who will throw bombs at you, and climb to the roof of the temple. At this point, descend to the right side of the temple roof to reach a structure just below. Through the roof of this building, you will enter a dark chamber, where the fight with the boss will take place.
Grain of the Prayer #17: Senpou Temple - Temple Grounds (NOT TO BE ENTERED ON THE FIRST TIME YOU SEE THE AREA)
This collectible item is present in the game world of Sekiro: Shadows Die Twice . From Temple Grounds' idol, jump into the pond where two Treasure Carps are swimming. After defeating the main boss, the Corrupt Monk, in the region of Ashina Depths, you will unlock the ability that will allow you to dive.
Once you have obtained this skill, you can press R2 / RT to go underwater and find this Prayer Beads, lying at the bottom of the pond. Performing this action will not be possible during your first visit to the area, but only after defeating the main boss mentioned above; for this very reason, return to this area only after getting rid of it.
Ashina Depts
Prayer Bead #18: Ashina Depths idol
You'll get it from the miniboss Snake Eyes Shirahagi. This prayer beads will be in the poison pool area, right after Ashina Depths' idol. You will arrive in this region through Ashina Castle. From the idol of Ashina Depths, jump on the tree branches on the left to land between a rifleman and a drummer, inside a strong enemy (where two big hammers walk).
Go to the area behind the drummer, until you reach the cliff, and use the grappling hook to reach the other side of the area. In there you'll find an old well with a miniboss called the Lone Shadow Longswordman. Kill it and you can swim through the well until you reach a dark cave.
At the end of the cave, find a woman praying; jump down into the dark crevasse and, as you fall, cling to the ledges with your grappling hook. From this point on, continue until you reach Ashina Depths.
Grain of the Prayer#19: Poison Pool
This prayer wheat is placed in the game world. In the tunnel behind the miniboss called Snake Eyes Shirahagi, you will be able to cling to the left side (before crossing a large circular room). This action will allow you to reach the head of a large statue in the pool of poison. Right at the top of the head of the statue in question, you will find this new collectible item.
Prayer Bead #20: Hidden Forest
You'll get it by defeating the miniboss Tokujiro the Glutton. You will find it on the main path in this area, on the way to the temple, where you will hear someone playing a flute. When you enter the foggy area with ghost enemies, you can cling to a branch of a tree on the left side, and that's where you'll find the Tokujiro miniboss.
Prayer Bead #21: Watermill
This item will be obtained from the miniboss O'rin of Water. After the idol of the Mill, you will meet a woman who plays an instrument; after passing her, she will become hostile and attack you. Kill her to collect the prayer beads you are looking for.
Prayer Bead #22: Watermill
This new prayer beads will be found in the game world. Start from the water mill idol, and continue towards the Corrupt Monk area: you will reach a building with a crowd of enemies gathered in front of it (one of them is a big enemy with a bell-shaped weapon) and, by standing on top of the door, you will be able to eavesdrop on their conversation.
Reach the right side of this building, crouch down to go under the floor and, at this point, you will find a panel that, if removed, will allow you to enter inside. In the attic, near a small shrine, you will find this collectible.
Prayer Bead #23: Mibu Village
Again, you'll need to get to a part of Sekiro's game world. On the right side of the village of Mibu (where many minor enemies are patrolling), you will find a lake. Jump into this lake and dive, pressing the R2 button. At the bottom of the lake, you will find a light box, which contains this new grain.
You'll learn the necessary skill to dive only after defeating the Corrupt Monk at the end of the Ashina Depths area, so you'll have to go back and get rid of the boss.
Sunken Valley
Prayer Grain #24 - Under-Shrine Valley
To collect in the game world. From the first Sunken Valley idol, called "Under-Shrine Valley", turn slightly to climb the hill. Cross the crevasse by clinging to a tree trunk. At this point, you will arrive in an area with two riflemen; kill them and double jump over the wall next to them.
Lean against the wall around the ledge and reach the other side; go down and you will find the Prayer beads inside the snow. Just like any other collectible, it will appear to you as a common collector's item (a glittering sphere).
Prayer Bead #25 - Sunken Valley Idol
You will get it after defeating the Snake Eyes Shirafuji miniboss. Reach the second idol in the Sunken Valley region (the quick travel point will be called "Sunken Valley"), descend down the nearby slope and cling to the trees as you fall down. Continue until you meet the miniboss.
Prayer Bead #26 - Sunken Valley - Gun Fort
This prayer beads will be doped by the miniature Long-arm Centipede Giraffe. This enemy will be in the next room after the idol named "Gun Fort".
Prayer Bead #27 - Sunken Valley - Gun Fort
You can collect this prayer beads in the game world. After defeating the previous boss, descend into the hole in the floor of the area where the fight took place. Immediately afterwards, you will have to squat down and cross an underground section, coming out of the left side of the tunnel in question.
From there, cling to the handhold that will be just above you, on the left. From here you can reach several handholds, this time on the right; continue inside the dark cavern until you find yourself in a dead end, with a group of monstrous dwarves and poisonous geckos.
The collectible you're looking for will be right in this area, in the middle of the enemies, and it will appear to you as a golden sphere, as well as any other object to collect present in Sekiro.
After defeating the Corrupt Monk and the Guardian Monkey.
WARNING: after defeating these two bosses, some of the previous minibosses will disappear, to be replaced by others who, if defeated, will reward you with new prayer beads.
Prayer Beads #28 and #29: Ashina Depths - Poison Pool
You'll get them as soon as you defeat the two Undying Guardian Ape bosses. In the great hall between the Poison Pool and the idols of the Hidden Forest (Ashina Depths), you can meet the headless Guardian Ape again. After taking away his first health bar, a second, slightly smaller Guardian Bee will appear.
Fortunately, these are much slower, less aggressive and less healthy enemies than the original Guardian Bee. Defeat them both and you'll get two Prayer Beads.
Prayer Bead #30: Ashina Castle - Upper Tower Antechamber
You'll get it from the Ogre Chained miniboss in Ashina Castle. From the idol of the "Upper Tower - Anticamera", jump down to the inside of the tower. Towards the bottom, you will face a second Chained Ogre; defeat it and this new Prayer beads will be yours.
Prayer Grain #31: Ashina Castle - Great Serpent Shrine
This item will be doped by the miniboss Lone Shadow Masanaga the Spear-Bearer. You can reach it by arriving at Old Grave's idol. Where the idol of the Snake Sanctuary used to be, you will now find a miniboss that, once defeated, will release this new grain. This boss will no longer be available after reaching Fountainhead Palace.
Prayer Bead #32: Ashina Castle - Upper Tower Dojo
Again, you'll have to defeat a miniboss: Shadow Vilehand. On your way back to the Black Room, you will find it in the same room where you have the "Ashina Elite - Jinsuke Saze" miniboss. Fortunately, you won't be able to miss this opponent: you'll be forced to take that path to complete the game.
Hirata Summer (Purification Final)
ATTENTION: the following Prayer Beads are, without a shadow of a doubt, the most easily missed in Sekiro: Shadows Die Twice . The reason is soon said: to obtain them, you will have to follow all the necessary steps to obtain the Final Purification. Do you not know how to obtain it? Consult our guide to the Finals.
Following all the necessary steps, you will find yourself in front of a new version of Hirata Estate, with new minibosses to tackle. Doing so will also allow you to reach Fountainhead Palace, an otherwise inaccessible area.
Be careful NOT TO DISCONFIGURE THE DIVINE DRAGON before you have done all these actions, otherwise the Final Purification will be compromised.
Grain of the Prayer #33: Final Purification - Hirata Summer - Bamboo Thicket Slope (HIGHLY MISSING)
It will be yours after defeating the Lone Shadow miniboss, Masanaga the Spear-Bearer. This opponent will appear in the area where you took the key from Owl, on your first visit to Hirata Estate, in the burning building after the Bamboo Thicket Slope idol. This miniboss can only be activated in the Purification Final.
Grain of the Prayer #34: Purification Final - Hirata Summer - Main Hall (HIGHLY MISSABLE)
You'll get it by defeating the mini-boss Juzou the Drunkard. If you are following all the necessary steps to achieve the Final Purification, you will be able to fight Drunk Juzou in the same place where you faced him during your first visit to Hirata Estate. Defeat him again and he will leave you this new prayer beads as a "gift".
Fountainhead Palace
WARNING: The Fountainhead Palace area is an entirely missing area! If you managed to get the two prayer beads mentioned earlier, luckily you followed all the correct steps to get the Purification Final, and the game plot will lead you here automatically.
Basically, you will have to remain faithful to Black. After defeating the Corrupt Monk at Ashina Depths and the Bee Guardian at the Sunken Valley, return to the Black Room in Ashina Castle (you will have to go through the Abandoned Dungeon). When you talk to Owl on the roof of Ashina Castle, choose the second dialogue option "Break the Iron Code, stay true to Black".
If you choose the first dialog option, the game will end at that moment, and you'll never reach Fountainhead Palace. At this point, you'll have to talk to Black in his room several times, until all of his dialogs are finished.
Make a quick trip to the Wedding Cave Door idol, located in the Ashina Depths area, and enter the tent in the cave. In this way, you will be transported to Fountainhead Palace. If you are following all the steps necessary for the Final Purification, you will automatically reach this area.
Prayer Bead #35: Mibu Manor
You'll have to defeat the Sakura Bull miniboss. After crossing the courtyard with squid-like enemies, exit the building complex, turn around and cling to the overhangs with your grappling hook to reach the rooftops. Behind those buildings, you will find a bull idol of Great Sakura. In reality, he is an enemy that you won't be able to miss, as you'll have to defeat him for the purposes of the game's plot: to be able to swim quietly through the lake, and continue in the main quest, you'll have to stop his lightning.
Prayer Bead #37: Great Sakura
This prayer beads will be available in the game world. After beating the mini-boss Okami Leader Shizu (the enemy capable of throwing lightning bolts), you can safely cross the big lake. There, underwater, you will find a chest, on the right side of the lake, near Mibu Manor. It will be inside it that you will find this new collectible.
Fountainhead Palace (After defeating the Divine Dragon)
Immediately after defeating Fountainhead Palace's main boss, the "Divine Dragon", you'll be automatically transported back to Ashina Castle. You'll notice that the building in question is engulfed in flames and, not to mention, you'll find new bosses waiting for you.
Prayer Bead #38: Ashina Castle - Ashina Reservoir
You'll have to defeat the miniboss Seven Spears Ashina - Shume Masaji Oniwa. After defeating the Divine Dragon Boss at Fountainhead Palace, the Ashina Reservoir area will be on fire. The boss in question will appear right in front of the so-called idol. If the area in question is not yet engulfed in fire, it will mean that you have not yet defeated the Divine Dragon.
Prayer Bead #39: Ashina Castle - Upper Tower Dojo
This prayer beads will be doped by the miniboss Ujinari Mizou. This boss will only appear after defeating the Divine Dragon at Fountainhead Palace. From the idol of the Dojo, walk downstairs and turn: behind the stairs you will find a paper wall that you can destroy. Behind it you'll find a secret passage that will lead you to this miniboss.
If you don't find it in the area indicated here, it means that you will first have to face the Divine Dragon.
Prayer Bead #40: Ashina Castle - Old Grave
This last prayer beads grain will be released by the Red Guard's Shigekichi miniboss, which will appear, as well as the aforementioned enemies, only after defeating the Divine Dragon at Fountainhead Palace. From the idol of the Old Tomb, walk to the floor below and you will find a bridge, which was not there before, that will lead you to the other side.
Cross the bridge in question and find this boss in a yard. Defeat him and you will have the last collector's item in this category.
Stay tuned for further updates.


